


Today, I’m tackling a classic favorite: homemade bread and butter pickles. These sweet and tangy pickles are perfect for adding a delightful crunch to your sandwiches, burgers, or even as a tasty snack straight from the jar. Plus, I’ll walk you through the canning process to ensure you can enjoy these treats all year.
Why Are They Called Bread and Butter Pickles?
Bread and butter pickles are known for their perfect balance of sweetness and tanginess. The name is thought to have originated during the Great Depression when these pickles were a staple in many households and often enjoyed with bread and butter sandwiches.
Ingredients for Homemade Bread and Butter Pickles
This recipe is from the Ball Blue Book Guide to Preserving 38th edition. It will yield about 7-pint jars of bread and butter pickles. To get started, you’ll need the following ingredients:
- 4 lbs 4 to 6-inch cucumbers
- 2 lbs onions, thinly sliced
- 1/3 cup salt for pickling or canning
- 2 cups of sugar
- 2 tablespoons of mustard seeds
- 2 teaspoons of ground turmeric
- 2 teaspoons of celery seeds
- 1 teaspoon of ground ginger
- 1 teaspoon of black peppercorns
- 3 cups of white vinegar (5% acidity)

Equipment Needed for this recipe
Here is the equipment I used for making this recipe for homemade bread and butter pickles.
- Large Stainless Steel Pot
- Large Bowl
- Colander
- Knife
- Cutting Board
- Liquid Measuring Cups
- Measuring Cups
- Water Bath Canner or Steam Canner
- Pint Sized Canning Jars
- Lids
- Bands/Rings
- 1/2 Pint Canning Ladle
- Funnel
- De-Bubbler
- Jar Lifter
- Headspace Measurer
If you do not like slicing the cucumber or onion by hand you can use a mandolin for more even cuts.


Step-by-Step Guide to Canning Homemade Bread and Butter Pickles
Step 1: Prepare Your Jars
Clean jars and lids with warm soapy water. Ensure the jars do not have any chips or bubbles in the glass.
Step 2: Prepare the Vegetables
Wash cucumbers under cold running water and drain.
Remove the stem and 1/16-inch from the blossom end of the cucumbers. Cut cucumbers crosswise into 1/4-inch slices.
Peel onions. Cut onions crosswise into thin slices.
Put cucumbers and onions in a large bowl, layering with the salt. Cover with ice cubes. Let them stand for 1 and 1/2 hours. Drain the cucumbers and onions. Rinse cucumbers and onions under cold running water and then drain.
Step 3: Prepare the Canner
Using a Water Bath Canner:
Put your water bath canner on your stove. Add your canning rack to the water bath canner. Add your pint jars to the water bath canner. They will warm as you heat the water. Add enough water to cover jars with at least 2-3 inches of water. Start to bring your water to a boil.
Using a Steam Canner:
Put your steam canner on your stove. Add the steam canner rack to the bottom of the steam canner. Add the recommended amount of water to the steam canner according to the manufacturer. Add your pint jars to the steam canner. Put the lid on your steam canner and start your stove. The jars will warm as you heat your steam canner.


Step 4: Mix the Ingredients for Bread and Butter Pickles
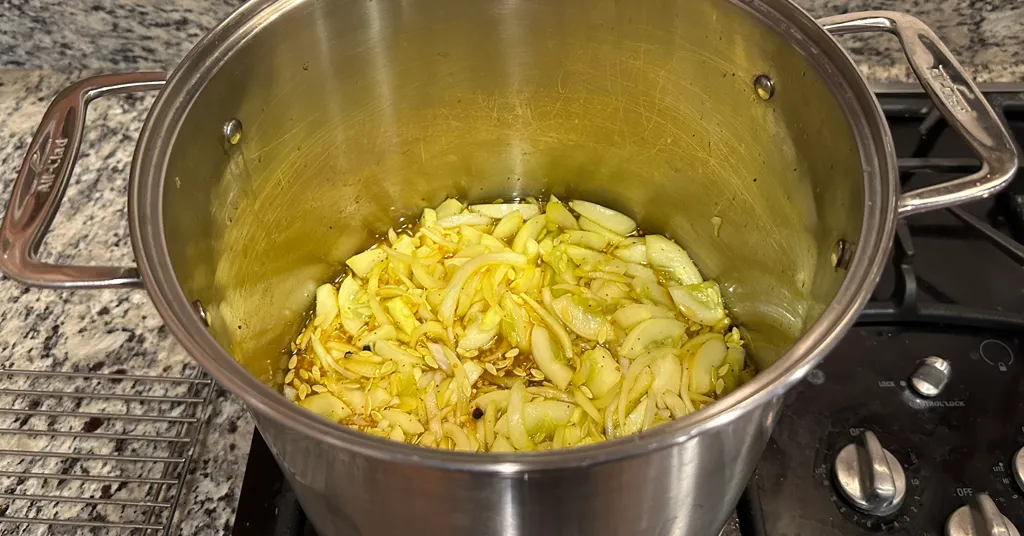
In a large pot, combine the sliced cucumbers, onions, sugar, mustard seeds, turmeric, celery seeds, ginger, black peppercorns, and white vinegar. Bring the mixture to a boil over medium-high heat, stirring occasionally to dissolve the sugar.
Add cucumbers and onions to the mixture and bring it back to a boil
Step 5: Fill the Jars
Once you have hot jars and hot pickles.
Water Bath Canner:
Remove your jars from the water bath canner one at a time using your jar lifter. Dump the water out of the jar into your water bath canner to ensure there is still 2-3 inches of water above your jars.
Steam Canner:
Remove the steam canner lid and remove your jars one at a time using your jar lifter.
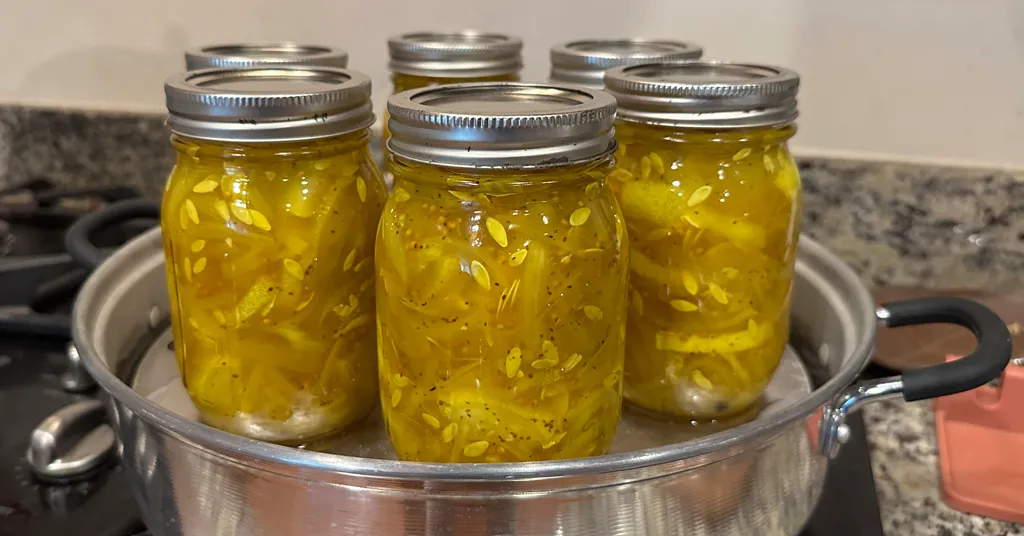
Pack hot pickles and liquid into hot jars, leaving 1/2 inch (1 cm) headspace. (Check with headspace measurer). Add 1/8 tsp Pickle Crisp to the pint jar, if desired. Remove air bubbles with a de-bubbler and adjust the headspace by adding more hot liquid if necessary.

Step 6: Seal the Jars
Wipe the rims of the jars with a clean, damp cloth to remove any residue. Place the lids on the jars and screw on the bands until they are fingertip tight.
Step 7: Process the Jars
Water Bath Canner:
Lower the water bath canner rack into the boiling water. Ensure your jars are covered by at least 2 inches of water.
If your water is not boiling start your processing time when the water is boiling. Process pint jars for 10 minutes. Make sure to adjust your time for altitude.
Set a timer, it makes it much easier to make sure you process for the correct time. When your timer goes off turn off the heat and remove the canner lid.
Leave the jars in the water for 5 minutes.
Steam Canner:
Put the lid on the steam canner. Turn your stove on high until your steam canner water comes to a vigorous boil. Continue heating so the indicator is in the correct “Zone” per your altitude.
Start your processing time when the needle reaches the maximum point you have tested your steam canner to reach in your “Zone”.
Adjust the burner so that it maintains an even rolling boil throughout the entire processing time. Usually, this will be much lower than where it was set for the vigorous boil. If the top lid is lifting and/or spitting water from the edges this is an indication that you have the heat turned up too high. Slowly reduce the heat until this stops. Watch the indicator to ensure the temperature does not decrease.
The processing times for steam canning are the same as for water bath canning. Process pint jars for 10 minutes.
Make sure to adjust your time for altitude. Set a timer, it makes it much easier to make sure you process for the correct time.
When your timer goes off turn off the heat and let the canner stand for 5 minutes with the lid on before removing the jars. The lid MUST remain ON the canner during this time. This cool-down period is necessary to ensure the jar contents are properly processed.
Carefully remove the lid by tilting it away from you to avoid steam burns.
Step 8: Cool and Store
Using your jar lifer carefully move the jars onto a wire rack or kitchen towel to allow them to cool. When moving the jars try not to tilt them to the side as this could affect the seal of the jars. Allow your jars to cool for 12-24 hours before handling.
Once cool, remove the canning rings from the jars. Wash your jars off to ensure no food residue on the outside of the jar from processing. Label your jar with the name of the recipe and date. This will help you remember what recipe you used to can and the date will allow you to use the oldest canned goods first.
Tips for Perfect Bread and Butter Pickles
- Use Fresh Cucumbers: Fresh, firm cucumbers are essential for crunchy pickles. Avoid using overripe or soft cucumbers.
- Consistent Slicing: Use a mandoline slicer for even slices, ensuring consistent texture and flavor absorption.
Can Any Cucumber Be Used for Pickles?
When it comes to making homemade bread and butter pickles, the type of cucumber you use can greatly affect the final product. While it might be tempting to use any cucumbers you have on hand, certain varieties are better suited for pickling due to their texture, size, and water content.
Best Cucumber Varieties for Pickling
- Kirby Cucumbers: Kirby cucumbers are a popular choice for pickling. They are small, firm, and have a bumpy skin, which helps them stay crisp during the pickling process. Their lower water content compared to other varieties means they are less likely to become mushy.
- Gherkin Cucumbers: Gherkins are another excellent option. These small, knobby cucumbers have a great crunch and are often used for making sweet pickles. Their petite size makes them ideal for jars.
- Persian Cucumbers: Persian cucumbers are slightly longer and thinner than Kirby cucumbers but still offer a good crunch and flavor. They are a versatile choice and work well for both spears and slices.
- English Cucumbers: English cucumbers can be used for pickling, but they are not the top choice. They have a higher water content and thinner skin, which can result in softer pickles. If using English cucumbers, consider slicing them thicker and removing some of the seeds to maintain a firmer texture.
Avoid Overripe or Soft Cucumbers
Regardless of the variety, it’s crucial to choose cucumbers that are fresh, firm, and free from blemishes or soft spots. Overripe or soft cucumbers will not hold up well during the pickling process and can lead to mushy pickles.
Enjoying Your Homemade Bread and Butter Pickles
Your canned bread and butter pickles should be stored in a cool, dark place and can be enjoyed for several years. They make a perfect accompaniment to sandwiches, salads, and charcuterie boards. Share your creations with family and friends or enjoy them as a special treat for yourself.
Additional Pickling Recipes
Recipe Card
Bread and Butter Pickles
Equipment
- Water Bath Canner or Steam Canner
- Steam Canner or Water Bath Canner
Ingredients
- 4 lbs 4 to 6 inch cucumbers
- 2 lbs onions thinly sliced
- 1/3 cup Pickling Salt
- 2 cups sugar
- 2 tbsp mustard seeds
- 2 tsp ground turmeric
- 2 tsp celery seeds
- 1 tsp Ground Ginger
- 1 tsp black peppercorns 5% Acidity
- 3 cups White Vinegar (5% acidity)
- Ball Pickle Crisp Granules
Instructions
- Clean jars and lids with warm soapy water. Ensure the jars do not have any chips or bubbles in the glass.
- Wash cucumbers under cold running water and drain.
- Remove the stem and 1/16-inch from the blossom end of the cucumbers. Cut cucumbers crosswise into 1/4-inch slices.
- Peel onions. Cut onions crosswise into thin slices.
- Put cucumbers and onions in a large bowl, layering with the salt. Cover with ice cubes. Let them stand for 1 and 1/2 hours. Drain the cucumbers and onions. Rinse cucumbers and onions under cold running water and then drain.
- Prepare your cannerUsing Water Bath Canner: Put your water bath canner on your stove. Add your canning rack to the water bath canner. Add your pint jars to the water bath canner. They will warm as you heat the water. Add enough water to cover jars with at least 2-3 inches of water. Start to bring your water to a boil.Using a Steam Canner: Put your steam canner on your stove. Add the steam canner rack to the bottom of the steam canner. Add the recommended amount of water to the steam canner according to the manufacturer. Add your pint jars to the steam canner. Put the lid on your steam canner and start your stove. The jars will warm as you heat your steam canner.
- Combine sugar, spices, and vinegar in a large Stainless Steel Pot. Bring the mixture to a boil over medium-high heat, stirring to dissolve the sugar.
- Add cucumbers and onions to the mixture and bring it back to a boil
- Once you have hot jars and hot pickles.Water Bath Canner:Remove your jars from the water bath canner one at a time using your jar lifter. Dump the water out of the jar into your water bath canner to ensure there is still 2-3 inches of water above your jars.Steam Canner:Remove the steam canner lid and remove your jars one at a time using your jar lifter.
- Pack hot pickles and liquid into hot jars, leaving 1/2 inch (1 cm) headspace. (Check with headspace measurer). Add 1/8 tsp Pickle Crisp to the pint jar, if desired. Remove air bubbles with a de-bubbler and adjust the headspace by adding more hot liquid if necessary.
- Wipe the rim to ensure a good seal is made with the lid. Center the lid on the jar and screw the band down to fingertip tight.
- Water Bath Canner:Lower the water bath canner rack into the boiling water. Ensure your jars are covered by at least 2 inches of water.If your water is not boiling start your processing time when the water is boiling. Process pint jars for 10 minutes. Make sure to adjust your time for altitude.Set a timer, it makes it much easier to make sure you process for the correct time. When your timer goes off turn off the heat and remove the canner lid.Leave the jars in the water for 5 minutes.Steam Canner:Put the lid on the steam canner. Turn your stove on high until your steam canner water comes to a vigorous boil. Continue heating so the indicator is in the correct "Zone" per your altitude. Start your processing time when the needle reaches the maximum point you have tested your steam canner to reach in your "Zone".Adjust the burner so that it maintains an even rolling boil throughout the entire processing time. Usually, this will be much lower than where it was set for the vigorous boil. If the top lid is lifting and/or spitting water from the edges this is an indication that you have the heat turned up too high. Slowly reduce the heat until this stops. Watch the indicator to ensure the temperature does not decrease.The processing times for steam canning are the same as for water bath canning. Process pint jars for 10 minutes.Make sure to adjust your time for altitude. Set a timer, it makes it much easier to make sure you process for the correct time.When your timer goes off turn off the heat and let the canner stand for 5 minutes with the lid on before removing the jars. The lid MUST remain ON the canner during this time. This cool-down period is necessary to ensure the jar contents are properly processed.Carefully remove the lid by tilting it away from you to avoid steam burns.
- Using your jar lifer carefully move the jars onto a wire rack or kitchen towel to allow them to cool. When moving the jars try not to tilt them to the side as this could affect the seal of the jars. Allow your jars to cool for 12-24 hours before handling.
- Once cool, remove the canning rings from the jars. Wash your jars off to ensure no food residue on the outside of the jar from processing. Label your jar with the name of the recipe and date. This will help you remember what recipe you used to can and the date will allow you to use the oldest canned goods first.