


If you’re looking for an easy dill pickle recipe, you’ve come to the right place! Canning homemade dill pickles is a fun and rewarding process, and with this guide, you’ll have delicious, crunchy pickles that you can enjoy year-round. This Best Dill Pickle Recipe brings you a simple and reliable method for canning, perfect for families who love snacking or anyone wanting to stock the pantry with their own jars.
Why Make Your Own Dill Pickles?
There’s nothing quite like the taste of homemade dill pickles. Store-bought varieties can’t compare to the freshness and flavor of pickles made with your own hands. Plus, canning dill pickles at home allows you to control the ingredients, ensuring you get the perfect balance of tartness and crunch. This simple dill pickle recipe for canning will quickly become a staple in your kitchen.
The Best Dill Pickle Recipe for Canning
This recipe comes from the Ball Blue Book Guide to Preserving, 38th edition. It will make about 7 pint jars or 3 quart jars of dill pickles.
To make these easy homemade dill pickles, you’ll need the following ingredients:
- 8 lbs cucumbers (4 to 6 inches long)
- 3/4 cup sugar
- 1/2 cup pickling salt
- 1 quart white vinegar (5% acidity)
- 1 quart water
- 3 tbsp pickling spice
- Green or Dry Dill Head (1 per jar)
- Ball Pickle Crisp (optional, adds extra crunch)


Essential Equipment for Dill Pickle Recipe Canning
You’ll want to gather the right tools before getting started. Here is the equipment I used to make this recipe.
- Large Stainless Steel Pot
- Large Bowl
- Cheesecloth or Spice Bag
- Knife
- Cutting Board
- Liquid Measuring Cups
- Measuring Spoons
- Water Bath Canner or Steam Canner
- Pint Sized Canning Jars or Quart Sized Canning Jars
- Lids
- Rings/Bands
- 1/2 Pint Canning Ladle
- De-bubbler
- Jar Lifter
- Funnel
- Headspace Measurer
Having all your canning gear ready helps the process run smoothly.
Step-by-Step: Easy Dill Pickles Recipe for Canning
Follow these simple steps to create your Best Dill Pickle Recipe for Canning. You’ll love having crunchy dill pickles ready for sandwiches, burgers, or snacking.
Clean Your Jars
Clean jars and lids with warm, soapy water. Ensure the jars do not have any chips or bubbles in the glass.
Prepare the Cucumbers
Rinse cucumbers under cold water. Trim off the blossom end by about 1/16 inch. Cut cucumbers lengthwise into halves or quarters, depending on your jar size and preference.
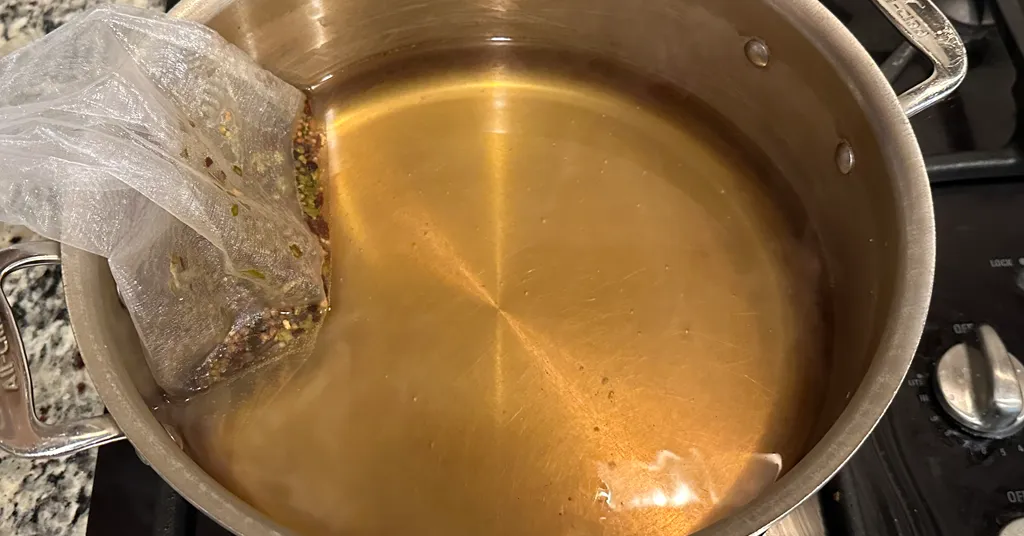
Make the Brine
Tie spices in a spice bag or square of cheesecloth. Combine sugar, salt, vinegar, and water in a large Stainless Steel Pot. Add the spice bag. Bring the mixture to a boil over medium-high heat, stirring to dissolve the sugar. Reduce heat to a simmer, and simmer for 15 minutes. This brine will make your dill pickles recipe shine.

Prepare the Canner:
Using Water Bath Canner:
Put your water bath canner on your stove. Add your canning rack to the water bath canner. Add your pint jars to the water bath canner. They will warm as you heat the water. Add enough water to cover jars with at least 2-3 inches of water. Start to bring your water to a boil.
Using a Steam Canner:
Put your steam canner on your stove. Add the steam canner rack to the bottom of the steam canner. Add the recommended amount of water to the steam canner according to the manufacturer. Add your pint jars to the steam canner. Put the lid on your steam canner and start your stove. The jars will warm as you heat your steam canner.
Pack the Jars
Once you have hot jars and hot brine.
Water Bath Canner:
Remove your jars from the water bath canner one at a time using your jar lifter. Dump the water out of the jar into your water bath canner to ensure there is still 2-3 inches of water above your jars.
Steam Canner:
Remove the steam canner lid and remove your jars one at a time using your jar lifter.
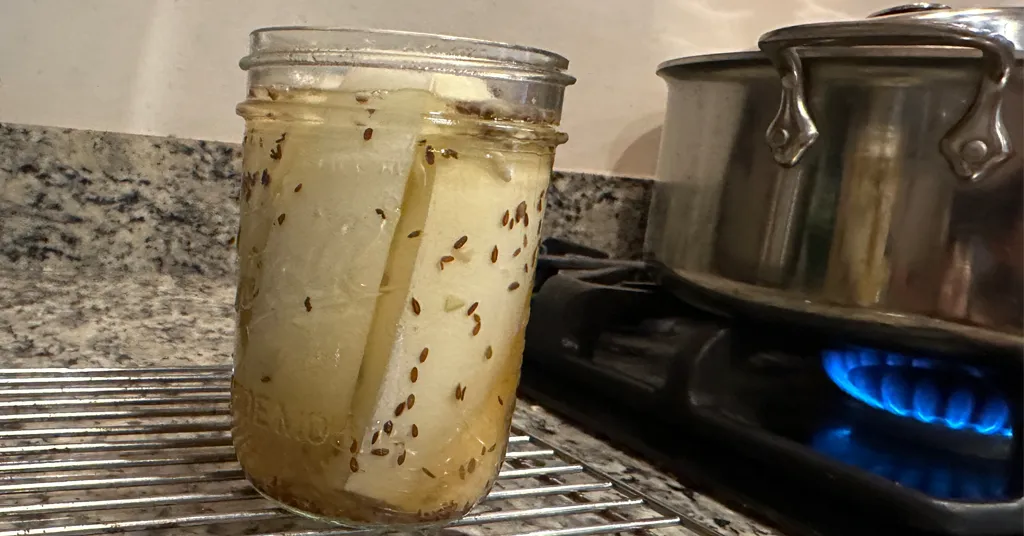
Pack Jar
Pack cucumber spears into a hot jar, leaving 1/2 inch (1 cm) headspace. (Check with the headspace measurer). Add one head of dill to the jar. Add 1/8 tsp Pickle Crisp to the pint jar or 1/4 tsp Pickle Crisp to the quart jar, if desired.


Add the Brine
Ladle hot pickling liquid over cucumbers, leaving 1/2 inch (1 cm) headspace. Remove air bubbles with a de-bubbler and adjust the headspace by adding more hot liquid if necessary. Wipe the rim to ensure a good seal is made with the lid. Center the lid on the jar and screw the band down to fingertip tight.
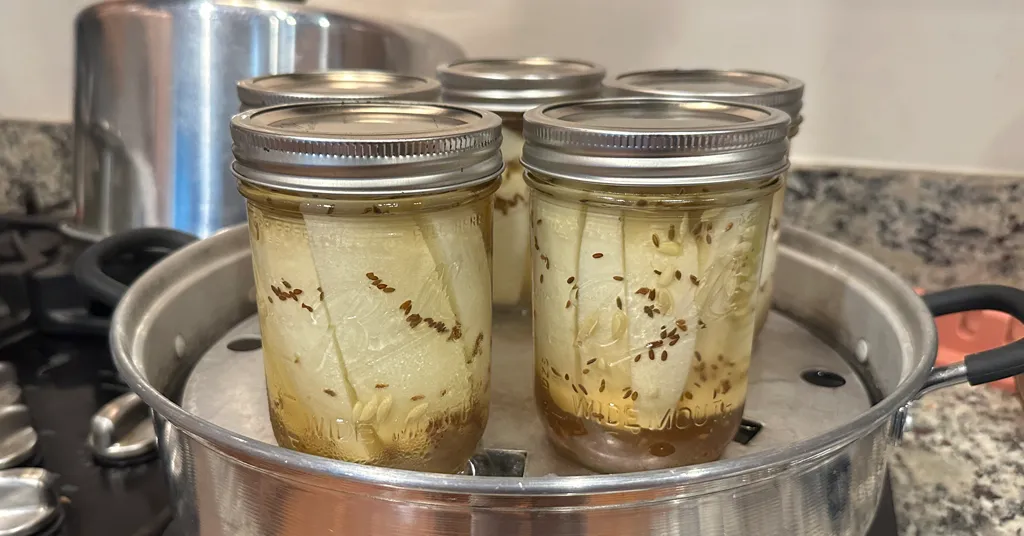
Process the Jars
Water Bath Canner:
Lower the water bath canner rack into the boiling water. Ensure your jars are covered by at least 2 inches of water.
If your water is not boiling, start your processing time when the water is boiling. Process pint jars or quart jars for 15 minutes. Make sure to adjust your time for altitude.
Set a timer, it makes it much easier to make sure you process for the correct time. When your timer goes off, turn off the heat and remove the canner lid.
Leave the jars in the water for 5 minutes.
Steam Canner:
Put the lid on the steam canner. Turn your stove on high until your steam canner water comes to a vigorous boil. Continue heating so the indicator is in the correct “Zone” per your altitude.
Start your processing time when the needle reaches the maximum point you have tested your steam canner to reach in your “Zone”.
Adjust the burner so that it maintains an even rolling boil throughout the entire processing time. Usually, this will be much lower than where it was set for the vigorous boil. If the top lid is lifting and/or spitting water from the edges this is an indication that you have the heat turned up too high. Slowly reduce the heat until this stops. Watch the indicator to ensure the temperature does not decrease.
The processing times for steam canning are the same as for water bath canning. Process pint jars or quart jars for 15 minutes.
Make sure to adjust your time for altitude. Set a timer, it makes it much easier to make sure you process for the correct time.
When your timer goes off turn off the heat and let the canner stand for 5 minutes with the lid on before removing the jars. The lid MUST remain ON the canner during this time. This cool-down period is necessary to ensure the jar contents are properly processed.
Carefully remove the lid by tilting it away from you to avoid steam burns.
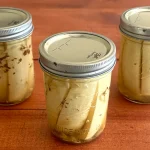
Cool and Store
Using your jar lifer carefully move the jars onto a wire rack or kitchen towel to allow them to cool. When moving the jars try not to tilt them to the side as this could affect the seal of the jars. Allow your jars to cool for 12-24 hours before handling.
Once cool, remove the canning rings from the jars. Wash your jars off to ensure no food residue on the outside of the jar from processing. Label your jar with the name of the recipe and date. This will help you remember what recipe you used to can and the date will allow you to use the oldest canned goods first.
Tips the Best Homemade Dill Pickles
- Pick smaller cucumbers for a crispier bite.
- Use the freshest dill and spices you can find.
- Stick with pickling salt to keep the brine clear.
For more ideas about variations, you can check out the Hamburger Dill Pickles Canning Guide, it’s a fun twist for burger lovers.
Substitutions for Dill Heads
If you can’t find dill heads, use:
- 1 teaspoon dried dill seed per jar
- 1/4 teaspoon dill weed per jar
Why This is the Best Dill Pickle Recipe
This Ball Dill Pickle Recipe stands out because it delivers consistent results every time. The balance of sugar, vinegar, and salt keeps the flavor sharp and the texture crunchy. It’s easy enough for beginners, but even seasoned canners come back to this classic Dill Pickle Recipe.
Other Pickling Recipes
Recipe Card
Dill Pickles
Equipment
- Cheesecloth or spice bag
- Spice Bag or cheesecloth
- Water Bath Canner or Steam Canner
- Steam Canner or Water Bath Canner
- Pint Size Canning Jars or Quart Size Jars
- Quart size canning jars or Pint Size Canning Jars
Ingredients
- 8 lbs 4 to 6 inch cucumbers
- 3/4 cup sugar
- 1/2 cup Pickling Salt
- 1 quart White Vinegar (5% acidity)
- 1 quart water
- 3 tbsp Pickling Spice
- Green or Dry Dill (1 head per jar)
- Ball Pickle Crisp Granules
Instructions
- Clean jars and lids with warm soapy water. Ensure the jars do not have any chips or bubbles in the glass.
- Wash cucumbers under cold running water and drain.
- Remove the stem and 1/16-inch from the blossom end of the cucumbers. Cut cucumbers in half lengthwise or into quarters lengthwise.
- Tie spices in a spice bag or square of cheesecloth.
- Combine sugar, salt, vinegar, and water in a large Stainless Steel Pot. Add spice bag. Bring the mixture to a boil over medium-high heat, stirring to dissolve the sugar. Reduce heat to a simmer, and simmer for 15 minutes.
- Prepare your cannerUsing Water Bath Canner: Put your water bath canner on your stove. Add your canning rack to the water bath canner. Add your pint jars to the water bath canner. They will warm as you heat the water. Add enough water to cover jars with at least 2-3 inches of water. Start to bring your water to a boil.Using a Steam Canner: Put your steam canner on your stove. Add the steam canner rack to the bottom of the steam canner. Add the recommended amount of water to the steam canner according to the manufacturer. Add your pint jars to the steam canner. Put the lid on your steam canner and start your stove. The jars will warm as you heat your steam canner.
- Once you have hot jars and hot brine.Water Bath Canner:Remove your jars from the water bath canner one at a time using your jar lifter. Dump the water out of the jar into your water bath canner to ensure there is still 2-3 inches of water above your jars.Steam Canner:Remove the steam canner lid and remove your jars one at a time using your jar lifter.
- Pack cucumbers into a hot jar leaving 1/2 inch (1 cm) headspace. (Check with headspace measurer). Add one head of dill in jar. Add 1/8 tsp Pickle Crisp to the pint jar or 1/4 tsp Pickle Crisp to the quart jar, if desired.
- Ladle hot pickling liquid over cucumbers leaning 1/2 inch (1 cm) headspace.
- Remove air bubbles with a de-bubbler and adjust the headspace by adding more hot liquid if necessary.
- Wipe the rim to ensure a good seal is made with the lid. Center the lid on the jar and screw the band down to fingertip tight.
- Water Bath Canner:Lower the water bath canner rack into the boiling water. Ensure your jars are covered by at least 2 inches of water.If your water is not boiling start your processing time when the water is boiling. Process pint jars or quart jars for 15 minutes. Make sure to adjust your time for altitude.Set a timer, it makes it much easier to make sure you process for the correct time. When your timer goes off turn off the heat and remove the canner lid.Leave the jars in the water for 5 minutes.Steam Canner:Put the lid on the steam canner. Turn your stove on high until your steam canner water comes to a vigorous boil. Continue heating so the indicator is in the correct "Zone" per your altitude. Start your processing time when the needle reaches the maximum point you have tested your steam canner to reach in your "Zone".Adjust the burner so that it maintains an even rolling boil throughout the entire processing time. Usually, this will be much lower than where it was set for the vigorous boil. If the top lid is lifting and/or spitting water from the edges this is an indication that you have the heat turned up too high. Slowly reduce the heat until this stops. Watch the indicator to ensure the temperature does not decrease.The processing times for steam canning are the same as for water bath canning. Process pint jars or quart jars for 15 minutes.Make sure to adjust your time for altitude. Set a timer, it makes it much easier to make sure you process for the correct time.When your timer goes off turn off the heat and let the canner stand for 5 minutes with the lid on before removing the jars. The lid MUST remain ON the canner during this time. This cool-down period is necessary to ensure the jar contents are properly processed.Carefully remove the lid by tilting it away from you to avoid steam burns.
- Using your jar lifer carefully move the jars onto a wire rack or kitchen towel to allow them to cool. When moving the jars try not to tilt them to the side as this could affect the seal of the jars. Allow your jars to cool for 12-24 hours before handling.
- Once cool, remove the canning rings from the jars. Wash your jars off to ensure no food residue on the outside of the jar from processing. Label your jar with the name of the recipe and date. This will help you remember what recipe you used to can and the date will allow you to use the oldest canned goods first.