


There’s something special about biting into a juicy burger topped with a perfectly crisp, tangy dill pickle. But why settle for store-bought when you can make your own delicious Hamburger Dill Pickles at home? Canning your pickles allows you to control the quality of ingredients, customize flavors, and ensure freshness.
Why Make Your Own Hamburger Dill Pickles?
Making your pickles is not only satisfying but also comes with a host of benefits:
- Quality Control: When you make pickles at home, you know exactly what’s going into each jar. You can hand-select fresh cucumbers, choose high-quality vinegar, and use fresh dill to ensure the best flavor and crunch.
- Cost-Effectiveness: Canning pickles at home can be much more economical than buying premium brands at the store. If you have a garden or access to a local farmer’s market, you can save even more.
- Preserving Traditions: Canning is often a cherished tradition, passed down through generations. It’s a way to connect with the past, create new memories, and share the joy of home-preserved food with friends and family.
Key Ingredients and Their Roles
Understanding the role of each ingredient helps in making the perfect jar of Hamburger Dill Pickles. Here’s a closer look:
- Cucumbers: Fresh, firm cucumbers are key to achieving that satisfying crunch in your pickles. Kirby cucumbers or other pickling varieties are best, as they have fewer seeds and a denser texture. Select cucumbers that are uniform in size for even pickling and free of blemishes.
- Pickling Salt: Unlike regular table salt, pickling salt doesn’t contain iodine or anti-caking agents that can cause cloudiness in the brine. The purity of pickling salt ensures a clear brine and a crisp texture.
- White Vinegar: Vinegar is the crucial ingredient that not only provides the tangy flavor but also ensures the pickles are safely preserved. A 5% acidity level is necessary to kill bacteria and create a stable environment for canning.
- Fresh Dill Heads: Fresh dill is essential for that classic dill pickle flavor. If dill heads aren’t available, dill seeds can be used as an alternative, though the flavor will be slightly different.
- Mustard Seeds and Peppercorns: These spices add depth and complexity to the brine. Mustard seeds provide a mild, tangy note, while peppercorns add a subtle heat that complements the vinegar’s acidity.


The Science of Pickling and Canning Safety
Pickling is both an art and a science. Understanding the chemistry behind it can help you make the most flavorful and safe pickles possible.
- The Pickling Process: The key to great pickles is in the brine. A combination of vinegar, salt, and spices works together to transform fresh cucumbers into tangy, delicious pickles. The salt draws out moisture from the cucumbers, creating a crisp texture, while the vinegar’s acidity prevents the growth of harmful bacteria.
- Canning Safety Tips: Proper canning procedures are essential to ensure that your pickles are safe to eat and stored for extended periods. Always use tested recipes, clean jars, and ensure proper seals to prevent spoilage. Botulism, a rare but serious form of food poisoning, can occur if pickles are not canned correctly.
Hamburger Dill Pickle Recipe
This recipe comes from the Ball Blue Book Guide to Preserving 38th Edition. It will yield about 7-pint jars of Hamburger Dill Pickles.
Ingredients for Canning Hamburger Dill Pickles
- 4 lbs cucumbers (4 to 6 inches in length)
- 6 tbsp salt for canning and pickling
- 1 quart plus 1/2 cup water
- 1 quart white vinegar (5% acidity)
- 14 heads of fresh dill
- 3 1/2 teaspoon mustard seed
- 14 black peppercorns
- Ball Pickle Crisp (Optional)
Equipment Needed for Hamburger Dill Pickles
Here is the equipment I used when using this recipe.
- Large stainless steel pot
- Large Bowl
- Knife
- Cutting Board
- Liquid Measuring Cups
- Measuring Spoons
- Water Bath Canner or Steam Canner
- Pint Sized Canning Jars
- Lids
- Rings/Bands
- 1/2 pint canning ladle
- De-bubbler
- Jar Lifter
- Headspace Measurer
- Funnel

Step-by-Step Process
Clean Your Jars:
Clean jars and lids with warm soapy water. Ensure the jars do not have any chips or bubbles in the glass.
Prepare the Cucumbers:
Wash cucumbers under cold running water and drain. Remove the stem and 1/16-inch from the blossom end of the cucumbers. Cut cucumbers crosswise or lengthwise into 1/4-inch slices.
Prepare the Canner:
Using Water Bath Canner:
Put your water bath canner on your stove. Add your canning rack to the water bath canner. Add your pint jars to the water bath canner. They will warm as you heat the water. Add enough water to cover jars with at least 2-3 inches of water. Start to bring your water to a boil.
Using a Steam Canner:
Put your steam canner on your stove. Add the steam canner rack to the bottom of the steam canner. Add the recommended amount of water to the steam canner according to the manufacturer. Add your pint jars to the steam canner. Put the lid on your steam canner and start your stove. The jars will warm as you heat your steam canner.
Make the Brine:
Combine salt, vinegar, and water in a large Stainless Steel Pot. Bring the mixture to a boil over medium-high heat. Reduce heat to a simmer, and simmer for 10 minutes. This brine is what will preserve your pickles and give them their flavor.
Pack the Jars:
Once you have hot jars and hot brine.
Water Bath Canner:
Remove your jars from the water bath canner one at a time using your jar lifter. Dump the water out of the jar into your water bath canner to ensure there is still 2-3 inches of water above your jars.
Steam Canner:
Remove the steam canner lid and remove your jars one at a time using your jar lifter.
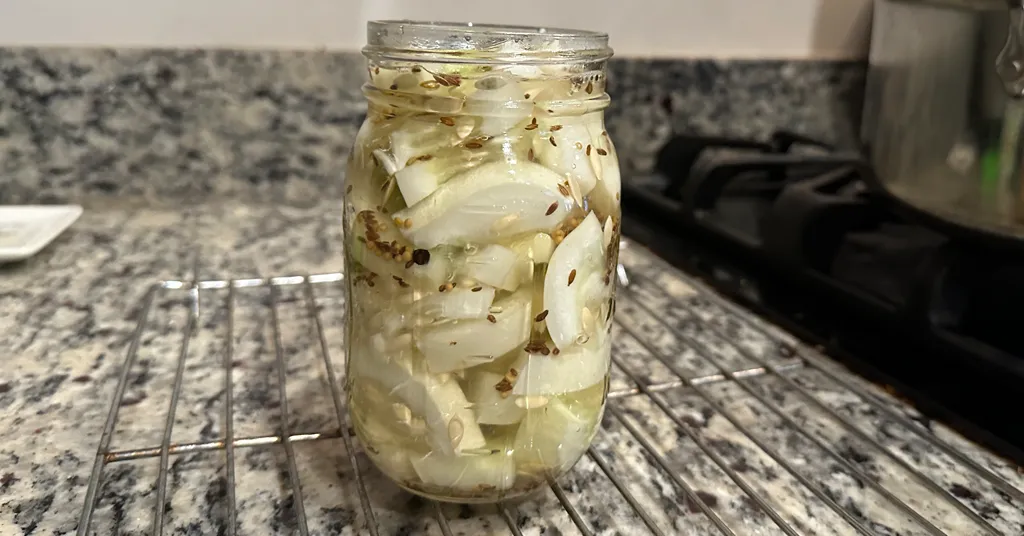
Pack Jar:
Pack cucumbers into a hot jar leaving 1/2 inch (1 cm) headspace. (Check with headspace measurer). Add two heads of dill, 1/2 tsp mustard seeds, and 2 peppercorns in the jar. Add 1/8 tsp Pickle Crisp to the pint jar, if desired.


Add the Brine:
Ladle hot pickling liquid over cucumbers leaving 1/2 inch (1 cm) headspace. Remove air bubbles with a de-bubbler and adjust the headspace by adding more hot liquid if necessary. Wipe the rim to ensure a good seal is made with the lid. Center the lid on the jar and screw the band down to fingertip tight. Using your jar lifter add jar back into the canner.
Repeat until all cucumbers are used.
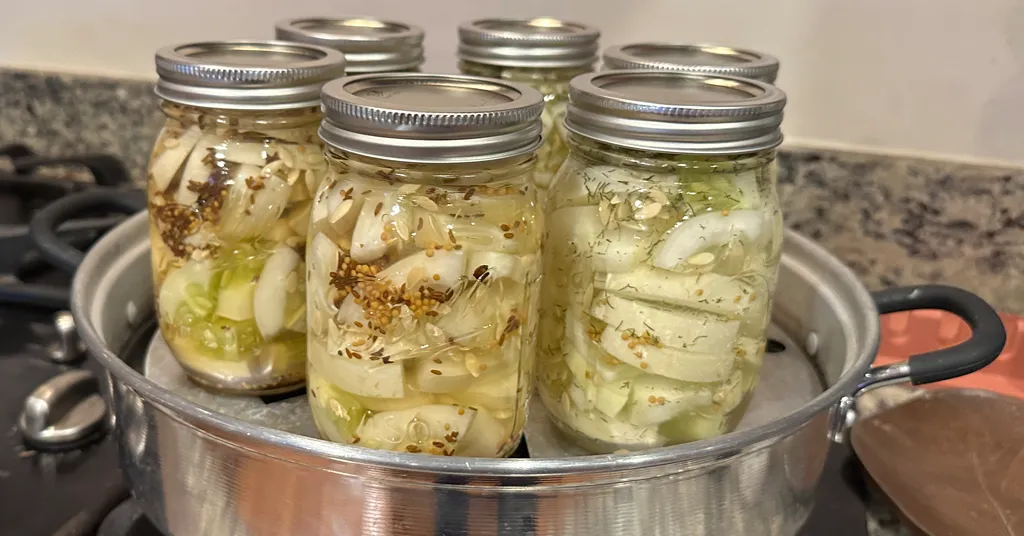
Process the Jars:
Water Bath Canner:
Lower the water bath canner rack into the boiling water. Ensure your jars are covered by at least 2 inches of water.
If your water is not boiling start your processing time when the water is boiling. Process pint jars for 15 minutes. Make sure to adjust your time for altitude.
Set a timer, it makes it much easier to make sure you process for the correct time. When your timer goes off turn off the heat and remove the canner lid.
Leave the jars in the water for 5 minutes.
Steam Canner:
Put the lid on the steam canner. Turn your stove on high until your steam canner water comes to a vigorous boil. Continue heating so the indicator is in the correct “Zone” per your altitude.
Start your processing time when the needle reaches the maximum point you have tested your steam canner to reach in your “Zone”.
Adjust the burner so that it maintains an even rolling boil throughout the entire processing time. Usually, this will be much lower than where it was set for the vigorous boil. If the top lid is lifting and/or spitting water from the edges this is an indication that you have the heat turned up too high. Slowly reduce the heat until this stops. Watch the indicator to ensure the temperature does not decrease.
The processing times for steam canning are the same as for water bath canning. Process pint jars for 15 minutes.
Make sure to adjust your time for altitude. Set a timer, it makes it much easier to make sure you process for the correct time.
When your timer goes off turn off the heat and let the canner stand for 5 minutes with the lid on before removing the jars. The lid MUST remain ON the canner during this time. This cool-down period is necessary to ensure the jar contents are properly processed.
Carefully remove the lid by tilting it away from you to avoid steam burns.
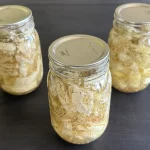
Cool and Store:
Using your jar lifer carefully move the jars onto a wire rack or kitchen towel to allow them to cool. When moving the jars try not to tilt them to the side as this could affect the seal of the jars. Allow your jars to cool for 12-24 hours before handling.
Once cool, remove the canning rings from the jars. Wash your jars off to ensure no food residue on the outside of the jar from processing. Label your jar with the name of the recipe and date. This will help you remember what recipe you used to can and the date will allow you to use the oldest canned goods first.
Tips for Perfect Hamburger Dill Pickles
- Crispness: For extra-crisp pickles, start with fresh, firm cucumbers and keep them cold before canning. Adding a grape leaf or pickle crisp granules to each jar can help maintain crispness.
- Storage Advice: Store your canned pickles in a cool, dark place to maintain their flavor and texture. Properly processed pickles can last up to a year or more, but they’re best enjoyed within the first six months.
Substitutions
If you do not have Fresh Dill Heads you can replace them with the following:
- 1 Dill Head = 1 tsp dried dill seed
- 1 Dill Head = 1/4 tsp Dill Weed
Common Pitfalls and How to Avoid Them
- Cloudy Brine: If the brine in your pickles turns cloudy, it could be due to the use of iodized salt, mineral-rich water, or improper processing. Always use pickling salt and distilled water for the clearest brine.
- Soft Pickles: Soft or mushy pickles can result from using overripe cucumbers, not processing jars for the proper amount of time, or storing jars in a warm place. Ensure cucumbers are fresh and firm, and follow proper canning procedures.
- Unsealed Jars: If your jars don’t seal, the pickles won’t be safe to store on your shelf. Ensure jar rims are clean before applying lids, and use new lids each time you can. If a jar doesn’t seal, you can refrigerate it and eat the pickles within a few weeks.
Making your own Hamburger Dill Pickles is a rewarding process that allows you to enjoy crisp, tangy pickles any time of the year. So grab some fresh cucumbers, gather your ingredients, and start preserving the delicious taste of summer with your homemade dill pickles. Your taste buds—and your burger—will thank you!
Additional Pickle Recipes
Recipe Card

Hamburger Dill Pickles
Equipment
- Water Bath Canner or Steam Canner
- Steam Canner or Water Bath Canner
Ingredients
- 4 lbs 4 to 6 inch cucumbers
- 6 tbsp Pickling Salt
- 1 quart water plus water below
- 1/2 cup water plus water above
- 1 quart White Vinegar (5% acidity)
- Green Dill Heads (2 heads per jar)
- 3 1/2 tsp mustard seeds
- 14 black peppercorns
- Ball Pickle Crisp Granules
Instructions
- Clean jars and lids with warm soapy water. Ensure the jars do not have any chips or bubbles in the glass.
- Prepare your cannerUsing Water Bath Canner: Put your water bath canner on your stove. Add your canning rack to the water bath canner. Add your pint jars to the water bath canner. They will warm as you heat the water. Add enough water to cover jars with at least 2-3 inches of water. Start to bring your water to a boil.Using a Steam Canner: Put your steam canner on your stove. Add the steam canner rack to the bottom of the steam canner. Add the recommended amount of water to the steam canner according to the manufacturer. Add your pint jars to the steam canner. Put the lid on your steam canner and start your stove. The jars will warm as you heat your steam canner.
- Wash cucumbers under cold running water and drain.
- Remove the stem and 1/16-inch from the blossom end of the cucumbers. Cut cucumbers crosswise or lengthwise into 1/4-inch slices.
- Combine salt, vinegar, and water in a large Stainless Steel Pot. Bring the mixture to a boil over medium-high heat. Reduce heat to a simmer, and simmer for 10 minutes.
- Once you have hot jars and hot brine.Water Bath Canner:Remove your jars from the water bath canner one at a time using your jar lifter. Dump the water out of the jar into your water bath canner to ensure there is still 2-3 inches of water above your jars.Steam Canner:Remove the steam canner lid and remove your jars one at a time using your jar lifter.
- Pack cucumbers into a hot jar leaving 1/2 inch (1 cm) headspace. (Check with headspace measurer). Add two heads of dill, 1/2 tsp mustard seeds, and 2 peppercorns in the jar. Add 1/8 tsp Pickle Crisp to the pint jar if desired.
- Ladle hot pickling liquid over cucumbers leaning 1/2 inch (1 cm) headspace.
- Remove air bubbles with a de-bubbler and adjust the headspace by adding more hot liquid if necessary.
- Wipe the rim to ensure a good seal is made with the lid. Center the lid on the jar and screw the band down to fingertip tight.
- Using your jar lifter put the jar in the canner. Repeat filling jars until all cucumbers are used.
- Water Bath Canner:Lower the water bath canner rack into the boiling water. Ensure your jars are covered by at least 2 inches of water.If your water is not boiling start your processing time when the water is boiling. Process pint jars for 15 minutes. Make sure to adjust your time for altitude.Set a timer, it makes it much easier to make sure you process for the correct time. When your timer goes off turn off the heat and remove the canner lid.Leave the jars in the water for 5 minutes.Steam Canner:Put the lid on the steam canner. Turn your stove on high until your steam canner water comes to a vigorous boil. Continue heating so the indicator is in the correct "Zone" per your altitude. Start your processing time when the needle reaches the maximum point you have tested your steam canner to reach in your "Zone".Adjust the burner so that it maintains an even rolling boil throughout the entire processing time. Usually, this will be much lower than where it was set for the vigorous boil. If the top lid is lifting and/or spitting water from the edges this is an indication that you have the heat turned up too high. Slowly reduce the heat until this stops. Watch the indicator to ensure the temperature does not decrease.The processing times for steam canning are the same as for water bath canning. Process pint jars for 15 minutes.Make sure to adjust your time for altitude. Set a timer, it makes it much easier to make sure you process for the correct time.When your timer goes off turn off the heat and let the canner stand for 5 minutes with the lid on before removing the jars. The lid MUST remain ON the canner during this time. This cool-down period is necessary to ensure the jar contents are properly processed.Carefully remove the lid by tilting it away from you to avoid steam burns.
- Using your jar lifer carefully move the jars onto a wire rack or kitchen towel to allow them to cool. When moving the jars try not to tilt them to the side as this could affect the seal of the jars. Allow your jars to cool for 12-24 hours before handling.
- Once cool, remove the canning rings from the jars. Wash your jars off to ensure no food residue on the outside of the jar from processing. Label your jar with the name of the recipe and date. This will help you remember what recipe you used to can and the date will allow you to use the oldest canned goods first.