


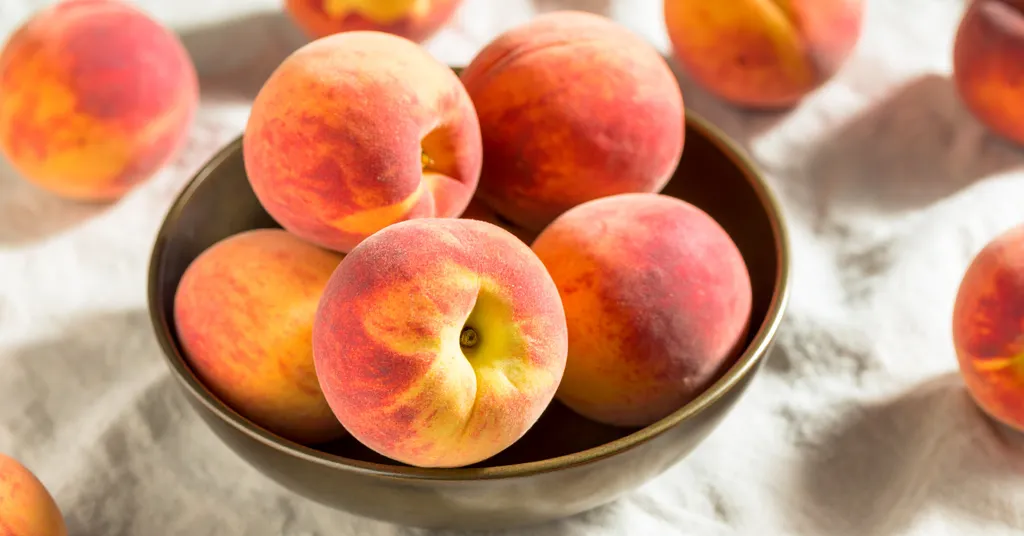
There’s nothing that feels more like summer than a homemade Peach Pie Filling Recipe bubbling away on the stove. This recipe gives you sweet, juicy peaches every time, if you’re using fresh fruit at the peak of the season or frozen slices from the freezer. If you love baking, canning, or just want good desserts year-round, this is one you’ll want to save.
I’ll walk you through exactly how to make, can, and store peach pie filling so you can plan for every busy holiday, birthday, or family get-together. You’ll find tips for making fresh peach pie filling from scratch, safe canning practices for peach pie filling, and ideas for using your homemade filling over time. You’ll even get details on the safest canning methods, including Water Bath vs Pressure Canning, so you never have to guess. If you want a Recipe for Peach Pie Filling that’s easy, versatile, and made for sharing, you’re in the right spot.
Essential Ingredients and Equipment for Peach Pie Filling
Making Peach Pie Filling Recipe at home is easy when you know what you need from the start. Having the right ingredients is just as important as using the proper tools. If you’re whipping up a Fresh Peach Pie Filling for a weekend treat or setting up for Canning Peach Pie Filling to last all year, having this list handy will shorten your prep time and help you get delicious, consistent results.
Must-Have Ingredients for Homemade Peach Pie Filling
This recipe comes from the Ball Complete Book of Home Preserving and will yield about 4 pint jars if you are canning it. You can make this delicious Peach Pie Filling Recipe with the following ingredients:
- 1 Cinnamon Stick (About 3 inches long, broken into pieces)
- 2 tsp Whole Cloves
- 12 Cups Peeled, Pitted, and Sliced Yellow Peaches (Treated to prevent browning)
- 2 Cups Peeled, Cored, and Finely Chopped Apples (Treated to prevent browning)
- 2 2/3 Cups Granulated Sugar
- 1 Cup Golden Raisins
- 2 tbsp Grated Lemon Zest
- 1/2 Cup Bottled Lemon Juice
- 1/4 Cup White Vinegar
- 1/2 tsp Ground Nutmeg
Canning Note: You must use Yellow Peaches when canning. Yellow peaches contain enough acid to be safely canned. Never use white peaches when canning. White peaches do not contain enough acid for canning, even if you add additional acid to the recipe. Plan to use those white peaches for fresh baking and eating.

Equipment for Peach Pie Filling and Safe Canning
Having the right equipment makes the whole process easier, cleaner, and safer. This is especially key for those learning how to make peach pie filling for the first time. Here’s what I always keep at the ready:
- Large Heavy-Bottomed Pot: Helps prevent sticking and allows enough room for stirring.
- Measuring Cups and Spoons: Accuracy matters, especially when thickening.
- Sharp Knife and Peeler: Clean slices mean even cooking.
- Mixing Bowls: For prepping and combining ingredients.
- Wooden Spoon or Silicone Spatula: Strong enough for thick filling.
- Canning Jars with Lids: Go with wide-mouth jars for easier filling.
- Jar Funnel: Keeps the mess down, especially when canning.
- Ladle: Makes transferring hot filling safer.
- Water Bath Canner or Steam Canner: For anyone wanting Peach Pie Filling for Canning, this is a must for food safety.
- Jar Lifter: Protects your hands and your jars.
Keeping your workspace organized and all tools within arm’s reach saves you time and reduces spills. If you like to experiment, a canning routine is easy to update with a few small gadget upgrades.
Step-by-Step Guide: How to Make Peach Pie Filling from Fresh Peaches
Making peach pie filling with fresh fruit is one of my favorite ways to keep summer going. There’s just something about working with peaches, apples, and spices that makes the process satisfying, no matter your skill level. If you’re ready to start your Recipe for Peach Pie Filling, follow these simple but important steps for the best results.
Preparing and Peeling Fresh Peaches
For bright, beautiful filling that stays appealing, stopping the fruit from browning is essential. I start with a quick lemon water bath, which keeps everything golden and fresh.
- In a large bowl, combine 1/4 cup lemon juice with 4 cups of water.
- As you peel and slice your yellow peaches, add each piece to the lemon water. This helps keep the peaches from turning brown while you work. Measure as you slice, aiming for even, thin pieces.
- Once you’ve finished with the peaches, drain them well with a slotted spoon or in a colander.
- Next, move on to the apples. Peel, core, and finely chop your apples, adding each handful to the same lemon water. Again, measure as you go so your batch turns out just right. Drain the apples thoroughly before moving to the next step.
For the spice mix, I use a square of cheesecloth to tie up cinnamon stick pieces and whole cloves. This homemade spice bag adds rich flavor but is easy to remove later, so nobody bites into a surprise clove.
If you want more ideas for using and prepping peaches in preservation, check out the Easy Peach Jelly Recipe, which uses many of the same steps for handling fresh fruit.
Cooking the Filling to Perfection
With your peaches and apples prepped, it’s time to bring everything together for the perfect Peach Pie Filling Recipe. I go for a balance of fruit, spice, and sweetness.
- In a large stainless steel pot, add your sliced peaches and chopped apples.
- Stir in sugar, raisins, fresh lemon zest, bottled lemon juice, white vinegar, and ground nutmeg.
- Toss in the spice bag you prepared earlier.
- Place the pot over medium-high heat and stir frequently as the mixture comes to a boil.
When you see gentle bubbles breaking the surface, reduce the heat. Cover the pot and let the filling boil gently, stirring now and then. This slow simmer thickens the mix and lets all those warm, sweet flavors blend.
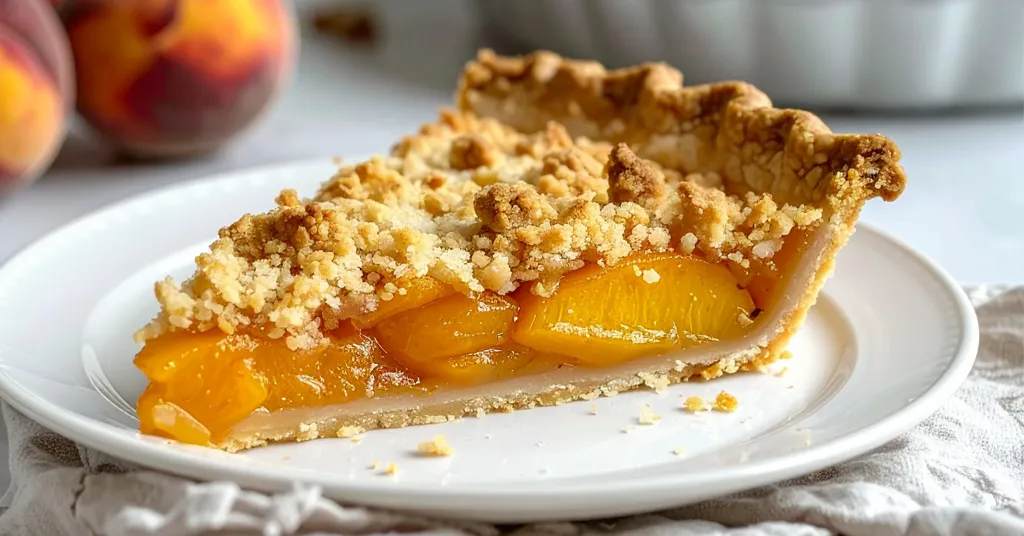
Good pie filling should be thick enough to coat a spoon, with fruit pieces holding their shape. These steps make your Homemade Peach Pie Filling shine. Careful prepping and slow simmering bring out the flavor and keep every bite tasting like summer.


How to Make Peach Pie Filling with Frozen Peaches
Frozen peaches are a life-saver. If you want to enjoy Peach Pie Filling Recipe year-round, frozen fruit makes the process simple and the results delicious. I love the fact that with frozen peaches on hand, I can whip up a Homemade Peach Pie Filling even when summer feels far away. You get the same juicy sweetness as a Fresh Peach Pie Filling, but with less prep.
Preparing Frozen Peaches for Pie Filling
Getting started with frozen peaches couldn’t be easier. The best part is, you skip the peeling and slicing—no sticky hands or extra work.
- Start by measuring your frozen peach slices. I use the same amount as I would for fresh: about 12 cups is perfect for this peach pie filling recipe.
- Spread the frozen peaches out on clean paper towels and let them thaw at room temperature for about 30 minutes. This keeps your filling from getting watery.
- Once thawed, gently blot any extra moisture with paper towels. This helps your Peach Pie Filling thicken up just right.
The process for making the Peach Pie Filling Recipe with frozen fruit is identical to fresh. You still get all the flavor, and the filling sets up beautifully.
Canning Peach Pie Filling: Techniques and Tips
Canning Peach Pie Filling brings the taste of summer into your pantry, ready for pies, crisps, and sweet treats any time. If you want to enjoy that Homemade Peach Pie Filling all year, following these reliable steps for preparing, filling, and processing jars keeps your food safe and delicious.
Preparing Your Canner and Jars
Starting clean is always my number one rule. For every batch of Peach Pie Filling for Canning, I wash all jars and lids in warm, soapy water. I check every jar carefully, making sure there are no chips or bubbles in the glass. It takes just a minute and can save a whole batch.
Next up is heating. If you use a water bath canner, add the canning rack to your pot, place your clean jars inside, and fill with enough water so jars are covered by 2-3 inches. I bring it up to a gentle boil to warm the jars as I prep the filling. Warm jars help prevent cracking when hot filling goes in.
If you prefer a steam canner, place the rack in the bottom and follow the manufacturer’s guide for the right amount of water. I set my jars on the rack, cover with the lid, and begin heating. Either way, having hot jars ready is the secret to safe, efficient canning.
How to Properly Fill and Seal Jars
Once your jars and your Peach Pie Filling Recipe are both piping hot, you’re ready to fill. Take out the spice bag. I use a funnel and a ladle for this step, anything to keep sticky spills at bay.
- Ladle hot filling into jars, leaving a good 1-inch headspace. This gap helps with expansion during processing.
- Use a headspace measurer for accuracy.
- Run a de-bubbler or a small tool around each jar’s edge. This chases out air pockets, which can mess with the seal.
- Wipe the rim carefully with a clean, damp cloth. Even a little syrup on the edge can spell trouble for the seal.
Top each jar with a lid and screw the band on just fingertip tight. It doesn’t need to be super tight, just snug. Using a jar lifter, load the jars back into your canner, whether you’re using water bath or steam. Repeat this until you’ve filled and sealed all your jars.


Processing Times and Altitude Adjustments
How you process your jars helps turn your homemade Peach Pie Filling into a true pantry staple. After placing jars in the hot canner, here’s what you need to do:
- For water bath canning, lower the rack with jars into boiling water. The jars must always be covered by at least 2 inches of water.
- When the water is fully boiling, start your timer: Process 15 minutes for pint jars.
Altitude makes a difference in canning time. If you live above 1,000 feet, add extra minutes to the processing time. For an exact adjustment by your elevation, take a look at my post on Altitude Adjustment Tips for Canning.
Set a timer so you don’t guess or forget. After processing, turn off the heat, remove the lid, and leave the jars in the hot water for another 5 minutes to settle.
For steam canners, once the indicator reaches your “zone,” start timing (same as for water bath: 15 minutes for pints, adjusting for altitude). Keep the temperature steady, and don’t remove the lid until five minutes after processing. When you do lift the lid, tilt it away from you to dodge any steam burns.
Lift jars gently onto a towel or rack. Keep them upright—no tilting. This lets them cool and seal. I always wait 12-24 hours before handling to make sure every jar forms a strong vacuum.
Storage Recommendations for Canned Peach Pie Filling
Here’s how I make sure my Canned Peach Pie Filling stays fresh and ready for baking when I need it most:
- Let jars cool completely (12-24 hours).
- Remove the canning rings. This helps spot any failed seals.
- Wash the jars to remove any sticky residue from the canning process.
- Label each jar with the recipe name and date. I like using a permanent marker or a handwritten label.
Properly labeled Peach Pie Filling jars help you rotate your pantry, use the oldest first, and remember exactly what’s inside. This step is quick but goes a long way toward keeping your preserves organized and making every dessert taste homemade.
Store your homemade Peach Pie Filling in a cool, dark spot. When canned right, these jars will safely last for many years, giving you a splash of summer flavor even on the coldest days.
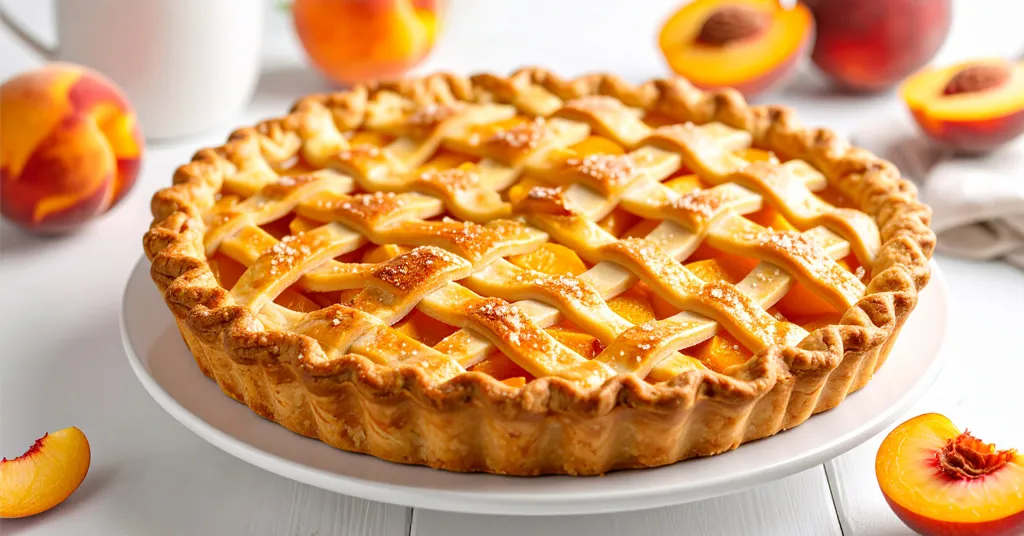
Creative Ways to Use Your Homemade Peach Pie Filling
There’s a real sense of pride when you open a jar of your own Peach Pie Filling Recipe. You get the color, aroma, and sunshine flavor you tucked away at the height of peach season, ready to brighten any day. Peach Pie Filling is so much more than a pie ingredient. Your pantry stash is a shortcut to quick, memorable desserts, comfort food breakfasts, and playful spins on classic treats. If you’ve ever wondered how else to use up your Homemade Peach Pie Filling, you’re in for a treat.
Peaches for Breakfast Lovers
I’m a fan of starting the day with a little sweetness, especially when it’s homemade. Here are a few easy, crowd-pleasing ways to turn Fresh Peach Pie Filling into breakfast gold:
- Waffle and Pancake Topping: Warm some filling and spoon it over pancakes, waffles, or French toast. The juicy fruit and syrupy sauce pair perfectly with a pat of butter.
- Greek Yogurt Swirl: Layer Peach Pie Filling with creamy yogurt and granola. This makes breakfast easy, filling, and full of summer flavor.
- Peach Oatmeal: Stir a few spoonfuls into hot oatmeal. Add a pinch of cinnamon for a warm twist.
Kids and adults get excited when breakfast feels special. A dollop of Homemade Peach Pie Filling brightens up any morning.
Simple But Impressive Desserts
Sometimes you need a last-minute dessert with big flavor. Canned Peach Pie Filling is your secret weapon. Here’s how I use mine for parties or family dinners:
- Crisp or Cobbler: Pour filling into a baking dish, toss on some streusel or biscuit dough, and bake. In under an hour, you have a golden, bubbling treat.
- Parfaits and Trifles: Layer the filling with cake cubes or ladyfingers and whipped cream. Looks fancy, but takes just minutes.
- Ice Cream Sundaes: Warm the filling and drizzle over vanilla ice cream. Sprinkle with chopped nuts or a pinch of nutmeg for extra flair.
With just one jar, dessert is done, and everyone is happy.
Peach Pie Filling for Snacks and Sides
Peach Pie Filling isn’t only for after dinner. These ideas keep snack time interesting:
- Peach Hand Pies: Cut out dough, fill with a spoonful of Peach Pie Filling, seal, and bake. They’re perfect for lunchboxes or picnics.
- Cheese Board Addition: A small bowl of Sweet Peach Pie Filling pairs beautifully with cheese and crackers, especially Brie or goat cheese.
- Spread for Toast or Biscuits: Spoon some over toast, English muffins, or fresh biscuits. Add a little butter for extra richness.
Your Recipe for Peach Pie Filling makes every snack feel a bit more homemade and special.
Peach Pie Filling Recipe makes it easy to bring the taste of summer into your kitchen any time. Using fresh peaches at their peak or trusted frozen fruit, you get juicy, bright flavor in every batch.
If this recipe inspires you, try other peach projects like making peach jelly or canning sliced peaches. Peach Pie Filling for Canning is just one way to keep those sunny flavors around. I’m grateful you joined me in the kitchen, your stories and questions always make the process better. Share your experience with this Peach Pie Filling Recipe and let’s keep the tradition of home food preserving growing, one batch at a time.
Recipe Card

Peach Pie Filling Recipe
Equipment
- Water Bath Canner or Steam Canner
- Steam Canner or Water Bath Canner
Ingredients
- 1 stick Cinnamon Sticks About 3 inches long, broken into pieces
- 2 tsp Whole Cloves
- 12 cups Sliced, Pitted, Peeled Yellow Peaches Treated to prevent browning
- 2 cups finely chopped cored, peeled apples Treated to prevent browning
- 2 2/3 cups Granulated Sugar
- 1 cups Golden Raisins
- 2 tbsp grated lemon zest
- 1/2 cup Bottled Lemon Juice
- 1/4 cup White Vinegar (5% acidity)
- 1/2 tsp Ground Nutmeg
Instructions
- Clean jars and lids with warm soapy water. Ensure the jars do not have any chips or bubbles in the glass.
- Add 1/4 cup lemon juice to 4 cups of water in a large bowl. This will be used to prevent the peaches and apples from browning.
- Peel, Pit, and Slice your Yellow Peaches. Measure as you are slicing and add your peaches to the lemon water to prevent browning. Drain well after putting them in the lemon water.
- Peel, core, and finely chop your apples. Measure as you are chopping and add your chopped apples to the lemon water to prevent browning. Drain well after putting them in the lemon water.
- Tie cinnamon stick pieces and cloves in a square of cheesecloth, creating a spice bag.
- In a large stainless steel pot, combine the sliced peaches, chopped apples, sugar, raisins, lemon zest, lemon juice, vinegar, and nutmeg. Add the spice bag.
- Bring the mixture to a boil over medium-high heat, stirring frequently.
- Reduce the heat, cover, and boil gently, stirring occasionally, until the pie filling has thickened.
- Prepare your cannerUsing Water Bath Canner: Put your water bath canner on your stove. Add your canning rack to the water bath canner. Add your pint jars or quart jars to the water bath canner. They will warm as you heat the water. Add enough water to cover jars with at least 2-3 inches of water. Start to bring your water to a boil.Using a Steam Canner: Put your steam canner on your stove. Add the steam canner rack to the bottom of the steam canner. Add the recommended amount of water to the steam canner according to the manufacturer. Add your pint jars or quart jars to the steam canner. Put the lid on your steam canner and start your stove. The jars will warm as you heat your steam canner.
- Remove the spice bag.
- Once you have hot jars and hot pie fillingWater Bath Canner:Remove your jars from the water bath canner one at a time using your jar lifter. Dump the water out of the jar into your water bath canner to ensure there is still 2-3 inches of water above your jars.Steam Canner:Remove the steam canner lid and remove your jars one at a time using your jar lifter.
- Using the ladle and funnel. Ladle hot pie filling into hot jars, leaving 1 inch headspace. Use your headspace measurer to verify space. Remove any air bubbles with your de-bubbler and adjust the headspace, if necessary, by adding more pie filling.
- Wipe the rim to ensure a good seal is made with the lid. Center the lid on the jar and screw the band down to fingertip tight.
- Place the jar in the canner using your jar lifter. Repeat until all pie filling is used.
- ProcessingWater Bath Canner:Lower the water bath canner rack into the boiling water. Ensure your jars are covered by at least 2 inches of water.If your water is not boiling start your processing time when the water is boiling. Process pint jars for 15 minutes. Make sure to adjust your time for altitude.Set a timer, it makes it much easier to make sure you process for the correct time. When your timer goes off turn off the heat and remove the canner lid.Leave the jars in the water for 5 minutes.Steam Canner:Put the lid on the steam canner. Turn your stove on high until your steam canner water comes to a vigorous boil. Continue heating so the indicator is in the correct "Zone" per your altitude. Start your processing time when the needle reaches the maximum point you have tested your steam canner to reach in your "Zone".Adjust the burner so that it maintains an even rolling boil throughout the entire processing time. Usually, this will be much lower than where it was set for the vigorous boil. If the top lid is lifting and/or spitting water from the edges this is an indication that you have the heat turned up too high. Slowly reduce the heat until this stops. Watch the indicator to ensure the temperature does not decrease.The processing times for steam canning are the same as for water bath canning. Process pint jars for 15 minutes.Make sure to adjust your time for altitude. Set a timer, it makes it much easier to make sure you process for the correct time.When your timer goes off turn off the heat and let the canner stand for 5 minutes with the lid on before removing the jars. The lid MUST remain ON the canner during this time. This cool-down period is necessary to ensure the jar contents are properly processed.Carefully remove the lid by tilting it away from you to avoid steam burns.
- Using your jar lifer carefully move the jars onto a wire rack or kitchen towel to allow them to cool. When moving the jars try not to tilt them to the side as this could affect the seal of the jars. Allow your jars to cool for 12-24 hours before handling.
- Once cool, remove the canning rings from the jars. Wash your jars off to ensure no food residue on the outside of the jar from processing. Label your jar with the name of the recipe and date. This will help you remember what recipe you used to can and the date will allow you to use the oldest canned goods first.