

")
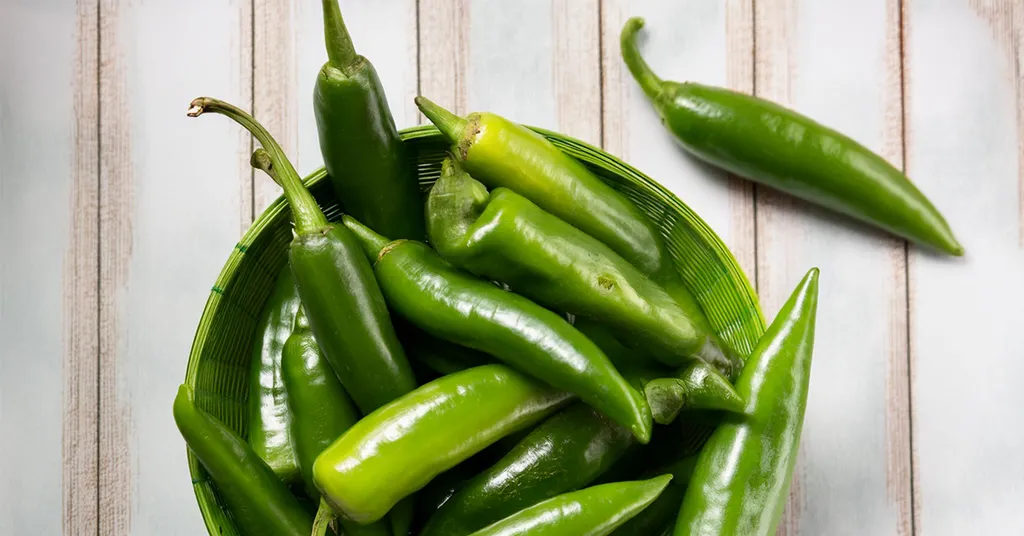
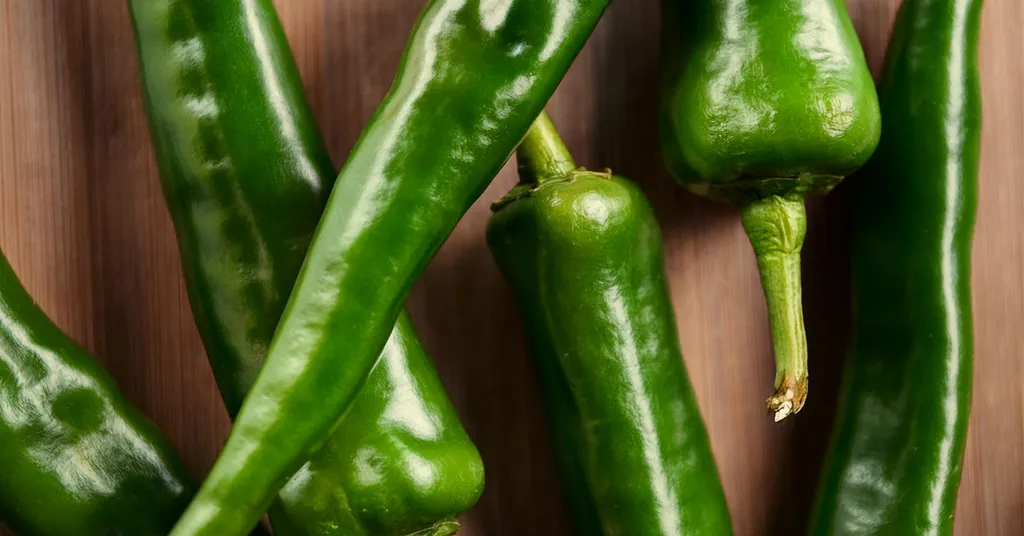
Hatch chile season is one of the most anticipated times of the year for pepper enthusiasts. Grown in the Hatch Valley of New Mexico, these unique peppers are celebrated for their distinct flavor, ranging from mild to fiery hot. If you’ve ever had the pleasure of tasting a fresh Hatch chile, you know that it’s something special. But the season is fleeting, which is why preserving these peppers through pickling is such a fantastic idea. Not only does pickling enhance their robust flavor, but it also extends their shelf life so you can enjoy them long after the fresh chiles have disappeared from the market.
What Makes Hatch Chile Peppers So Special?
Hatch chiles are unlike any other peppers you’ll find. They come from a unique area in the Hatch Valley, where the soil, temperature, and sunlight create an ideal environment for cultivating peppers that are both flavorful and aromatic. Hatch chiles vary in heat level, from mild to extra hot, and they have a slightly smoky, earthy flavor that sets them apart from other varieties. Their versatile flavor profile makes them perfect for roasting, grilling, and, of course, pickling!

Why Pickle Hatch Chile Peppers?
Pickling Hatch chiles brings out a tangy, slightly sweet flavor that complements their natural smokiness. The acidity of the pickling brine also adds a bright contrast to the chiles’ deep flavor, creating a balanced, layered taste experience. Beyond flavor, pickling peppers has several benefits:
- Preservation: Pickling allows you to preserve the peppers for months, so you can enjoy them long after the harvest season is over.
- Health Benefits: Hatch chiles are rich in vitamins A and C, capsaicin, and antioxidants, all of which remain largely intact during the pickling process.
- Convenience: Pickled peppers are incredibly versatile; they can be used as a topping, a condiment, or even a main ingredient in countless dishes.
Canning Pickled Hatch Pepper Recipe
This recipe comes from the Ball Canning Back to Basics Book called “Hot Peppers”. It will make about 5-pint jars of pickled hatch chile peppers.
Ingredients
Here are the ingredients needed for this recipe:
- 3 lbs Hatch Chile Peppers
- 1 Quart plus 2 cups White Vinegar (5% acidity)
- 2 cups water
- 3 cloves of Garlic (crushed)
- 1/8 tsp Ball Pickle Crisp Granules per jar
Equipment Needed for Canning Pickled Hatch Peppers
Here is the equipment I used for making this canning recipe:
- Gloves
- Knife
- Cutting Board
- Large Bowl
- Large Stainless Steel Pot
- Liquid Measuring Cups
- Measuring Spoons
- Pint Sized Canning Jars
- Lids
- Rings/Bands
- Water Bath Canner or Steam Canner
- Jar Lifter
- De-bubbler
- Headspace Measurer
- Funnel
- 1/2 pint Canning Ladle


Step-By-Step Canning Instructions
Prepare Jars and Canner
Clean jars and lids with warm soapy water. Ensure the jars do not have any chips or bubbles in the glass.
Using Water Bath Canner:
Put your water bath canner on your stove. Add your canning rack to the water bath canner. Add your pint jars to the water bath canner. They will warm as you heat the water. Add enough water to cover jars with at least 2-3 inches of water. Start to bring your water to a boil.
Using a Steam Canner:
Put your steam canner on your stove. Add the steam canner rack to the bottom of the steam canner. Add the recommended amount of water to the steam canner according to the manufacturer. Add your pint jars to the steam canner. Put the lid on your steam canner and start your stove. The jars will warm as you heat your steam canner.
Prepare Ingredients
Wash the Hatch Chile peppers under running water and drain.
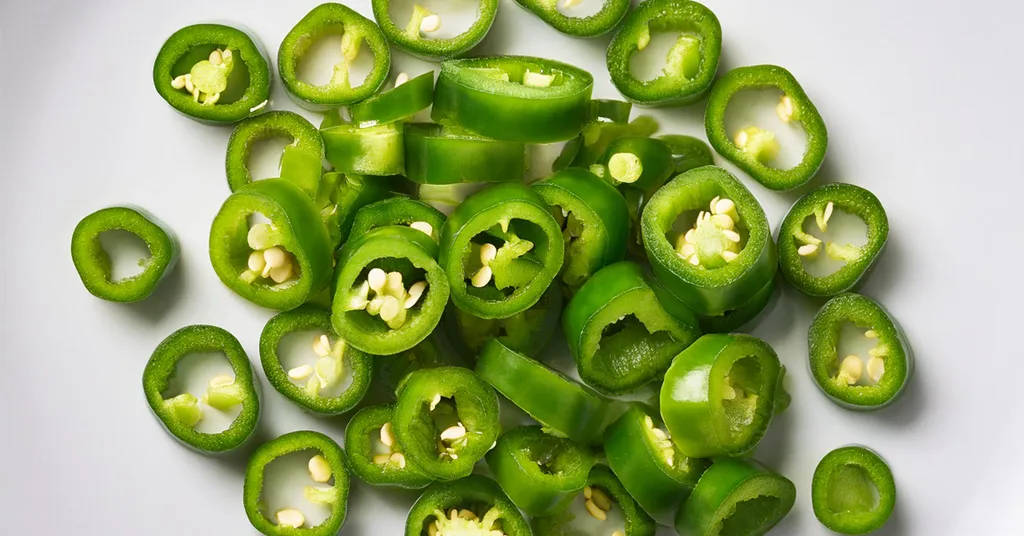
While wearing gloves (to protect your hands from the pepper oils) remove the stems and blossom ends from the peppers. Slice your Hatch Chile Peppers into 1-inch rings. Set aside in a bowl.
Peel and crush garlic cloves.
Prepare Brine
Combine the vinegar, water, and garlic in a large Stainless Steel Pot. Bring the mixture to a boil over high heat.
Reduce heat to a simmer and simmer for 5 minutes. Remove and discard the garlic.
Fill Jars
Once you have hot jars and hot brine.
Water Bath Canner:
Remove your jars from the water bath canner one at a time using your jar lifter. Dump the water out of the jar into your water bath canner to ensure there is still 2-3 inches of water above your jars.
Steam Canner:
Remove the steam canner lid and remove your jars one at a time using your jar lifter.
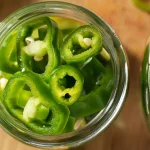
Pack the peppers into a hot jar, leaving 1/2 inch (1 cm) headspace. (Check with headspace measurer). Ladle the hot brine over the peppers, leaving 1/2 inch (1 cm) headspace. Add 1/8 tsp Ball Pickle Crisp Granules to jar, if desired. Remove air bubbles with a de-bubbler and adjust the headspace by adding more hot brine if necessary.
Wipe the rim to ensure a good seal is made with the lid. Center the lid on the jar and screw the band down to fingertip tight.
Place the jar in the canner using your jar lifter. Repeat until all the jars are filled.
Processing Jars
Water Bath Canner:
Lower the water bath canner rack into the boiling water. Ensure your jars are covered by at least 2 inches of water.
If your water is not boiling start your processing time when the water is boiling. Process pint jars for 10 minutes. Make sure to adjust your time for altitude.
Set a timer, it makes it much easier to make sure you process for the correct time. When your timer goes off turn off the heat and remove the canner lid.
Leave the jars in the water for 5 minutes.
Steam Canner:
Put the lid on the steam canner. Turn your stove on high until your steam canner water comes to a vigorous boil. Continue heating so the indicator is in the correct “Zone” per your altitude.
Start your processing time when the needle reaches the maximum point you have tested your steam canner to reach in your “Zone”.
Adjust the burner so that it maintains an even rolling boil throughout the entire processing time. Usually, this will be much lower than where it was set for the vigorous boil. If the top lid is lifting and/or spitting water from the edges this is an indication that you have the heat turned up too high. Slowly reduce the heat until this stops. Watch the indicator to ensure the temperature does not decrease.
The processing times for steam canning are the same as for water bath canning. Process pint jars for 10 minutes.
Make sure to adjust your time for altitude. Set a timer, it makes it much easier to make sure you process for the correct time.
When your timer goes off turn off the heat and let the canner stand for 5 minutes with the lid on before removing the jars. The lid MUST remain ON the canner during this time. This cool-down period is necessary to ensure the jar contents are properly processed.
Carefully remove the lid by tilting it away from you to avoid steam burns.
Cool and Store
Using your jar lifer carefully move the jars onto a wire rack or kitchen towel to allow them to cool. When moving the jars try not to tilt them to the side as this could affect the seal of the jars. Allow your jars to cool for 12-24 hours before handling.
Once cool, remove the canning rings from the jars. Wash your jars off to ensure no food residue on the outside of the jar from processing. Label your jar with the name of the recipe and date. This will help you remember what recipe you used to can and the date will allow you to use the oldest canned goods first.


Creative Ways to Enjoy Pickled Hatch Peppers
Once you’ve successfully pickled your Hatch chiles, the fun begins! Here are a few creative ideas for using them:
- Tacos and Burritos: Add a tangy, spicy twist to your favorite taco or burrito fillings.
- Sandwiches and Burgers: A few slices of pickled Hatch chiles can elevate a simple sandwich or burger to a gourmet level.
- Salads: Chop them up and toss them into salads for a burst of flavor and heat.
- Cheese and Charcuterie Boards: Serve them alongside cheeses, cured meats, and other pickled vegetables for a delicious contrast of flavors.
- Cocktails: Add a pickled pepper to a Bloody Mary or garnish a margarita for a spicy kick!
Pickling Hatch chile peppers is an excellent way to capture their seasonal flavor and enjoy it throughout the year. The process is simple and opens up a world of culinary possibilities. Don’t forget to share your experiences and unique uses for pickled Hatch chile peppers in the comments below.
Other Pickled Pepper Recipes
Recipe Card

Pickled Hatch Chile Peppers (Canning Recipe)
Equipment
- Water Bath Canner or Steam Canner
- Steam Canner or Water Bath Canner
Ingredients
- 3 lbs Hatch Chile Peppers sliced into 1 inch rings
- 1 Quart White Vinegar (5% acidity) Plus additional vinegar below
- 2 cups White Vinegar (5% acidity) Plus additional vinegar above
- 2 cups water
- 3 cloves Garlic crushed
- Ball Pickle Crisp Granules Optional
Instructions
- Clean jars and lids with warm soapy water. Ensure the jars do not have any chips or bubbles in the glass.
- Prepare your cannerUsing Water Bath Canner: Put your water bath canner on your stove. Add your canning rack to the water bath canner. Add your pint jars to the water bath canner. They will warm as you heat the water. Add enough water to cover jars with at least 2-3 inches of water. Start to bring your water to a boil.Using a Steam Canner: Put your steam canner on your stove. Add the steam canner rack to the bottom of the steam canner. Add the recommended amount of water to the steam canner according to the manufacturer. Add your pint jars to the steam canner. Put the lid on your steam canner and start your stove. The jars will warm as you heat your steam canner.
- Wash the Hatch Chile peppers under running water and drain.
- While wearing gloves (to protect your hands from the pepper oils) remove the stems and blossom ends from the peppers. Slice your Hatch Chile Peppers into 1-inch rings. Set aside in a bowl.
- Peel and crush garlic cloves.
- Combine the vinegar, water, and garlic in a large Stainless Steel Pot. Bring the mixture to a boil over high heat.
- Reduce heat to a simmer and simmer for 5 minutes. Remove and discard the garlic.
- Once you have hot jars and hot brine.Water Bath Canner:Remove your jars from the water bath canner one at a time using your jar lifter. Dump the water out of the jar into your water bath canner to ensure there is still 2-3 inches of water above your jars.Steam Canner:Remove the steam canner lid and remove your jars one at a time using your jar lifter.
- Pack the peppers into a hot jar, leaving 1/2 inch (1 cm) headspace. (Check with headspace measurer). Ladle the hot brine over the peppers, leaving 1/2 inch (1 cm) headspace. Add 1/8 tsp Ball Pickle Crisp Granules to jar, if desired. Remove air bubbles with a de-bubbler and adjust the headspace by adding more hot brine if necessary.
- Wipe the rim to ensure a good seal is made with the lid. Center the lid on the jar and screw the band down to fingertip tight.
- Place the jar in the canner using your jar lifter. Repeat until all the jars are filled.
- Water Bath Canner:Lower the water bath canner rack into the boiling water. Ensure your jars are covered by at least 2 inches of water.If your water is not boiling start your processing time when the water is boiling. Process pint jars for 10 minutes. Make sure to adjust your time for altitude.Set a timer, it makes it much easier to make sure you process for the correct time. When your timer goes off turn off the heat and remove the canner lid.Leave the jars in the water for 5 minutes.Steam Canner:Put the lid on the steam canner. Turn your stove on high until your steam canner water comes to a vigorous boil. Continue heating so the indicator is in the correct "Zone" per your altitude. Start your processing time when the needle reaches the maximum point you have tested your steam canner to reach in your "Zone".Adjust the burner so that it maintains an even rolling boil throughout the entire processing time. Usually, this will be much lower than where it was set for the vigorous boil. If the top lid is lifting and/or spitting water from the edges this is an indication that you have the heat turned up too high. Slowly reduce the heat until this stops. Watch the indicator to ensure the temperature does not decrease.The processing times for steam canning are the same as for water bath canning. Process pint jars for 10 minutes.Make sure to adjust your time for altitude. Set a timer, it makes it much easier to make sure you process for the correct time.When your timer goes off turn off the heat and let the canner stand for 5 minutes with the lid on before removing the jars. The lid MUST remain ON the canner during this time. This cool-down period is necessary to ensure the jar contents are properly processed.Carefully remove the lid by tilting it away from you to avoid steam burns.
- Using your jar lifer carefully move the jars onto a wire rack or kitchen towel to allow them to cool. When moving the jars try not to tilt them to the side as this could affect the seal of the jars. Allow your jars to cool for 12-24 hours before handling.
- Once cool, remove the canning rings from the jars. Wash your jars off to ensure no food residue on the outside of the jar from processing. Label your jar with the name of the recipe and date. This will help you remember what recipe you used to can and the date will allow you to use the oldest canned goods first.