


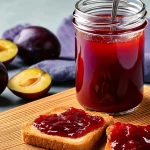
There’s something truly special about making your plum jam at home. This plum jam recipe with pectin brings out the bright, tangy sweetness of ripe plums and simplifies the canning process, making it approachable for anyone. By using pectin, the jam thickens beautifully every time, giving you consistent results you’ll love. From the Ball Canning Back to Basics book, this recipe yields about 4 1/2 pint jars—perfect for your pantry or gifting.
Essential Ingredients for a Perfect Plum Jam
Making homemade plum jam is all about using the best ingredients and understanding how each one contributes to the final product. From choosing the perfect plums to understanding the role of pectin, here’s everything you need to know to create a jam with outstanding flavor and texture.
Choosing the Right Plums
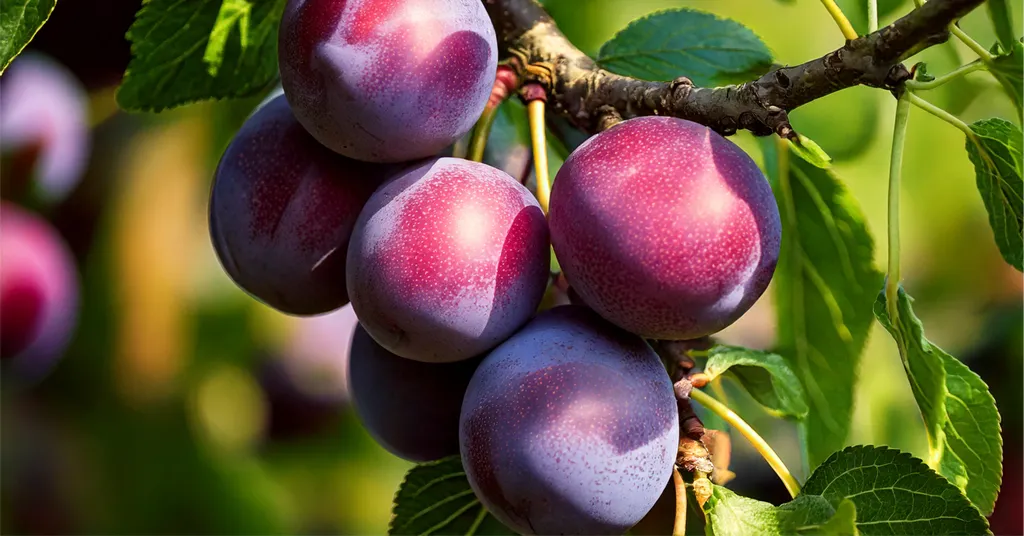
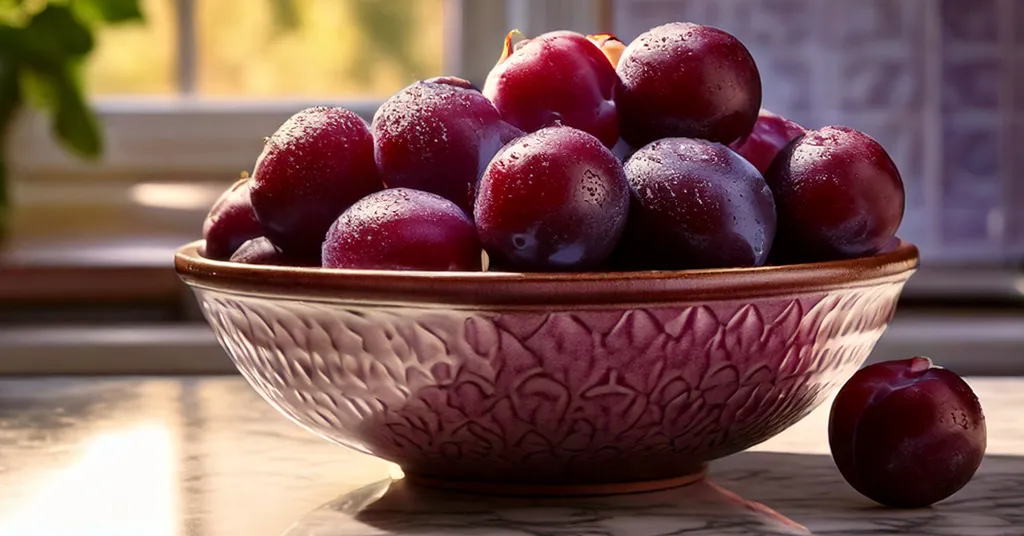
The key to delicious plum jam starts with selecting the best plums. Choose plums that are ripe but not overly soft—those that have a slight give when you press them gently. If you go for deep purple Italian plums or bright red Santa Rosa plums, make sure they’re free from blemishes or bruises. The flavor of your jam will depend heavily on the quality of the fruit, so it’s worth selecting top-notch plums.
Here’s a quick tip: If you prefer a slightly tart jam, look for varieties like Damsons, known for their tangy kick. For a sweeter jam, opt for varieties like Black Amber or Japanese plums. You can even mix varieties for a blend of flavors. Always give your plums a taste before starting jam-making to get an idea of their natural sweetness.

Do I Need to Peel Plums for Jam?
You might be surprised to hear that peeling plums isn’t necessary for most jam recipes. The plum skins not only contribute to the jam’s vibrant color but also bring out an extra layer of flavor. What makes plum skins even better is their natural pectin content, which helps the jam set beautifully.
If you’re concerned about texture, remember that the skins soften as they cook. They blend seamlessly into the jam, especially if you chop the plums finely or use a masher during cooking. Skipping the peeling step saves you time and ensures your jam benefits from all the flavor and color plums have to offer.
How Do You Get the Pits Out of Plums for Jam?
Pitting plums might sound tedious, but a simple technique can make it quicker. Use a small paring knife to slice each plum in half along the seam, twist the halves apart, and pop out the pit. If your plums are clingstone varieties, where the pit clings to the fruit, slice around the pit and pull it out piece by piece. It takes a little patience, but the smooth, pitless jam texture is worth the effort.
Understanding Pectin’s Role in Plum Jam Recipes
Pectin is the secret to achieving that perfect, spreadable jam consistency. When combined with sugar, pectin creates a gel-like texture, turning cooked fruit into jam. In this recipe, Ball Classic Pectin is used because of its reliability and ease of use. It ensures consistent results, even for first-time canners. If you don’t have Ball Classic Pectin, any commercial pectin will work as long as you use the correct quantity.
Using pectin also shortens the cooking time, preserving the fresh, bright flavor of the plums. If you’re curious to see how pectin works in other jams, you might enjoy exploring recipes like the Easy Strawberry Jelly Recipe for Canning with Pectin to experiment with different fruits and techniques.
Adding pectin might feel like an extra step, but it’s what transforms your juicy plums into a luscious jar of jam you’ll want to savor on toast, biscuits, or even straight from the spoon.


Step-by-Step Guide to Making Plum Jam with Pectin
Making homemade plum jam might sound like a big task, but it’s simpler than you think. I will guide you through the process of turning fresh, ripe plums into a flavorful jam, step by step. Let’s look at the details, so you can confidently tackle this recipe and enjoy jars of delicious plum jam in no time.
Preparing Your Ingredients
You will need the following ingredients for your plum jam recipe for canning:
- 2 2/3 cups finely chopped pitted plums
- 3 Tablespoons of Ball Classic Pectin
- 3 1/3 cups Sugar
The key to any great jam is starting with fresh, ripe fruit and preparing everything properly. Trust me, this step ensures smooth sailing once you start cooking.
- Wash Your Plums Thoroughly: Start by rinsing the plums under cool water to remove any dirt or debris. Pat them dry with a clean towel or kitchen cloth.
- Pit and Chop the Plums: No need to peel the plums! Their skins add a beautiful color and subtle texture to the jam. Using a small knife, slice each plum in half along the seam, gently twist, and remove the pit. If the pit clings, just slice around it. Chop the plums finely until you have 2 2/3 cups measured.
- Measure Out Sugar and Pectin: Precision is key when working with pectin. Be sure to measure both accurately based on the recipe guidelines. It’s always better to have these ingredients pre-portioned and within reach before you start cooking.
Taking time to prep each element guarantees you won’t feel rushed or miss steps mid-process.
Cooking the Jam
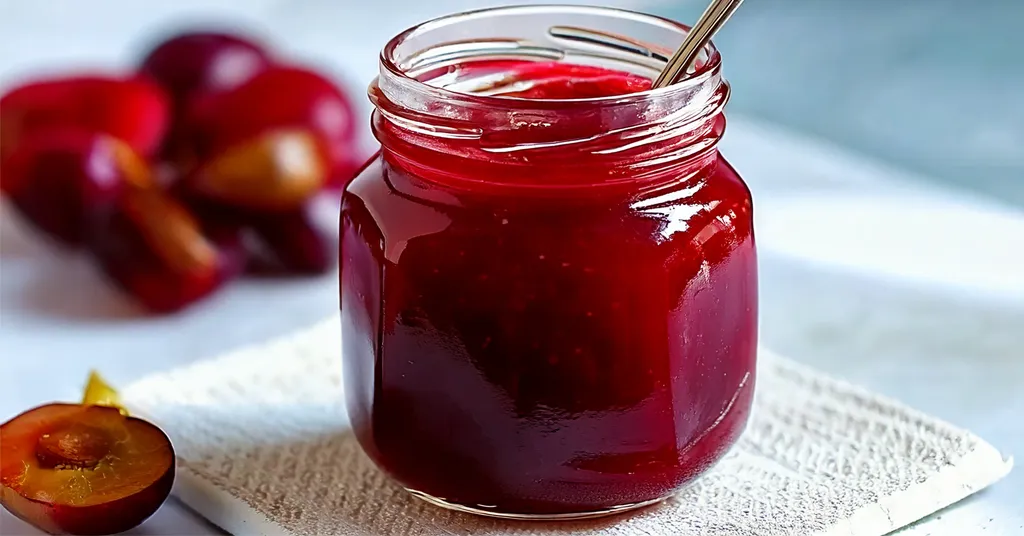
The cooking process transforms simple ingredients into a rich, spreadable delight with a consistency perfect for toast, biscuits, or even pastries.
- Combine Plums and Pectin: Use a large stainless steel pot or enameled Dutch oven to prevent the mixture from sticking. Add the chopped plums and pectin to the pot, stirring until combined.
- Bring to a Rolling Boil: Turn the heat to high and stir constantly as the mixture comes to a full rolling boil—a vigorous boil that doesn’t stop bubbling even when stirred. This step ensures the pectin activates properly.
- Incorporate the Sugar: Slowly add the sugar while continuing to stir. Once added, bring the mixture back to a full rolling boil. Boil hard for 1 minute, stirring the entire time to prevent scorching.
- Skim the Foam: After boiling, remove the pot from the heat and use a spoon to skim off any foam that rises to the surface. While harmless, removing the foam ensures a smooth texture and a cleaner finish in your jars.
Canning and Preserving the Jam
Once your jam is cooked, it’s time to preserve it so that you can enjoy it throughout the year. This step ensures your hard work doesn’t go to waste and allows you to safely store the jam for months.
- Prepare Jars and Canner:
- You can use a Water Bath Canner or a Steam Canner for this recipe.
- Wash jars, lids, and rings with warm soapy water, checking for chips or cracks.
- Water Bath Canner: Prepare your water bath canner by adding a canning rack and enough water to fully cover your jars by 2-3 inches. Bring the water to a boil while you’re cooking the jam.
- Steam Canner: Put your steam canner on your stove. Add the steam canner rack to the bottom of the steam canner. Add the recommended amount of water to the steam canner according to the manufacturer. Add your 1/2 pint jars to the steam canner. Put the lid on your steam canner and start your stove. The jars will warm as you heat your steam canner.
- You can use a Water Bath Canner or a Steam Canner for this recipe.
- Fill Your Jars:
- Once you have hot jars and hot plum jam.
- Remove jars from the canner using a jar lifter. Carefully ladle the hot jam into the hot jars, leaving 1/4 inch headspace. (A headspace measurer makes this easy!)
- Remove air bubbles with a de-bubbler or similar tool, then adjust the headspace as needed.
- Seal the Jars:
- Wipe jar rims clean with a damp cloth, ensuring a tight seal. Place the lid in the center and screw the band until it’s fingertip tight.
- Process the Jars:
- Water Bath Canner: Submerge the jars in the boiling water of the canner, ensuring they’re covered by at least 2 inches. Process the 1/2 pint jars for 10 minutes, adjusting the time for altitude if needed.
- Steam Canner: Put the lid on the steam canner. Turn your stove on high until your steam canner water comes to a vigorous boil. Continue heating so the indicator is in the correct “Zone” per your altitude. Start your processing time when the needle reaches the maximum point you have tested your steam canner to reach in your “Zone”. Adjust the burner so that it maintains an even rolling boil throughout the entire processing time. Usually, this will be much lower than where it was set for the vigorous boil. If the top lid is lifting and/or spitting water from the edges, this is an indication that you have the heat turned up too high. Slowly reduce the heat until this stops. Watch the indicator to ensure the temperature does not decrease. The processing times for steam canning are the same as for water bath canning. Process 1/2 pint jars for 10 minutes. Make sure to adjust your time for altitude. Set a timer, it makes it much easier to make sure you process for the correct time. When your timer goes off turn off the heat and let the canner stand for 5 minutes with the lid on before removing the jars. The lid MUST remain ON the canner during this time. This cool-down period is necessary to ensure the jar contents are properly processed. Carefully remove the lid by tilting it away from you to avoid steam burns.
- Cool and Store:
- Set them upright on a towel or cooling rack and wait for the lids to “ping,” indicating a successful seal.
For more details on water bath canning, check out my guide on How Water Bath Canning Keeps Your Food Safe. It’s an excellent resource for beginners and seasoned preservers alike.


Storage Tips for Homemade Plum Jam
Making your plum jam at home is a fulfilling experience, but proper storage ensures all your hard work pays off. When stored correctly, your homemade jam stays safe and delicious for months, allowing you to enjoy a little taste of summer even in the dead of winter.
- Location Matters: Store your jars in a cool, dark place, away from direct sunlight or heat sources, like the back of a pantry or a basement shelf.
- Temperature Range: Aim for a consistent temperature between 50-70°F. Extremes in temperature (like near stoves or windows) can compromise the seal over time.
- Watch for Signs: Always inspect jars before opening. If the lid’s seal is broken or the jar contains mold or off-odors, discard immediately. Safety first!
For open jar storage, transfer it to the fridge and plan on using it within 3-4 weeks. Treat your canned jam like gold, and it’ll keep its beautiful texture and rich, fruity flavor for months to come.
Tips for Beginner Canners
Are you new to canning? Starting with this easy plum jam recipe is a wonderful choice because it’s simple and doesn’t require complex techniques. Here’s how to make the process smooth and stress-free:
- Use Tested Recipes: Reliable recipes from trusted sources, like Ball Canning, help ensure safety. Using unvalidated recipes runs the risk of improper sealing, spoilage, or even sickness.
- Gather the Right Tools: Essentials like a water bath canner, jar lifter, and funnel make the process efficient and reduce avoidable mistakes.
- Practice Proper Jar Prep: Clean jars and heat them before filling to prevent cracking. Always use new lids to ensure a proper seal.
- Headspace Matters: Leave the correct amount of headspace when filling jars, usually about 1/4 inch for jams. This prevents overflow while ensuring a proper seal.
Need more guidance? Check out Safe and Tested Canning Resources for a wealth of beginner-friendly information, including recipes and how-to guides.
Preserving food at home connects us to a simpler, more intentional way of living. If you’re new to canning, this plum jam recipe is the perfect place to start. For tools and tips to ensure success with water bath canning, explore Essential Tools for Water Bath Canning for more guidance.
I’d love to hear about your experience with this recipe. Share your results or ask questions in the comments. Happy canning!
Additional Jam and Jelly Recipes
Recipe Card

Plum Jam Recipe
Equipment
- Large stainless steel pot or Enameled Dutch Oven
- Enameled Dutch Oven or Large stainless steel pot
- Water Bath Canner or Steam Canner
- Steam Canner or Water Bath Canner
Ingredients
- 2 2/3 Cups finely chopped pitted Plums
- 3 Tbsp Ball Classic Pectin
- 3 1/2 Cups Granulated Sugar
Instructions
- Clean jars and lids with warm soapy water. Ensure the jars do not have any chips or bubbles in the glass.
- Start by rinsing the plums under cool water to remove dirt or debris. Pat them dry with a clean towel or kitchen cloth.
- Pit and finely chop the plums to measure 2 2/3 cups. No need to peel the plums.
- Prepare your cannerUsing Water Bath Canner: Put your water bath canner on your stove. Add your canning rack to the water bath canner. Add your 1/2 pint jars to the water bath canner. They will warm as you heat the water. Add enough water to cover jars with at least 2-3 inches of water. Start to bring your water to a boil.Using a Steam Canner: Put your steam canner on your stove. Add the steam canner rack to the bottom of the steam canner. Add the recommended amount of water to the steam canner according to the manufacturer. Add your 1/2 pint jars to the steam canner. Put the lid on your steam canner and start your stove. The jars will warm as you heat your steam canner.
- Combine plums and pectin in a large, deep stainless steel pot or enameled Dutch oven.
- Over high heat, bring the mixture to a full rolling boil that cannot be stirred down. Stirring constantly.
- Add the sugar, stirring to dissolve. Return to a full rolling boil. Boil hard for 1 minute, stirring constantly.
- Remove from the heat and skim off the foam from the top of the jam.
- Once you have hot jars and hot jam.Water Bath Canner:Remove your jars from the water bath canner one at a time using your jar lifter. Dump the water out of the jar into your water bath canner to ensure there is still 2-3 inches of water above your jars.Steam Canner:Remove the steam canner lid and remove your jars one at a time using your jar lifter.
- Ladle hot jam into hot jars, leaving 1/4 inch (.5 cm) headspace (Check with headspace measurer). Remove air bubbles with a de-bubbler and adjust the headspace by adding more hot jam if necessary.
- Wipe the rim to ensure a good seal is made with the lid. Center the lid on the jar and screw the band down to fingertip tight.
- Water Bath Canner:Lower the water bath canner rack into the boiling water. Ensure your jars are covered by at least 2 inches of water.If your water is not boiling start your processing time when the water is boiling. Process 1/2 pint jars for 10 minutes. Make sure to adjust your time for altitude.Set a timer, it makes it much easier to make sure you process for the correct time. When your timer goes off turn off the heat and remove the canner lid.Leave the jars in the water for 5 minutes.Steam Canner:Put the lid on the steam canner. Turn your stove on high until your steam canner water comes to a vigorous boil. Continue heating so the indicator is in the correct "Zone" per your altitude. Start your processing time when the needle reaches the maximum point you have tested your steam canner to reach in your "Zone".Adjust the burner so that it maintains an even rolling boil throughout the entire processing time. Usually, this will be much lower than where it was set for the vigorous boil. If the top lid is lifting and/or spitting water from the edges this is an indication that you have the heat turned up too high. Slowly reduce the heat until this stops. Watch the indicator to ensure the temperature does not decrease.The processing times for steam canning are the same as for water bath canning. Process 1/2 pint jars for 10 minutes.Make sure to adjust your time for altitude. Set a timer, it makes it much easier to make sure you process for the correct time.When your timer goes off turn off the heat and let the canner stand for 5 minutes with the lid on before removing the jars. The lid MUST remain ON the canner during this time. This cool-down period is necessary to ensure the jar contents are properly processed.Carefully remove the lid by tilting it away from you to avoid steam burns.
- Using your jar lifer carefully move the jars onto a wire rack or kitchen towel to allow them to cool. When moving the jars try not to tilt them to the side as this could affect the seal of the jars. Allow your jars to cool for 12-24 hours before handling.
- Once cool, remove the canning rings from the jars. Wash your jars off to ensure no food residue on the outside of the jar from processing. Label your jar with the name of the recipe and date. This will help you remember what recipe you used to can and the date will allow you to use the oldest canned goods first.