


Welcome to the world of preserving herbs! As a beginner in the art of preservation, you’re about to embark on a journey that will not only enhance your culinary adventures but also provide you with a bounty of flavors and aromas all year round. We’ll delve into the wonderful world of preserving herbs grown in your very own garden or purchased at a farmers market, so you can savor the freshness of these aromatic wonders even during the colder months.
Preserving herbs is not only a way to extend their lifespan but also a means to capture their essence and unlock their full potential. Whether you’re a home cook, an herbal enthusiast, or simply someone who appreciates the power of nature’s flavors, the benefits of preserving herbs are undeniable.
Capturing the Essence of Herbs
One of the primary reasons for preserving herbs is the ability to enjoy their flavors long after the growing season has come to an end. Preserved herbs are like culinary treasures waiting to be rediscovered whenever you desire. They offer a burst of freshness, complexity, and a touch of nature’s magic to your recipes. Whether you’re adding dried oregano to a hearty tomato sauce, sprinkling frozen basil over a homemade pizza, or drizzling herb-infused oil over a crisp salad, the preserved herbs are there to elevate your culinary creations to new heights.
Utilizing the Peak Harvest: Preventing Waste, Maximizing Flavor
Preserving herbs allows you to take advantage of the abundance of your garden during the peak harvest season. It’s an excellent way to prevent waste and fully utilize the bountiful harvest that you’ve worked so hard to cultivate. By preserving your herbs, you can savor their flavors throughout the year and reduce dependency on store-bought herbs that may lack the freshness and intensity you desire.
So, whether you’re a novice or an experienced gardener, embracing the art of preserving herbs is a skill worth acquiring. We will explore various methods of preservation, from drying and freezing to infusing herbs in oils and vinegars. Get ready to embark on a flavorful journey that will allow you to unlock the true potential of your garden and savor the tastes of nature’s bounty in every season.
Get your preserving tools ready and let’s preserve herbs grown in your garden, where flavors and memories intertwine!

Selecting, Harvesting, and Preserving Herbs
Harvesting and preserving herbs is a delightful process that requires a bit of knowledge and attention to detail. To ensure the best quality and flavor in your preserved herbs, it’s important to consider the ideal time to harvest, select the healthiest herbs, and employ proper harvesting techniques.
Ideal Time to Harvest Herbs for Preservation
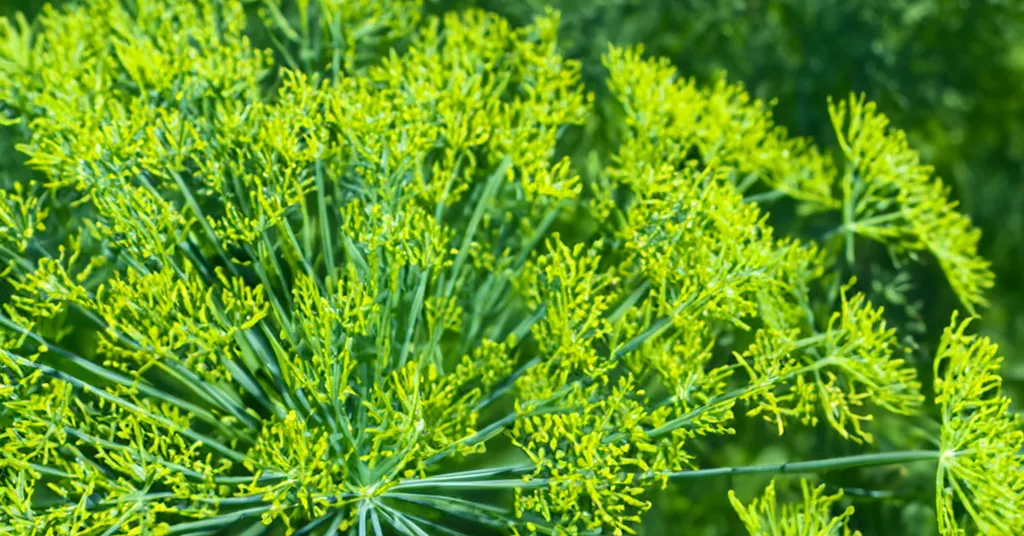
Timing plays a crucial role in harvesting herbs for preservation. For optimal flavor and potency, it’s generally recommended to harvest herbs just before they flower. At this stage, the herb’s essential oils, which carry its distinct flavors and aromas, are at their peak concentration. Harvesting before flowering helps capture these oils, ensuring the fullest flavor in your preserved herbs.
Choosing the Healthiest Herbs for Preservation
When it comes to preserving herbs, selecting the healthiest specimens is key. Look for herbs that are vibrant, free from diseases or pests, and have lush foliage. Healthy herbs not only have better flavor profiles but also retain their quality during the preservation process.
Inspect the leaves for any signs of discoloration, wilting, or damage. Choose herbs with fresh, crisp leaves that are free from spots or blemishes. Avoid herbs that have begun to yellow or show signs of decay.
Tips on Harvesting Herbs to Maximize Flavor and Quality
- Timing: As mentioned earlier, harvesting herbs just before they flower is ideal. This is typically in the morning when the essential oils are at their highest concentration. Avoid harvesting in the heat of the day when the sun can cause the oils to evaporate.
- Tools: Use sharp, clean garden shears or scissors to harvest herbs. Blunt tools can bruise the leaves, leading to a loss of flavor and quality. Clean your tools before use to prevent the spread of diseases.
- Selective Harvesting: Only harvest the amount of herbs you need at the time, leaving the remaining plant to continue growing. This ensures a steady supply of fresh herbs throughout the growing season.
- Harvesting Technique: When harvesting leafy herbs such as basil, mint, or parsley, opt for the “pinching” or “pruning” method. Pinch or cut off the top leaves just above a set of healthy leaves or leaf nodes. This encourages the plant to grow bushier and promotes continuous leaf production.
- Remove Flower Buds: If you notice any flower buds forming on your herbs, it’s advisable to remove them. The energy the plant puts into flower production can reduce the overall flavor and quality of the leaves. Pinch off the buds to redirect the plant’s energy back into leaf growth.
Cleaning and Preparing Herbs
Cleaning and preparing herbs before preservation is a crucial step to ensure the longevity, safety, and quality of your preserved herbs. Proper cleaning not only removes dirt and pests but also helps maintain the flavor and integrity of the herbs. Let’s explore the importance of cleaning, the proper method for cleaning and removing contaminants, and the different options for preparing herbs for preservation.
Importance of Cleaning Herbs Before Preservation
Cleaning herbs is essential to remove any dirt, dust, residues, or potential contaminants that might have accumulated during the growing process. Cleaning also helps eliminate pests or eggs that could be present on the herbs, ensuring that your preserved herbs remain safe for consumption.
Proper Method to Clean and Remove Dirt or Pests from Herbs
- Gently Shake: Start by gently shaking the herbs to remove any loose dirt or debris.
- Rinse with Water: Rinse the herbs under cool running water. Use a gentle stream or a spray attachment to ensure that the water flows evenly over the leaves.
- Leaf-by-Leaf Inspection: Inspect the leaves individually, looking for any remaining dirt, pests, or damaged parts. If you notice any damaged or discolored leaves, remove them.
- Soaking (Optional): For particularly dirty or sandy herbs, you can opt for a brief soaking. Fill a clean bowl or basin with water and immerse the herbs. Gently swish them around to dislodge any stubborn dirt particles. Then, lift the herbs out of the water, leaving any sediment behind.
- Pat Dry: After rinsing or soaking, gently pat the herbs dry with a clean kitchen towel or paper towel. Be careful not to bruise or crush the leaves during this process.
Drying Herbs
Drying is one of the oldest and most common methods of preserving herbs. It involves removing the moisture from the herbs, which helps inhibit bacterial growth and preserves their flavors. There are various drying techniques, such as air drying, oven drying, or using a dehydrator, each with its advantages and considerations.
Benefits of Drying Herbs
Drying herbs offers numerous benefits that make it a popular choice among herb enthusiasts. Let’s explore the advantages of drying herbs.
- Flavor Concentration: Drying herbs intensify their flavors by removing water content. As the moisture evaporates, the essential oils responsible for the herbs’ distinctive tastes and aromas become more concentrated. This concentration enhances the overall flavor profile of the herbs, allowing you to enjoy their robust and potent characteristics.
- Extended Shelf Life: Dried herbs have a significantly longer shelf life compared to fresh herbs. Properly dried and stored herbs can retain their quality for several months to a year, depending on the herb. This extended shelf life enables you to have a readily available supply of herbs throughout the year, even when they are out of season.
- Easy Storage and Accessibility: Dried herbs are compact and lightweight, making them easy to store and organize. They occupy much less space compared to fresh herbs and can be conveniently kept in airtight containers or spice jars. Their reduced volume allows you to have a wide variety of herbs at your disposal without taking up excessive pantry or freezer space.
- Versatility in Culinary Applications: Dried herbs offer versatility in cooking and culinary applications. They can be easily crumbled or ground to create herb blends, seasonings, or rubs. Dried herbs are perfect for long cooking processes such as simmering in soups, stews, or sauces, as their flavors have time to infuse and meld with the other ingredients.
- Convenient for Recipes: Dried herbs can be added directly to recipes without the need for extra preparation. Unlike fresh herbs, which require washing, chopping, or stripping leaves from stems, dried herbs are ready to use with a simple sprinkle or pinch. This convenience makes them an excellent choice for quick and spontaneous cooking.
- Herb Preservation in Limited Spaces: Drying herbs is particularly advantageous for those with limited gardening space or access to fresh herbs year-round. Whether you have a small balcony garden, live in a colder climate, or simply lack the time for continuous herb cultivation, drying herbs allows you to preserve their flavors and enjoy them whenever you desire.
- Cost-Effective Solution: Drying herbs from your garden or purchasing dried herbs in bulk can be a cost-effective alternative to purchasing fresh herbs regularly. Dried herbs often have a longer shelf life, allowing you to stretch your herb supply and save money in the long run.
By drying herbs, you can capture the essence of your garden’s harvest, extend their usability, and enhance your culinary creations. Embrace the art of herb drying, and unlock a world of flavors that will infuse your dishes with the richness and depth only dried herbs can provide.
Methods of Drying Herbs
Air Drying
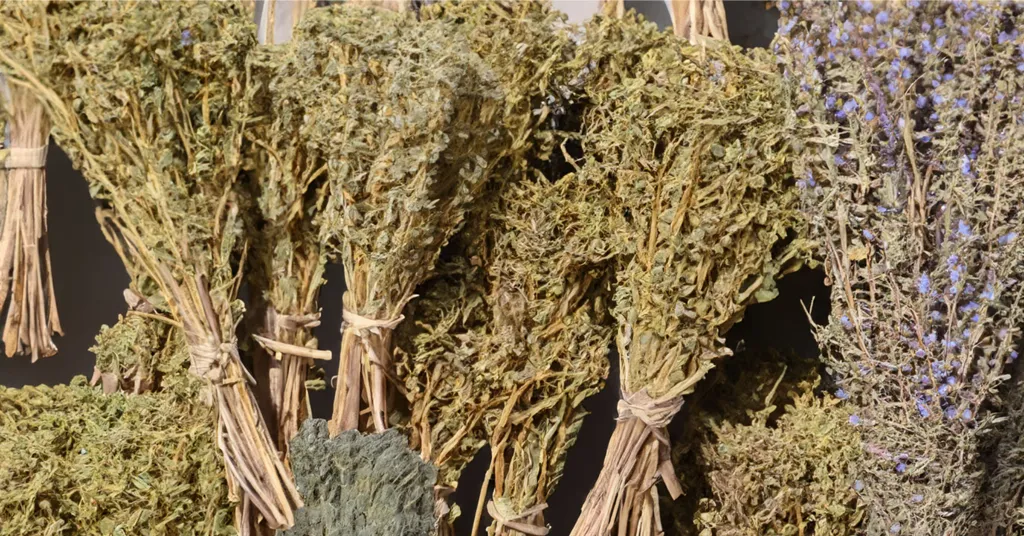
Air drying is a simple and cost-effective method of drying herbs that requires minimal equipment. It involves hanging or spreading herbs in a well-ventilated area to allow moisture to evaporate naturally over time.
Step-by-step instructions for air-drying herbs
- Harvest the herbs in the morning after the dew has dried but before the heat of the day.
- Gently shake off any excess dirt or debris from the herbs or clean using the instructions above.
- Bundle a small number of herb stems together, about 5-10 stems per bundle.
- Tie the stems together at the base using twine or a rubber band.
- Hang the herb bundles upside down in a warm, well-ventilated area away from direct sunlight.
- Ensure there is enough space between bundles for air circulation to prevent mold or mildew.
- Allow the herbs to air dry for about 1-2 weeks until they become crispy and brittle.
- Once fully dry, remove the leaves from the stems, discarding any tough or woody parts.
- Store the dried leaves in airtight containers, away from direct light and heat, to maintain their flavor and potency.
Oven Drying
Oven drying is a quicker method that uses low heat to remove moisture from herbs. It is a suitable option for those who want to expedite the drying process while still maintaining the herb’s flavor and quality.
Step-by-step instructions for oven drying herbs
- Preheat your oven to the lowest temperature setting, typically between 100-150°F (40-65°C).
- Prepare the herbs by gently rinsing and patting them dry using the instructions above.
- Place the herb leaves on a baking sheet lined with parchment paper, ensuring they are spread out evenly without overlapping.
- Place the baking sheet in the preheated oven and prop the oven door slightly open to allow moisture to escape.
- Check the herbs regularly, as oven drying can be relatively quick. Stir or turn the herbs occasionally to ensure even drying.
- Depending on the herb and oven temperature, the drying process can take anywhere from 1 to 4 hours.
- Remove the herbs from the oven when they are dry, and crispy, and crumble easily.
- Let the herbs cool completely, and then store them in airtight containers away from light and heat.


Get My Free Dehydrating Guide
Preserve the flavors of your favorite fruits and vegetables with my FREE comprehensive and beginner-friendly Dehydrating Guide.
Dehydrating Herbs
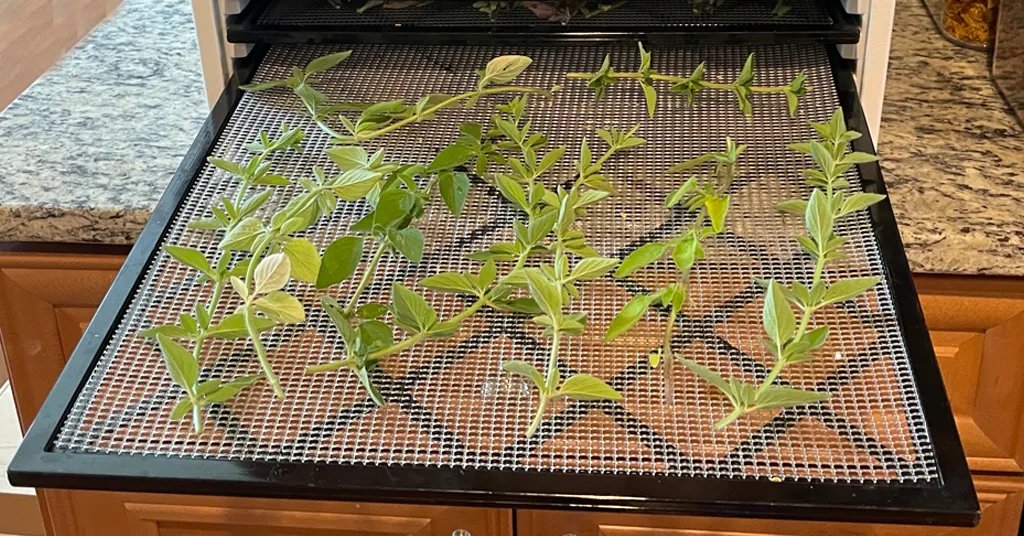
Using a food dehydrator is a reliable and efficient way to dry herbs. Dehydrators provide controlled temperature and airflow, ensuring consistent drying results.
- Harvest the herbs and gently clean them, removing any excess dirt or debris.
- Arrange the herb leaves in a single layer on the dehydrator trays, ensuring they don’t overlap.
- Set the dehydrator to the appropriate temperature for drying herbs (usually between 95-115°F or 35-45°C).
- Allow the herbs to dehydrate for the recommended time according to your dehydrator’s instructions, usually ranging from 1 to 4 hours.
- Check the herbs periodically for dryness. They should be brittle and crumble easily when fully dried.
- Once dried, remove the herbs from the trays and let them cool completely.
- Store the dried herbs in airtight containers, away from light and heat, to preserve their flavor and quality.
Remember, the drying times may vary depending on the herb type, humidity levels, and drying method. It’s important to monitor the herbs closely during the drying process and adjust the drying times accordingly to achieve the desired results.
Freezing Herbs
Freezing is another popular method that helps retain the freshness and flavors of herbs. Freezing herbs at their peak ensures that their flavors and nutrients are locked in. Blanching the herbs before freezing helps preserve their color and texture. Once blanched, you can freeze the herbs as whole leaves, chopped, or in ice cube trays with water or oil.
Advantages of Freezing Herbs
Freezing herbs is an excellent preservation method that offers several advantages for maintaining the flavors, aromas, and nutritional value of fresh herbs. Here are some key benefits of freezing herbs:
- Retains Freshness: Freezing herbs allows you to capture their freshness at the peak of flavor. By freezing herbs shortly after harvesting, you preserve their vibrant colors, delicate textures, and aromatic qualities, providing you with a taste of the garden even during off-seasons.
- Convenience and Accessibility: Frozen herbs provide convenience and accessibility in the kitchen. You can easily grab a handful of frozen herbs and incorporate them directly into your recipes without the need for additional prep work. This saves time and effort compared to drying or other preservation methods.
- Versatility in Culinary Applications: Frozen herbs can be used in a wide range of culinary applications. Whether you’re adding them to soups, stews, stir-fries, sauces, marinades, or other cooked dishes, the frozen herbs infuse the flavors and aromas into your recipes, delivering a burst of freshness and enhancing the overall taste.
- Minimizes Flavor Loss: Freezing herbs helps to minimize flavor loss compared to drying. The freezing process preserves the natural essential oils and volatile compounds responsible for the herbs’ distinctive flavors and aromas, ensuring a more vibrant and robust taste in your dishes.
Best Herbs for Freezing
While most herbs can be frozen successfully, some herbs are better suited for freezing due to their characteristics and resilience. Here are some herbs that freeze well:
- Basil
- Parsley
- Chives
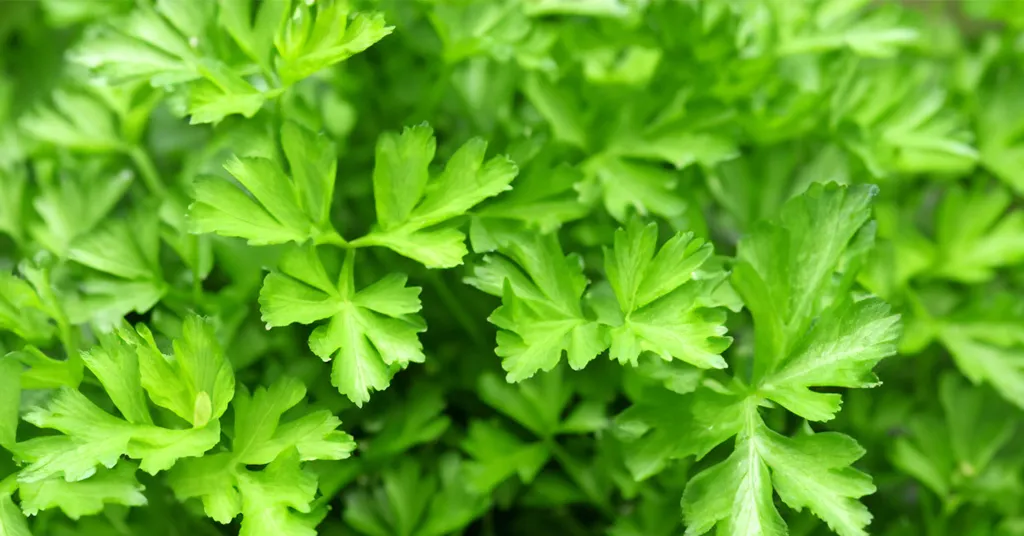
- Dill
- Cilantro/Coriander
- Mint
- Oregano
- Rosemary
- Thyme
Herbs with high water content, delicate leaves, or a high moisture content may not freeze as well.
Blanching Herbs Before Freezing
Blanching is a crucial step before freezing herbs as it helps to preserve their color, texture, and flavor. Here’s how to blanch herbs:
- Bring a pot of water to a boil.
- Prepare a bowl of ice water and set it aside.
- Drop a small batch of herbs into the boiling water and blanch them for a brief period—around 15 to 30 seconds.
- Quickly remove the herbs from the boiling water and transfer them to the bowl of ice water to stop the cooking process.
- Let the herbs cool in the ice water for a couple of minutes until they are completely chilled.
- Drain the herbs and gently pat them dry with paper towels to remove excess moisture.
- At this point, you can choose to leave the herbs as whole leaves or chop them into desired sizes.
- Add them to ice cube trays and add water or oil to cover the serving of herbs.
Tips for Packaging and Labeling Frozen Herbs
Proper packaging and labeling of frozen herbs are essential for organization and easy use. Follow these tips:
- Portion Control: Package the herbs in portion sizes that you typically use in recipes. This prevents thawing and refreezing large quantities repeatedly.
- Airtight Containers or Freezer Bags: Use airtight containers or freezer bags specifically designed for freezing to prevent freezer burn and maintain the quality of the herbs.
- Labeling: Clearly label each container or bag with the herb type and the date of freezing. This ensures easy identification and allows you to keep track of their freshness.
- Stackable and Flat: If using bags, remove as much air as possible and lay them flat to maximize freezer space. For containers, consider stackable options that fit well in your freezer.
By following these freezing guidelines and tips, you can preserve the essence of fresh herbs, extend their usability, and elevate your culinary creations with the flavors and aromas of the garden all year round.
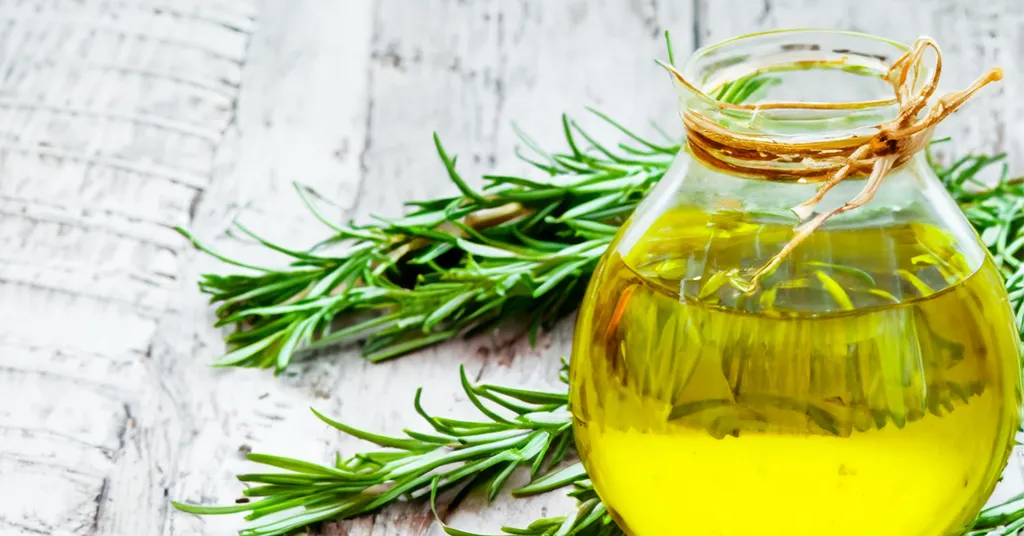
Preserving Herbs in Oil or Vinegar
Preserving herbs in oil or vinegar is a delightful way to capture the essence of herbs and infuse them into versatile culinary ingredients. By immersing fresh herbs in oils or vinegar, you can create flavorful concoctions that add depth and complexity to your dishes.
Benefits and Flavor Profiles of Herb-Infused Oils and Vinegars
Herb-infused oils and vinegars offer a multitude of benefits and bring unique flavor profiles to your culinary creations. Here are some advantages:
- Enhanced Flavor: Infusing herbs in oil or vinegar allows the flavors and aromas of the herbs to meld with the base liquid, resulting in a harmonious infusion of taste. The herbs infuse the oil or vinegar with their essence, creating a rich and nuanced flavor profile that can elevate a wide range of dishes.
- Versatility: Herb-infused oils and vinegar are incredibly versatile. They can be used in salad dressings, marinades, sauces, drizzled over roasted vegetables, or even as a finishing touch to enhance the flavor of a dish. The possibilities are endless, and you can get creative with how you incorporate these infused liquids into your culinary repertoire.
- Visual Appeal: Herb-infused oils and vinegar also add a touch of visual appeal to your dishes. The vibrant colors of the herbs infuse into the liquids, creating beautifully tinted oils or vinegar that can enhance the aesthetic appeal of your recipes.
How to Make Herb-Infused Oils and Vinegars
Making herb-infused oils and vinegar is a relatively simple process. Here’s a general guide to get you started:
- Choose Your Herbs: Select fresh, high-quality herbs from your garden or farmers’ market. Wash and thoroughly dry them to remove any moisture.
- Prepare the Oil or Vinegar: Choose a neutral oil such as olive, grapeseed, or vegetable oil for herb-infused oils. For vinegar infusions, opt for a good quality white wine vinegar, apple cider vinegar, or balsamic vinegar.
- Bruise or Slightly Crush the Herbs: Gently bruise or crush the herbs using a mortar and pestle or by rolling them between your hands. This helps release their essential oils and intensify the flavor.
- Combine Herbs and Liquid: Place the herbs in a clean, sterilized jar or bottle. Fill the container with the oil or vinegar, ensuring that the herbs are fully submerged.
- Infusion Time: Seal the container tightly and let the herbs infuse into the oil or vinegar. The infusion time can vary depending on your preference but typically ranges from a few days to a couple of weeks. Taste the infusion periodically to determine when it has reached your desired flavor intensity.
- Strain and Store: Once the infusion has reached the desired flavor, strain out the herbs using a fine-mesh strainer or cheesecloth. Transfer the infused oil or vinegar into clean, sterilized bottles or jars, and store them in a cool, dark place to maintain their flavor and quality.
Storage and Usage Tips for Preserving Herbs in Oil or Vinegar
To ensure the longevity and optimal usage of your herb-infused oils and vinegars, consider the following tips:
- Proper Storage: Store the infused oils and vinegar in a cool, dark place away from direct sunlight and heat. This helps preserve their flavors and prevents spoilage.
- Labeling: Clearly label each bottle or jar with the type of herb and the date of infusion. This ensures you can keep track of the flavors and freshness over time.
- Shelf Life: Herb-infused oils and vinegar can generally be stored for several months. However, it’s important to note that they are homemade and may not have the same extended shelf life as commercially produced versions. It’s recommended to use them within 3 to 6 months for optimal flavor and quality.
- Usage: When using herb-infused oils, consider incorporating them in recipes that require little to no additional heating. This helps preserve the delicate flavors of the herbs. Herb-infused vinegar can be used in dressings, marinades, or drizzled-over dishes as desired.
By preserving herbs in oil or vinegar, you can create custom flavorings that add a unique touch to your culinary creations. Experiment with different herb combinations and infusions to discover your favorite flavor profiles and elevate your dishes with the essence of herbs preserved in these delightful liquids.
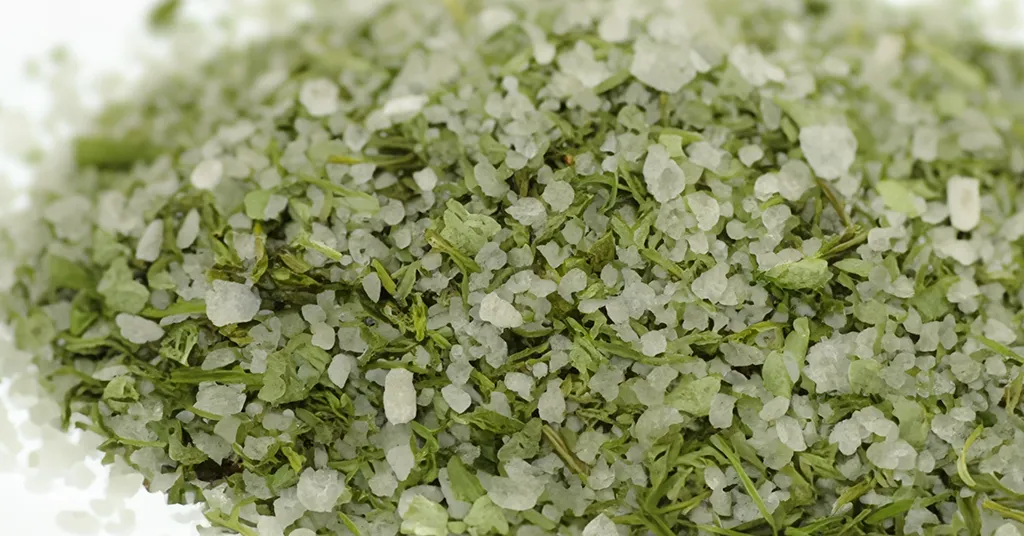
Other Preservation Methods: Herb Salts and Herb Butters
In addition to drying, freezing, and preserving herbs in oil or vinegar, there are a couple of other popular preservation methods worth exploring: herb salts and herb butter. These methods offer unique ways to extend the shelf life of your herbs while adding flavor to your culinary creations.
Herb Salts
Herb salts involve combining fresh herbs with salt to create a flavorful seasoning blend. Here’s a brief description of this method and its benefits:
- Method: Chop or finely mince fresh herbs and mix them with salt. The herbs infuse their flavors into the salt, resulting in a concentrated and aromatic seasoning.
- Benefits: Herb salts not only preserve the flavors of the herbs but also enhance the taste of your dishes. They provide a convenient way to incorporate herbs and salt into recipes with a simple sprinkle, and they can be used as a versatile seasoning in various savory dishes.
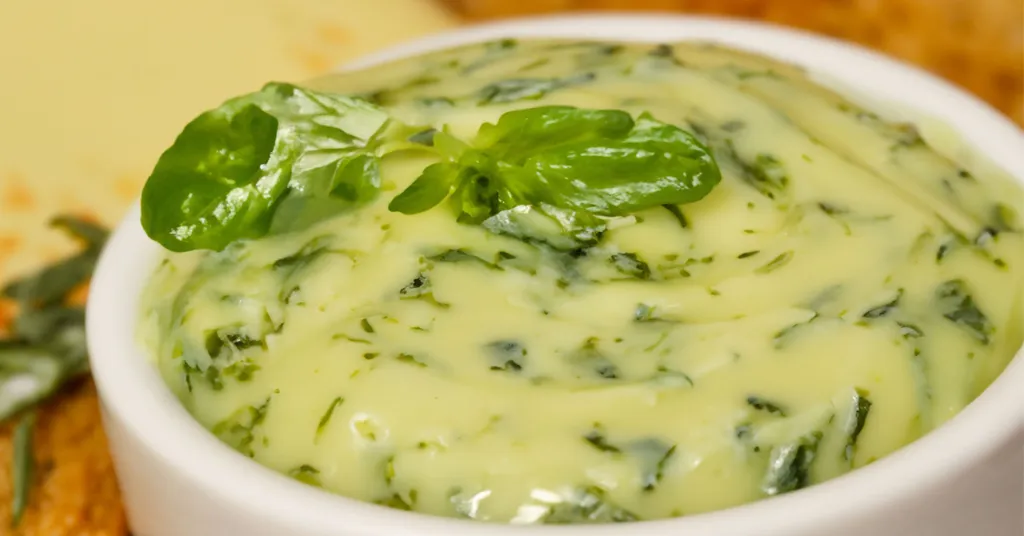
Herb Butters
Herb butter involves combining fresh herbs with softened butter, resulting in a flavorful compound butter that can be used as a spread or added to dishes. Here’s a brief description of this method and its benefits:
- Method: Finely chop or blend fresh herbs and mix them into softened butter. The herbs infuse their flavors into the butter, creating a delicious and herb-infused spread.
- Benefits: Herb butter is a great way to preserve the flavors of herbs while adding richness and depth to dishes. They can enhance the taste of bread, rolls, and other baked goods, or melted over grilled meats and vegetables for a burst of flavor. Herb butter can also be frozen in individual portions for long-term storage.
I love to make garlic scape compound butter when my garlic scapes are ready to be harvested. Spread it on some toasted bread for a quick and easy garlic bread.
Additional Tips and Considerations for Herb Salts and Butters
- When making herb salts or herb butter, ensure that your herbs are thoroughly dry to prevent moisture from causing spoilage.
- Use high-quality, unsalted butter for herb butter to have better control over the salt content and to allow the flavors of the herbs to shine.
- Experiment with different herb combinations to create unique flavor profiles that suit your taste preferences.
- Store herb salts in airtight containers and keep them in a cool, dry place. They can be stored for several months.
- Herb butter can be stored in the refrigerator for about a week or frozen for up to several months. Consider portioning them into smaller quantities for easier use.
By exploring these additional preservation methods of herb salts and herb butter, you can further enjoy the flavors of your garden herbs and add a creative touch to your culinary endeavors.
Preserving Herbs
We have explored the wonderful world of preserving herbs grown in your garden or purchased from a farmer’s market. We discussed the importance of preserving herbs for long-term use, allowing you to enjoy their flavors and aromas even during the colder months. We learned about different preservation methods such as drying, freezing, and preserving in oil or vinegar, as well as other methods like herb salts and herb butter. Each method offers unique benefits and flavor profiles, giving you a wide range of options to preserve and savor the essence of your garden herbs.
As you embark on your herb preservation journey, I encourage you to embrace your creativity and experiment with different preservation methods. Each technique offers its own unique advantages and can enhance the flavors of your culinary creations in different ways. Don’t be afraid to try drying, freezing, infusing in oil or vinegar, making herb salts, or crafting herb butter. Explore the possibilities and discover the preservation methods that resonate with your taste preferences and cooking style.
Remember, herb preservation is a journey of exploration and experimentation. Enjoy the process of preserving, and let the flavors and aromas of your garden herbs infuse your culinary creations all year round.
Preserving herbs allows you to savor the freshness and goodness of your garden, even when nature’s cycle takes a different turn. So, go ahead, start preserving, and let the vibrant tastes and fragrances of your garden continue to inspire your culinary adventures. Happy preserving!