


Do you find yourself craving the sweet taste of summer corn long after the season has ended? Say goodbye to store-bought canned corn and hello to the satisfaction of pressure canning corn. I am going to guide you through the steps of pressure canning, ensuring that you can enjoy the taste of summer all year round.
Selecting Quality Corn
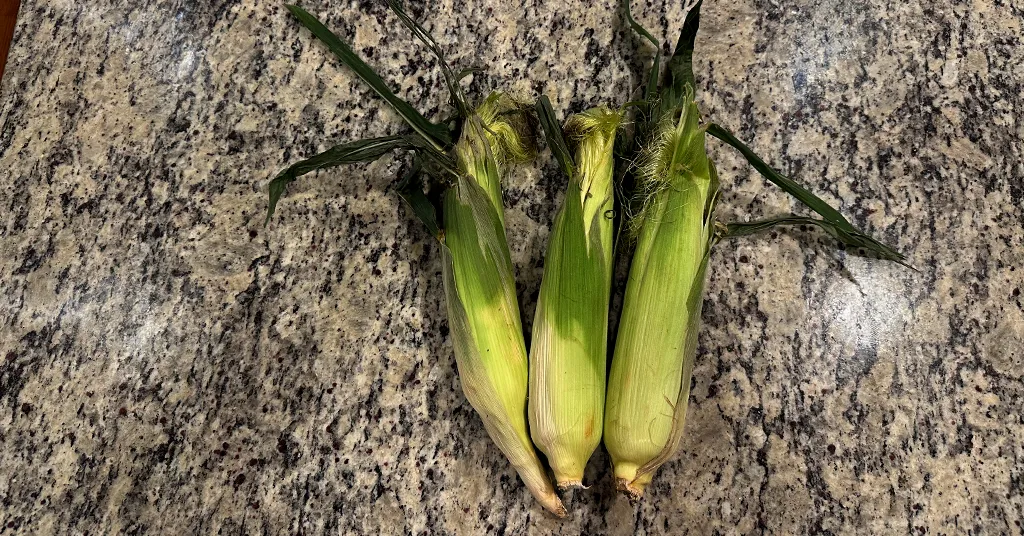
When it comes to pressure canning whole kernel corn, the first step to ensuring top-notch results is selecting quality corn. The success of your preserved corn largely depends on the freshness and ripeness of the corn you choose.
Look for ears of corn that are firm, plump, and free of blemishes or mold. Ideally, you want to use corn that has been harvested at the peak of its ripeness to lock in the best flavor and texture.
To enhance the flavor of your preserved corn, consider selecting sweet corn varieties such as Silver Queen or Peaches and Cream. These varieties are known for their natural sweetness and tenderness, making your pressure-canned corn even more delicious. If possible, opt for organic or locally grown corn to support sustainability and reduce exposure to harmful chemicals.

Ingredients
This recipe calls for three simple ingredients.
- Eating-quality Corn (You will need about 8 medium ears of corn for each quart jar you want to make)
- Salt (Optional)
- Hot Water
Recommended Equipment
To begin the pressure canning process, it is important to have the right tools on hand. You will need a pressure canner, as well as canning jars, lids, and rings. Make sure your equipment is in good condition and free of any damage to ensure a safe and successful canning experience. Below is a full list of equipment I use when making pressure-canned corn.
- Knife
- Cutting Board
- Bundt Pan (Optional but it makes cutting the corn off the cob easier)
- Pressure Canner
- Pint or Quart Size Canning Jars
- Rings
- Lids
- Jar Lifter
- De-bubbler/Headspace Measurer
- 1/2 Pint Canning Ladle
- Funnel
- Electric Water Kettle (Or Large pot of boiling water)
Preparing Your Corn
When it comes to preparing your corn for pressure canning, the key is to start with fresh, high-quality corn. Look for corn that is in season and at its peak freshness to ensure the best results. You will need about 8 medium ears of corn for every quart Jar (1 L) you would like to make.
Begin by shucking the corn and removing any silk. Wash your ears of corn.
Then using your knife and cutting board, carefully cut the kernels off the cob, do not cut kernels from the tip ends of the corn.
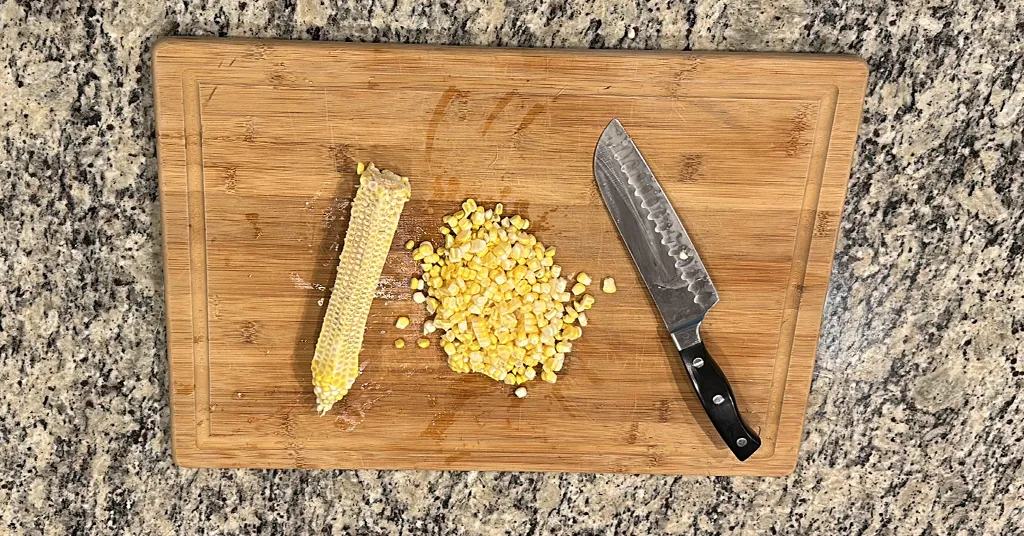
I made this process easier by using a bundt pan when cutting the corn kernels. Place the corn tip in the center hole of the bundt pan when cutting. This holds the corn more securely and collects most corn kernels as you cut them off the cob. This reduces wasted corn and the mess of cleaning up. Once you have prepared your corn, you can move on to the next step of getting your jars ready for the canning process.

Preparing Your Pressure Canner and Jars
Prepare your Pressure Canner according to Manufacturer instructions.
Wash your jars, lids, and rings in hot, soapy water and rinse thoroughly before use. Inspect each jar for cracks or chips, as these can prevent a proper seal during canning. Next, heat your jars in a large pot of water. Keep the jars hot until ready to use to prevent breakage when filled with hot corn.
Raw-Pack Instructions for Pressure Canning Corn
Bring water to a boil in a large pot on your stove. Reduce to a simmer, keeping your liquid hot. I use an electric water kettle to keep boiling water ready for canning.
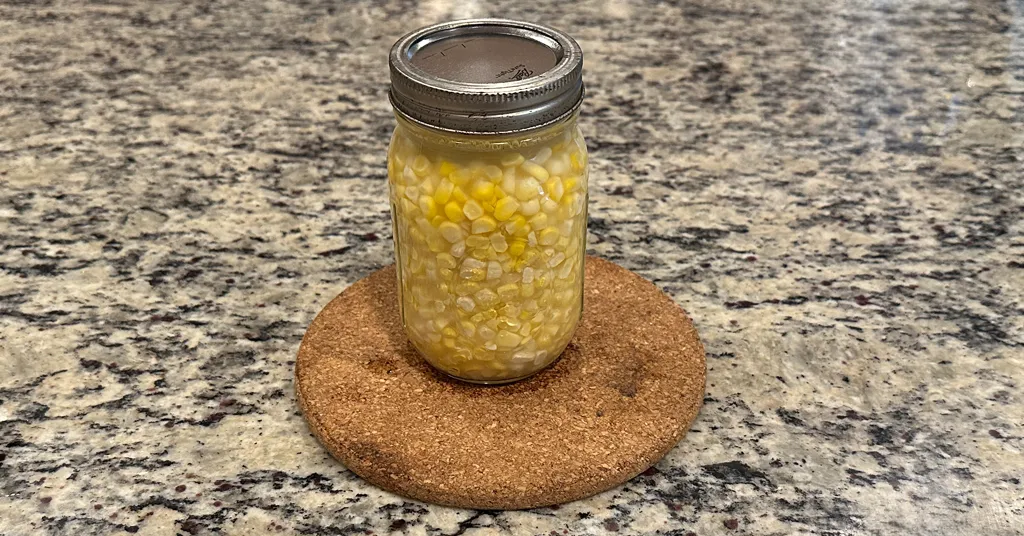
Loosely pack raw corn kernels into hot jars leaving 1-inch (2.5 cm) headspace.
Optional: Add 1/2 tsp of salt per pint jar or 1 tsp of salt per quart jar.
Ladle or pour boiling water into the jar to cover the corn kernels, leaving 1-inch (2.5 cm) of headspace.
Remove air bubbles from the jars using your de-bubbler. Adjust headspace as needed by adding more boiling liquid.
Clean your jar rim with a damp paper towel.
Place the lid and the band on your jar. Adjust to fingertip tight.
Using your jar lifter place your jars into your prepared hot pressure canner.
Hot-Pack Instructions for Pressure Canning Corn
Measure the corn kernels. For every 4 cups (1 L) of corn kernels, add 1 cup (250 mL) of water to a large stock pot. Combine the corn and water in the pot.
Bring to a boil over medium-high heat. Reduce heat and boil gently for 5 minutes, until heated through.
Ladle hot corn and cooking liquid into hot jars leaving a 1-inch (2.5 cm) headspace.
Optional: Add 1/2 tsp of salt per pint jar or 1 tsp of salt per quart jar.
Remove air bubbles from the jars using your de-bubbler. Adjust headspace as needed by adding more boiling liquid.
Clean your jar rim with a damp paper towel.
Place the lid and the band on your jar. Adjust to fingertip tight.
Using your jar lifter place your jars into your prepared hot pressure canner.


Processing Instructions
Adjust the water level if needed in the canner, lock the pressure canner lid, and bring it to a boil over medium-high heat. Vent steam for 10 minutes, then close the vent. Continue heating your pressure canner to achieve 10 lbs (69 kPa) of pressure (Make sure to adjust for your altitude) and maintain that pressure for the entire cooking time.
Process Pint Jars (500 mL) for 55 minutes and Quart Jars (1 L) for 85 minutes. Set a timer so it is much easier to remember how long you need to pressure can them for.
Turn off the heat when the timer is complete. Let pressure return to zero naturally. Wait 2 minutes after the pressure gauge reads 0, then open your vent. Remove your canner lid (making sure to lift it away from you so you don’t get burned by the steam).
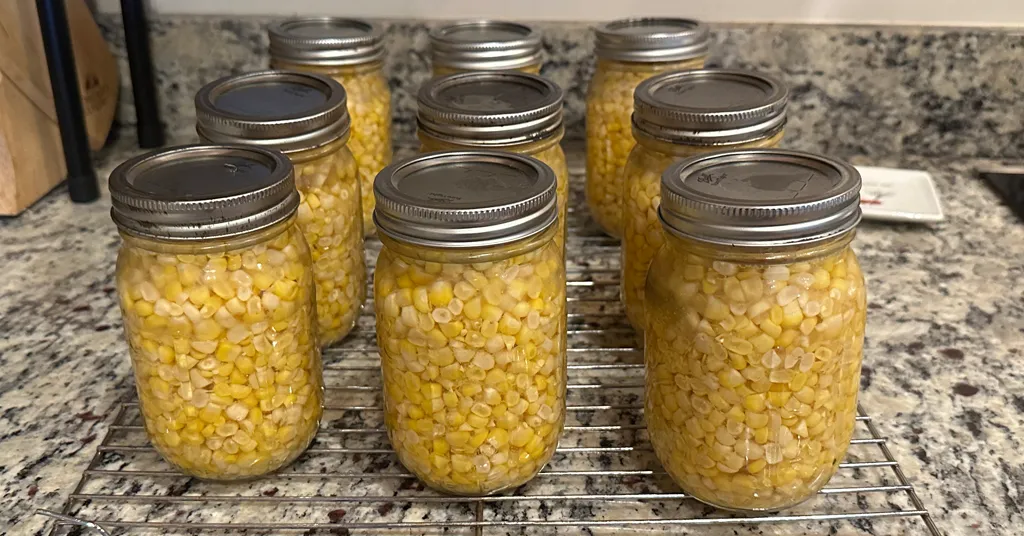
Leave jars in the pressure canner for 10 minutes after you remove the lid. Using your jar lifer carefully move the jars onto a wire rack or kitchen towel to allow them to cool. When moving the jars try not to tilt them to the side as this could affect the seal of the jars. Allow your jars to cool for 12-24 hours before handling.
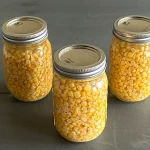
Once cool, remove the canning rings from the jars. Wash your jars off to ensure no food residue on the outside of the jar from processing. Label your jar with the name of the recipe and date. This will help you remember what recipe you used to can and the date will allow you to use the oldest canned goods first.
Storing and Enjoying
After you have completed the pressure canning process for your whole kernel corn, it’s important to store the jars properly to maintain their quality. Find a cool, dark place to store your canned corn, such as a pantry or cupboard, away from direct sunlight and extreme temperatures. Make sure to label each jar with the date it was canned so you can keep track of freshness.
When it comes time to enjoy your preserved whole-kernel corn, there are countless ways to incorporate it into your meals. Whether you add it to soups, salads, and casseroles, or simply enjoy it on its own as a side dish, your home-canned corn is sure to elevate any dish with its fresh flavor.
Pressure Canning Recipes
Here are some additional pressure canning recipes for you to try.
Recipe Card

Pressure Canning Corn
Equipment
- Bundt Pan Optional but made cutting the corn off the cob easier
- Pint Size Canning Jars or Quart Size Canning Jars
- Quart size canning jars or Pint Size Canning Jars
- Water kettle or pot of boiling water
Ingredients
- 8 ears Eating-quality Corn You will need about 8 medium ears of corn for each quart jar you want to make
- Salt Optional
- Hot Water
Instructions
- Choose eating-quality corn with slightly immature kernels. You will need about 8 medium ears of corn for every Quart Jar (1 L) you would like to make.
- Husk Corn and remove silk. Wash your ears of corn.
- Using a knife, cut kernels from the center of the cob. Do not cut kernels from the tip ends of the corn. I use a bunt pan and place the corn tip in the center hole of the bundt pan when cutting. This holds the corn more securely and collects most corn kernels as you cut them off the cob. This reduces wasted corn and the mess of cleaning up.
Prepare Canner and Jars
- Prepare your Pressure Canner according to Manufacturer instructions.
- Clean jars and lids with warm soapy water. Ensure the jars do not have any chips or bubbles in the glass. Heat jars in hot water.
Raw Pack Instructions
- Bring water to a boil in a large pot on your stove. Reduce to a simmer, keeping your liquid hot. I use an electric kettle to keep boiling water ready for canning.
- Loosely pack raw corn kernels into hot jars leaving 1-inch (2.5 cm) headspace.
- Add 1/2 tsp salt per pint jar or 1 tsp salt per quart jar. (Optional)
- Ladle or pour boiling water into the jar to cover the corn kernels, leaving 1-inch (2.5 cm) of headspace.
- Remove air bubbles from the jars using your de-bubbler. Adjust headspace as needed by adding more boiling liquid.
- Clean your jar rim with a damp paper towel.
- Place the lid and the band on your jar. Adjust to fingertip tight.
- Using your jar lifter place your jar into your prepared hot pressure canner.
Hot Pack Instructions
- Measure the corn kernels. For every 4 cups (1 L) of corn kernels, add 1 cup (250 mL) of water to a large stock pot. Combine the corn and water in the pot.
- Bring to a boil over medium-high heat. Reduce heat and boil gently for 5 minutes, until heated through.
- Ladle hot corn and cooking liquid into hot jars leaving a 1-inch (2.5 cm) headspace.
- Add 1/2 tsp salt per pint jar or 1 tsp salt per quart jar. (Optional)
- Remove air bubbles from the jars using your de-bubbler. Adjust headspace as needed by adding more boiling liquid.
- Clean your jar rim with a damp paper towel.
- Place the lid and the band on your jar. Adjust to fingertip tight.
- Using your jar lifter place your jar into your prepared hot pressure canner.
Processing Instructions
- Adjust the water level if needed in the canner, lock the pressure canner lid, and bring it to a boil over medium-high heat. Vent steam for 10 minutes, then close the vent. Continue heating your pressure canner to achieve 10 lbs (69 kPa) of pressure (Make sure to adjust for your altitude) and maintain that pressure for the entire cooking time.
- Process Pint Jars (500 mL) for 55 minutes and Quart Jars (1 L) for 85 minutes. Set a timer so it is much easier to remember how long you need to pressure can them for.
- Turn off the heat when the timer is complete. Let pressure return to zero naturally. Wait 2 minutes after the pressure gauge reads 0, then open your vent. Remove your canner lid (making sure to lift it away from you so you don't get burned by the steam).
- Leave jars in the pressure canner for 10 minutes after you remove the lid. Using your jar lifer carefully move the jars onto a wire rack or kitchen towel to allow them to cool. When moving the jars try not to tilt them to the side as this could affect the seal of the jars. Allow your jars to cool for 12-24 hours before handling.
- Once cool, remove the canning rings from the jars. Wash your jars off to ensure no food residue on the outside of the jar from processing. Label your jar with the name of the recipe and date. This will help you remember what recipe you used to can and the date will allow you to use the oldest canned goods first.