


Pressure canning vegetable stock is an excellent way to preserve the flavors of fresh vegetables and have a nutritious base ready for soups, stews, and other meals. I will cover everything you need to know about pressure canning vegetable stock, including the benefits, a recipe, and important safety tips. This recipe comes from the Ball Blue Book Guide to Preserving 38th edition.
Why Pressure Canning Vegetable Stock?
Pressure canning is the safest method for preserving low-acid foods like vegetable stock. Unlike boiling water bath canning, which is suitable for high-acid foods, pressure canning reaches higher temperatures that kill harmful bacteria and spores, ensuring the safety and longevity of your stock.
Benefits of Pressure Canning Vegetable Stock
- Long Shelf Life: Pressure canning extends the shelf life of vegetable stock to up to a year or more, allowing you to enjoy homemade vegetable stock without the need for refrigeration.
- Convenience: Having pre-made stock on hand simplifies meal preparation, saving you time on busy days.
- Cost-Effective: Making and canning your own stock reduces the need to buy commercial stocks, which often contain preservatives and less desirable ingredients.


How to Can Vegetable Stock
Preparing Your Equipment
Before you start, ensure you have all the necessary equipment:
- Knife
- Cutting Board
- Large Stainless Steel Pot
- Mesh Strainer or Cheesecloth
- Pressure canner
- Pint Sized Canning Jars or Quart Size Canning Jars
- Lids
- Bands
- Funnel
- Ladle
- Jar lifter
- Headspace Measurer
Pressure Canning Recipe for Vegetable Stock
This recipe should yield about 8-pint jars or 4-quart jars of vegetable stock. Here are the ingredients used in this recipe:
- 1 lb carrots (5 to 6 medium)
- 6 stalks celery
- 1 lb onions (3 medium)
- 2 medium red bell peppers
- 2 medium tomatoes, diced
- 2 medium turnips, diced
- 3 cloves garlic, crushed
- 3 bay leaves
- 1 teaspoon thyme
- 8 black peppercorns
- 7 quarts of water
Step-by-Step Instructions for Pressure Canning Vegetable Stock
Step 1: Prep Your Vegetables
Wash carrots, celery, peppers, tomatoes, and turnips under cold running water and drain.
Using your knife and cutting board: remove stem ends from carrots. Cut the carrots into 1-inch pieces. Remove the leafy top and root ends from the celery. Cut the celery into 1-inch pieces. Peel the onions. Cut the onions into quarters. Remove the stem and seeds from the bell peppers. Cut the peppers into 1-inch strips. Remove the core and stem from the tomatoes. Coarsely chop the tomatoes. Remove the stem ends from the turnips. Coarsely chop the turnips. Crush garlic cloves.
Step 2: Cook the Ingredients
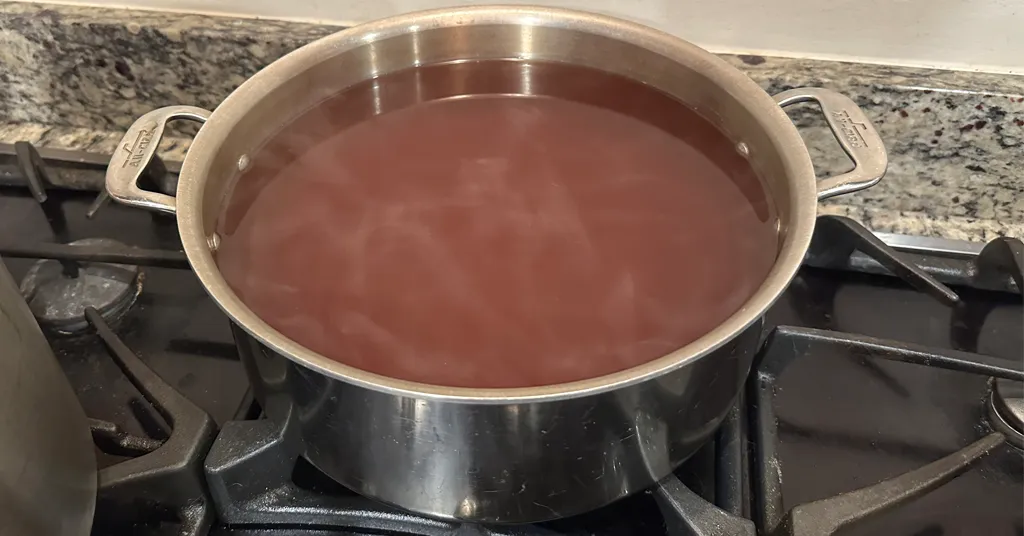
Combine all ingredients in a large stainless steel pot. Bring the mixture to a boil.
Reduce the heat to a simmer. Cover the pot and simmer for 2 hours.
Remove the lid and continue simmering for 2 hours.
Strain the stock through a fine mesh strainer or several layers of cheesecloth.
Discard the vegetables and herbs that have been strained from the stock.

Step 3: Prepare Canner and Jars
Prepare your Pressure Canner according to Manufacturer instructions.
Clean jars and lids with warm soapy water. Ensure the jars do not have any chips or bubbles in the glass. Heat jars in hot water.
Step 4: Fill the Jars
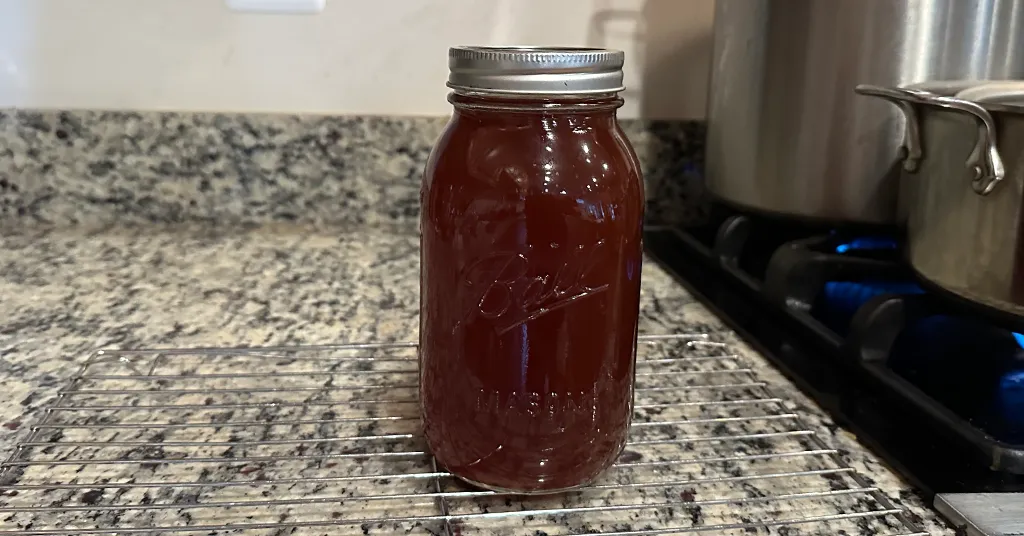
Using a funnel, carefully ladle the hot vegetable stock into the prepared jars, leaving about an inch (2.5 cm) of headspace at the top.
Wipe the rims of the jars with a clean, damp cloth to ensure a good seal.
Step 5: Apply the Lids and Bands
Place the lid and the band on your jar. Adjust to fingertip tight.
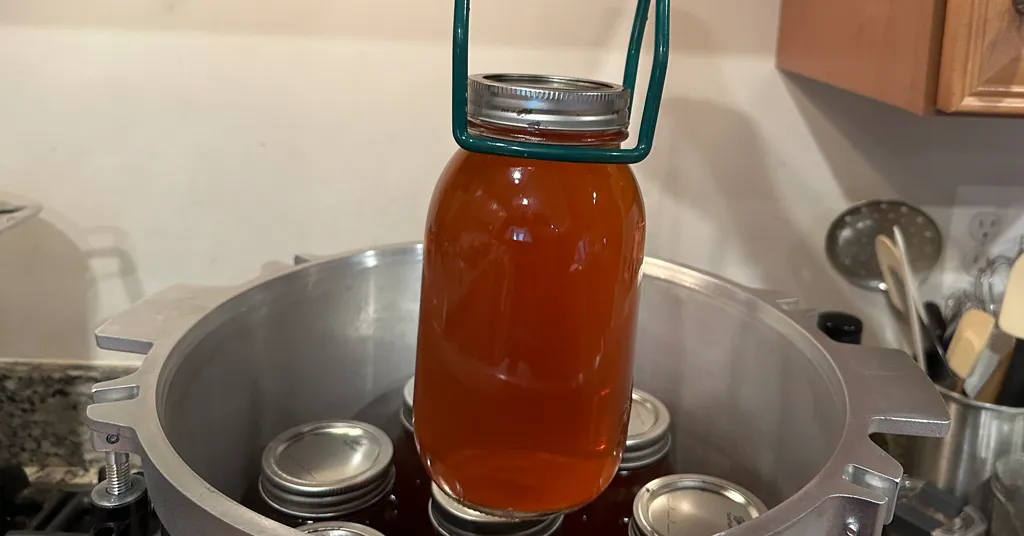
Using your jar lifter place your jar into your prepared hot pressure canner.
Step 5: Process in the Pressure Canner
Adjust the water level if needed in the canner, lock the pressure canner lid, and bring it to a boil over medium-high heat. Vent steam for 10 minutes, then close the vent. Continue heating your pressure canner to achieve 10 lbs (69 kPa) of pressure (Make sure to adjust for your altitude) and maintain that pressure for the entire cooking time.
Process Pint Jars (500 mL) for 30 minutes and Quart Jars (1 L) for 35 minutes. Set a timer so it is much easier to remember how long you need to pressure can them for.
Turn off the heat when the timer is complete. Let pressure return to zero naturally. Wait 5 minutes after the pressure gauge reads 0, then open your vent. Remove your canner lid (making sure to lift it away from you so you don’t get burned by the steam).
Leave jars in the pressure canner for 10 minutes after you remove the lid. Using your jar lifer carefully move the jars onto a wire rack or kitchen towel to allow them to cool. When moving the jars try not to tilt them to the side as this could affect the seal of the jars. Allow your jars to cool for 12-24 hours before handling.
Once cool, remove the canning rings from the jars. Wash your jars off to ensure no food residue on the outside of the jar from processing. Label your jar with the name of the recipe and date. This will help you remember what recipe you used to can and the date will allow you to use the oldest canned goods first.
Homemade Vegetable Stock
Homemade vegetable stock is rich in nutrients and flavor. It’s a great way to use up vegetable scraps and create a versatile base for countless dishes. Home canning vegetable stock is easy as long as you are using a pressure canner.
Shelf Life of Canned Vegetable Stock
Properly canned vegetable stock has a shelf life of up to a year or more when stored in a cool, dark place. Always check for signs of spoilage before use, such as off smells, discoloration, or broken seals.
Safety Tips for Pressure Canning
- Follow Instructions: Always follow the guidelines provided with your pressure canner to ensure safety.
- Check Seals: Ensure that jars are properly sealed after processing. Lids should not flex up and down when pressed.
- Inspect Jars: Regularly inspect your canned goods for signs of spoilage.
By mastering the process of pressure canning vegetable stock, you can enjoy the convenience and health benefits of homemade stock year-round.
Recipe Card
Vegetable Stock (Pressure Canning)
Equipment
- Mesh Strainer or Cheesecloth
- Pint Size Canning Jars or Quart Size Canning Jars
- Quart size canning jars or Pint Size Canning Jars
Ingredients
- 1 lb carrots 5 to 6 meduim carrots
- 6 stalks celery
- 1 lb onions 3 medium onions
- 2 medium red bell peppers
- 2 medium tomatoes diced
- 2 medium turnips diced
- 3 cloves garlic crushed
- 3 bay leaves
- 1 tsp thyme
- 8 black peppercorns
- 7 quarts water
Instructions
- Wash carrots, celery, peppers, tomatoes, and turnips under cold running water and drain.
- Using your knife and cutting board: remove stem ends from carrots. Cut the carrots into 1-inch pieces. Remove the leafy top and root ends from the celery. Cut the celery into 1-inch pieces. Peel the onions. Cut the onions into quarters. Remove the stem and seeds from the bell peppers. Cut the peppers into 1-inch strips. Remove the core and stem from the tomatoes. Coarsely chop the tomatoes. Remove the stem ends from the turnips. Coarsely chop the turnips. Crush garlic cloves.
- Cook the Ingredients
- Combine all ingredients in a large stainless steel pot. Bring the mixture to a boil.
- Reduce the heat to a simmer. Cover the pot and simmer for 2 hours.
- Remove the lid and continue simmering for 2 hours.
- Strain the stock through a fine mesh strainer or several layers of cheesecloth.
- Discard the vegetables and herbs that have been strained from the stock.
Prepare Canner and Jars
- Prepare your Pressure Canner according to Manufacturer instructions.
- Clean jars and lids with warm soapy water. Ensure the jars do not have any chips or bubbles in the glass. Heat jars in hot water.
- Fill Jars
- Ladle hot stock into hot jars leaving a 1-inch (2.5 cm) headspace.
- Clean your jar rim with a damp paper towel.
- Place the lid and the band on your jar. Adjust to fingertip tight.
- Using your jar lifter place your jar into your prepared hot pressure canner.
Processing Instructions
- Adjust the water level if needed in the canner, lock the pressure canner lid, and bring it to a boil over medium-high heat. Vent steam for 10 minutes, then close the vent. Continue heating your pressure canner to achieve 10 lbs (69 kPa) of pressure (Make sure to adjust for your altitude) and maintain that pressure for the entire cooking time.
- Process Pint Jars (500 mL) for 30 minutes and Quart Jars (1 L) for 35 minutes. Set a timer so it is much easier to remember how long you need to pressure can them for.
- Turn off the heat when the timer is complete. Let pressure return to zero naturally. Wait 5 minutes after the pressure gauge reads 0, then open your vent. Remove your canner lid (making sure to lift it away from you so you don't get burned by the steam).
- Leave jars in the pressure canner for 10 minutes after you remove the lid. Using your jar lifer carefully move the jars onto a wire rack or kitchen towel to allow them to cool. When moving the jars try not to tilt them to the side as this could affect the seal of the jars. Allow your jars to cool for 12-24 hours before handling.
- Once cool, remove the canning rings from the jars. Wash your jars off to ensure no food residue on the outside of the jar from processing. Label your jar with the name of the recipe and date. This will help you remember what recipe you used to can and the date will allow you to use the oldest canned goods first.