


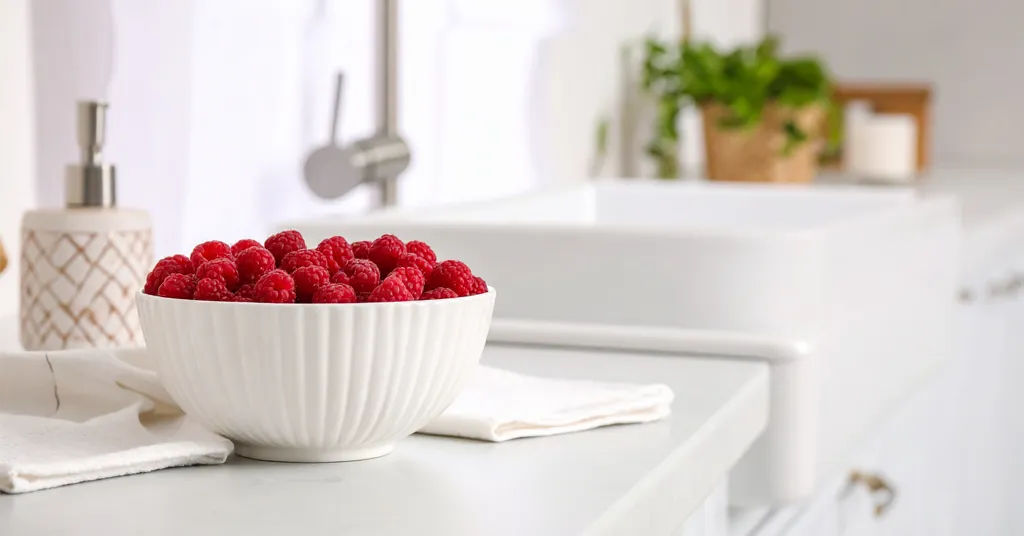
If you love homemade fruit syrups, this easy raspberry syrup recipe is sure to become a new favorite. Fresh raspberries give this syrup a bright color and a burst of real fruit flavor that’s hard to resist. Home canners know raspberry syrup shines on pancakes, in tea, over ice cream, or as a sweet addition to cocktails and drinks.
I’m always looking for reliable ways to preserve summer’s berries, and raspberry syrup delivers on both taste and versatility. This safe and tested raspberry syrup canning recipe comes from the All New Ball Book of Canning and Preserving. This recipe will yield 4 pint jars of raspberry syrup. If you’re stocking up for winter or planning homemade gifts, this recipe will help you create safe, shelf-stable syrup you’ll use all year. For those interested in other fruit preserving projects, check out the Blueberry Syrup Canning Recipe for even more inspiration.
Essential Ingredients and Equipment for Raspberry Syrup Canning
With any raspberry syrup recipe, the right ingredients and equipment make all the difference. You want rich color, bold flavor, and a shelf-stable syrup you can count on all year. Getting prepared means gathering a few basics and understanding a couple of options for juicing, like using a steam juicer for clear, beautiful syrup. Let’s walk through what you’ll need before you start cooking.
Ingredients for Raspberry Syrup
High-quality ingredients are the backbone of a great raspberry syrup. Here’s what I use in my easy raspberry syrup recipe:
- 3 lbs fresh or frozen raspberries (fresh always carries the best flavor)
- 2 cups water
- 2 3/4 cups granulated sugar for sweetness and smooth texture
- 1/2 cup light corn syrup to help keep the syrup from crystallizing
- 2 tablespoons of bottled lemon juice for a safe acidity level
These essentials will help you make a raspberry syrup for pancakes, tea, cocktails, and even ice cream. If you’re new to canning, using bottled lemon juice is especially important for safe home preservation.
Equipment Checklist
Having the right tools keeps the process safe and fun. Here’s what I set out every time I make raspberry syrup for canning:
- A large, stainless steel pot or enameled Dutch Oven
- Fine mesh strainer with cheesecloth or a jelly bag for straining the juice
- Measuring cups and spoons
- Pint size canning jars with new lids and screw bands
- Water bath canner or steam canner
- Ladle and jar funnel (these make for less mess)
- Jar lifter and clean towels
Laying everything out ahead prevents last-minute scrambling and keeps your syrup hot and ready for the jars.


Steam Juicing Raspberries: Alternate
I have also used a steam juicer to juice my raspberries for this recipe. This tool is a favorite for a few reasons. A steam juicer lets you pull out bright, clear juice with almost no seeds or pulp. That means your raspberry syrup comes out beautifully clear, with a flavor that really shines through.
If you’re using a steam juicer, just make sure to extract 4 1/2 cups of raspberry juice for the recipe. This keeps the balance right and ensures you get enough syrup for several jars. The steam juicing process is simple—add the berries to the top, keep water in the bottom, and gently collect juice from the middle compartment. Your kitchen will smell like summer the whole time.
For more inspiration on using raspberries in home canning, see the Cranberry Raspberry Jam Recipe. It’s a great way to discover more about raspberry uses and other creative options for preserving fruit.
Having everything in place, from the juicer to the jars, makes the steps that follow much smoother and more enjoyable. Raspberry syrup canning turns into a fun, easy kitchen tradition when you start with the right setup.
Step-by-Step Instructions: How to Make Raspberry Syrup for Canning
Once your ingredients and tools are ready, it’s time to tackle the fun part: making homemade raspberry syrup. I cover everything step-by-step: preparing raspberries, cooking the syrup, water bath or steam canning, and how to store your finished jars. If you want raspberry syrup for pancakes, tea, cocktails, or dessert, these steps walk you through the whole canning process at home.
Preparing the Raspberries: Fresh vs Frozen
Your Raspberry Syrup Recipe starts with the berries. Using high-quality raspberries, whether fresh or frozen, makes all the difference in flavor and texture.
- Fresh Raspberries: Rinse berries gently under cool water. Discard any that are very soft, moldy, or bruised; only choose the best for your syrup. After sorting, they’re ready to go.
- Frozen Raspberries: These are a great alternative when summer’s berries aren’t in season. Thaw them in a large bowl and keep the thawed liquid. Thawed berries might release more juice and can sometimes have a softer texture, but they still pack a flavorful punch for your easy raspberry syrup recipe.

Next, place your raspberries and 2 cups of water into a large stainless steel or enameled pot. Bring to a simmer over medium-low heat. Cook uncovered for 20 minutes, stirring every few minutes to help release the juices, but do not boil. This gentle heat keeps the color bright and prevents bitterness.
When finished, strain the hot raspberry mixture through a jelly bag or cheesecloth-lined strainer over a large bowl. Let the juice drip naturally for at least two hours, and avoid pressing or squeezing, which can make your syrup cloudy. You should yield 4 1/2 cups of beautiful raspberry juice.
For those with steam juicers, use them for this step. They give clear juice with less sediment, and the process is efficient. Just remember to extract the same 4 1/2 cups for your raspberry syrup canning recipe. Discard the berry solids and rinse your pot before moving on.
Cooking Down the Raspberry Syrup Base
Now you’re ready to transform that juice into sweet, pourable raspberry syrup for drinks or breakfast.
Pour your raspberry juice back into your cleaned pot. Add 2 3/4 cups granulated sugar, 1/2 cup light corn syrup (prevents crystallization), and 2 tablespoons bottled lemon juice (keeps it safe for canning and brings out the berry flavor).
- Tip: Stir well until the sugar completely dissolves.
Set your burner to medium-high and bring the mixture to a full, rolling boil. Once bubbling hard, boil for just one minute. This quick, high heat sets the syrup’s texture and keeps it from getting too thick or sticky. Don’t cook longer because you want a pourable syrup, not jelly.
Remove from heat. Your raspberry syrup is now ready for jars.
Water Bath Canning: Processing and Sealing Jars
Water bath canning is perfect for fruit-based recipes like raspberry syrup for pancakes or raspberry syrup for cocktails. Let’s walk through the process so your syrup stays safe and shelf-stable.
Start by washing jars and lids in warm, soapy water. Check each jar for any tiny chips or rough edges that can hurt the final seal.
Prepare your canner:
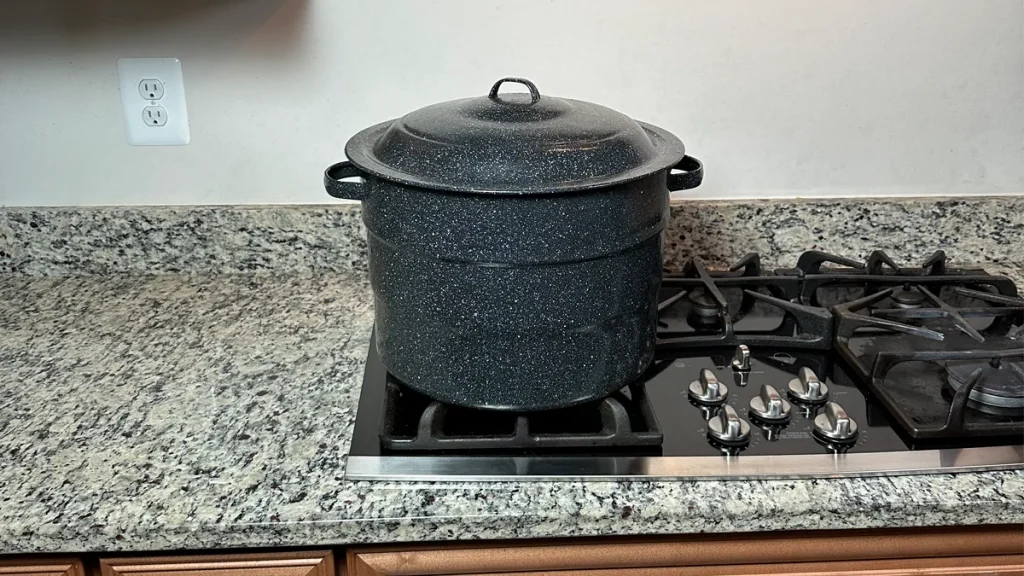
- Water Bath Canner: Place the rack in your water bath canner and add your jars. Add water to cover jars by 2-3 inches. Begin heating.
- Steam Canner: Place the rack inside your steam canner, add the right amount of water, set the jars on the rack, and cover with the lid. Warm them up as the canner heats.
Now, working with hot jars and hot syrup, use a funnel and ladle to fill each jar with the raspberry syrup, leaving 1/2 inch of space at the top. Double-check headspace with a measuring tool and remove air bubbles with a non-metallic utensil. Adjust if needed and wipe the jar rims for a clean, tight seal.
Center lids and screw bands down to fingertip tight. Using a jar lifter, return filled jars to your canner rack.
Processing steps:
- Water Bath Canner: Lower the rack into boiling water, confirming jars are covered by at least 2 inches. Once boiling, process pint jars for 10 minutes. Adjust for your altitude if needed. When time is up, turn off the heat, remove the canner lid, and let jars sit in water for 5 minutes before lifting out.
- Steam Canner: Start timing once your canner hits the correct temperature “Zone.” Process pint jars for 10 minutes, adjusting for altitude. Shut off the stove, leave the lid on, and let jars rest for 5 extra minutes before removing.
For more detailed information on water bath canning safety, I recommend reading How Water Bath Canning Protects Food, which covers the science behind these time and temperature rules.

Cooling, Storing, and Testing Seals
Once jars come out of the canner, the final steps are all about protecting your hard work and making sure the seal holds.
Place hot jars upright on a kitchen towel or cooling rack. Keep them spaced out and don’t tilt them. Let them cool, undisturbed, for 12 to 24 hours. This forms the airtight seal that keeps your raspberry syrup shelf-stable for years.
After jars are fully cooled:
- Remove and store the canning rings separately so you can check the seal.
- Wash the outside of each jar if sticky.
- Label clearly with your recipe and date.
A good seal is key for any raspberry syrup canning recipe. The lids should not flex up and down when pressed. Any jars that didn’t seal should go straight into the fridge and be used first.
Store your sealed jars of raspberry syrup in a cool, dark cabinet or pantry. Properly canned syrup stays fresh and ready for pancakes, tea, cocktails, or ice cream. If you want even more ideas for raspberry preserves, check out the Raspberry Jam Recipe for another classic way to capture summer’s sweetness.
Following these steps, you’ll fill your pantry with safe, delicious raspberry syrup ready for countless uses and homemade treats.
Can I Use Black Raspberries in This Recipe?
Many people ask if black raspberries can be swapped for red raspberries in a raspberry syrup recipe. If you have black raspberries on hand or they’re what’s thriving in your backyard, I completely understand wanting to use them in your home canning projects. Both types of berries are delicious, but they have differences that can change your syrup a bit.
Flavor and Color Differences for Raspberry Syrup
Black raspberries pack a distinct, slightly earthier flavor compared to typical red raspberries. The taste is a little deeper, sometimes a touch less tart, and often described as somewhere between a raspberry and a blackberry. When used in syrup, that earthiness comes through and can make your raspberry syrup for pancakes or drinks even more interesting.
The other thing you’ll notice is color. Black raspberries make a syrup that’s much darker, almost purple, and this can be beautiful on ice cream or in iced tea. The final look will be richer than the bright ruby you expect from red raspberry syrup.
Swapping Quantities and Adjusting the Recipe
You can use the same measurements for black raspberries in this easy raspberry syrup recipe. Just swap in the 3 pounds of black raspberries for red, and keep the rest of your ingredients the same:
- 3 lbs black raspberries
- 2 cups water
- 2 3/4 cups granulated sugar
- 1/2 cup light corn syrup
- 2 tbsp bottled lemon juice
This keeps the syrup safe, shelf-stable, and ensures the proper acidity for canning. Lemon juice is still required. Black raspberries can sometimes taste less sharp, so that lemon helps balance out the syrup and also supports preservation.
Texture and Pectin in Black Raspberries
Black raspberries tend to be a bit seedier than their red relatives. When you cook and strain the fruit, expect more seeds and possibly a little less juice. Using a fine mesh strainer or cheesecloth is especially important. This step makes your syrup smooth for pouring over pancakes or adding to cocktails.
The natural pectin content is also pretty similar, so the syrup will thicken the same way during cooking. You don’t need to tweak cook times or the amount of corn syrup.
Best Uses for Black Raspberry Syrup
Black raspberry syrup is just as versatile as the classic version. Here are a few favorite ideas for using this syrup:
- Stirring into lemonade or iced tea for a summer refresher
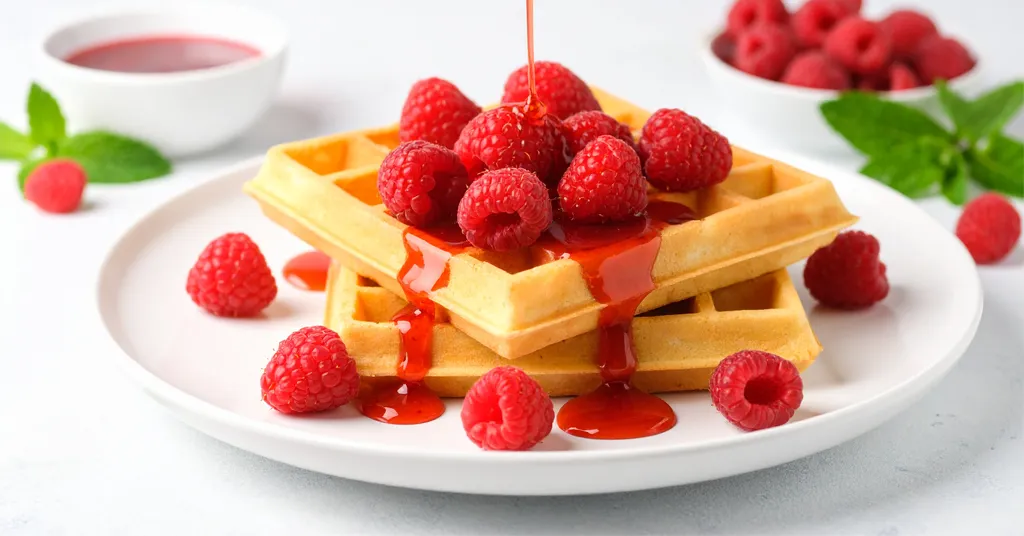
- Drizzling over pancakes, waffles, or French toast
- Mixing with seltzer water for homemade soda
- Pouring over vanilla ice cream for a rich, fruity twist
The dark color stands out even more in drinks, and the berry flavor gives classic recipes a new spin. Black raspberries can absolutely shine in your raspberry syrup canning recipe. If you love their flavor, this is a great way to preserve them for months to come.
Can I Use Frozen Raspberries in This Recipe?
Many home canners want to keep making raspberry syrup even when fresh berries aren’t available. Frozen raspberries step in as a reliable option. They’re picked and frozen at peak ripeness, locking in both flavor and color. Using frozen berries in a Raspberry Syrup Recipe means you can enjoy bright, homemade syrup for pancakes, tea, drinks, and more, any time of year.
How Frozen Raspberries Work in a Raspberry Syrup Recipe
Frozen raspberries make a delicious syrup. When you thaw them, the berries release extra juice, leading to a strong raspberry flavor. Expect the thawed berries to soften and break down more than fresh berries, but that’s helpful for extracting juice.
Here’s what I keep in mind when I use frozen raspberries:
- Thaw berries fully in a large bowl before using.
- Keep the soft berries and remaining juices to extract as much flavor as possible.
- Handle gently, as frozen berries tend to release more tiny seeds and pulp.
Once thawed, just follow the same steps in the easy raspberry syrup recipe you use for fresh berries. Simmer berries with water, strain, then add sugar, corn syrup, and lemon juice. This simple tweak keeps your syrup safe, flavorful, and shelf-stable.
Keeping the Flavor and Safety
Frozen raspberries keep most of their fresh flavor. Some people even say their syrup tastes a little more intense. Because freezing can change the berry texture, the finished syrup might be slightly cloudier or have a bit more pulp. Use a fine mesh strainer with cheesecloth when straining to keep your raspberry syrup for drinks or pancakes silky smooth.
Safety stays the same. You must use bottled lemon juice in this raspberry syrup canning recipe, whether you use fresh or frozen berries. The acidity level matters for safe canning and long shelf life.
Tips for Substituting Frozen Raspberries
Here’s a quick list for easy substitution:
- Use the same amount – 3 pounds of frozen raspberries for this recipe.
- Fully thaw before starting.
- Strain well for a clear syrup.
- Continue with cooking and canning instructions as written.
So if the raspberry craving hits while fresh berries are out of season, don’t wait. Reach for frozen raspberries and enjoy homemade raspberry syrup for cocktails, ice cream, pancakes, and more.
If you love exploring freezer-friendly recipes with berries, check out my favorite Blueberry Raspberry Freezer Jam Recipe for another great way to use frozen fruit.
This makes it easy to keep raspberry syrup in your pantry (or freezer) all year long, no matter when you find the time or the berries!


Tips for Perfect Raspberry Syrup Every Time
Everyone wants their Raspberry Syrup Recipe to turn out great. A little attention to detail makes all the difference. If you want raspberry syrup for pancakes, iced tea, cocktails, or even drizzled on ice cream. Over many batches, I’ve picked up small tricks that always help produce syrup that’s not only safe for canning but also full of fresh berry flavor and smooth texture.
Let’s talk about what makes a Raspberry Syrup Recipe shine and what will keep yours tasting bright and looking beautiful from the first jar to the last.
Get the Most from Your Raspberries
Starting with the right berries puts you on the path to rich flavor right away.
- Pick the best berries. Choose raspberries that are bright, plump, and full of color. Soft, bruised, or overripe berries can add off-flavors or cloud your syrup.
- Don’t skip sorting. Take a minute to remove stems, leaves, or stray bits. It’s a quick step that results in a cleaner, fresher taste.
- Fresh or frozen? Both work! Frozen raspberries are a great time-saver, especially off-season.
When juicing the berries, simmer gently. Boiling can dull their color and make the syrup taste slightly bitter. You want the juice to be as vivid and tasty as possible.
Strain for the Silkiest Texture
Nobody wants seeds in their syrup. For the smoothest raspberry syrup for drinks or pancakes, straining is a make-or-break step.
- Line a fine mesh strainer with two layers of damp cheesecloth or use a jelly bag.
- Let juice drip for at least two hours. If you’re in a hurry, resist pressing the pulp. Pressing squeezes in extra pulp and seeds, making your syrup cloudier.
If you own a steam juicer, that tool works wonders for extracting clear, seed-free juice. I always check that I’ve got exactly 4 1/2 cups of juice before moving on to the sweetening and thickening part.
Sweetener and Lemon Juice: Getting the Balance Right
A great Raspberry Syrup Recipe is all about balance—sweet but still tart, with the berry flavor right up front.
- Stick to the recipe amounts: 2 3/4 cups granulated sugar and 1/2 cup light corn syrup for every 3 pounds of raspberries. The corn syrup helps keep the syrup smooth and prevents crystals from forming.
- Don’t skip the bottled lemon juice. This keeps the syrup safe for home canning and brightens the berry flavor. Always use bottled, never fresh-squeezed, for consistent acidity.
Tasting while cooking is fine, but remember: the syrup will taste sweeter as it thickens and cools.
Achieve the Perfect Raspberry Syrup Consistency
A runny syrup makes breakfast soggy, while a too-thick syrup turns into jam. Here’s how I make sure my syrup is just right:
- Bring the mixture to a rolling boil, then boil hard for one minute.
- Don’t cook longer. Too much time on the heat leads to thick, sticky syrup.
- Remove from the heat right away and ladle into jars while still hot.
If you want to double-check, drizzle a spoonful on a cold plate. It should spread slightly and run off a spoon in a smooth, steady stream.
Canning Safety and Trusted Resources
I care deeply about making raspberry syrup canning recipes that aren’t just delicious, but also safe. When you put up jars of raspberry syrup for pancakes or keep bottles for raspberry syrup for drinks, you want to be certain every jar is shelf-stable and ready for your family. Following science-based canning steps matters as much as your flavor and ingredient choices. Let’s walk through what keeps home food preservation safe, and where you can get accurate, trustworthy advice when canning raspberry syrup or any fruit syrup at home.
Why Canning Safety Matters
Canning is all about confidence—knowing your raspberry syrup recipe is safe means you’re protecting everyone you serve. Using clean jars, correct processing methods, and the right ingredients (like bottled lemon juice for acidity) makes the real difference. It guards against spoilage and dangerous bacteria. That’s why I always follow trusted sources for every technique, whether I’m making raspberry syrup for cocktails, raspberry syrup for tea, or a new easy raspberry syrup recipe.
It’s tempting to try shortcuts or family methods “passed down” for generations. But old traditions sometimes skip important safety updates. Food science is clear: home canners should stick to tested recipes, measure, and process with care. Even simple things, like adjusting processing time for your altitude, can mean the difference between a pantry staple and spoiled food.
Safe canning isn’t hard—it’s about following well-established steps and using the best information you can find. That way, every jar of raspberry syrup you share is packed with confidence along with flavor.
Recipe Card


Raspberry Syrup Canning Recipe
Equipment
- Cheesecloth or Jelly Bag
- Steam Juicer Optional
- Large stainless steel pot or Enameled Dutch Oven
- Enameled Dutch Oven or Large Stainless Steel Pot
- Water Bath Canner or Steam Canner
- Steam Canner or Water Bath Canner
Ingredients
- 3 lbs raspberries
- 2 cups Water
- 2 3/4 cups Granulated Sugar
- 1/2 cup Light Corn Syrup
- 2 tbsp Bottled Lemon Juice
Instructions
- Clean jars and lids with warm soapy water. Ensure the jars do not have any chips or bubbles in the glass.
- Rinse raspberries under cool water. Sort your raspberries to ensure you have the best raspberries for your syrup.
- Combine the raspberries and 2 cups of water in a large stainless steel pot or enameled Dutch oven. Bring the mixture to a simmer over medium-low heat.
- Cook, uncovered, for 20 minutes, stirring occasionally. (Do not bring to a boil.)
- Set a strainer lined with 2 layers of dampened cheesecloth or a jelly bag over a large bowl.
- Transfer the raspberry mixture to the strainer. Allow the raspberry juice to drip, undisturbed, for at least 2 hours. You need to extract 4 1/2 cups of raspberry juice. (Do not press or squeeze the mixture as this will lead to a cloudy syrup.)
- Alternate: I have also used a Steam Juicer to juice my raspberries for this recipe. If you have a Steam Juicer, this allows you to get nice, clear juice with less sediment. Just make sure to extract 4 1/2 cups of raspberry juice.
- Discard the solids and rinse your pot.
- Prepare your cannerUsing Water Bath Canner: Put your water bath canner on your stove. Add your canning rack to the water bath canner. Add your pint jars or quart jars to the water bath canner. They will warm as you heat the water. Add enough water to cover jars with at least 2-3 inches of water. Start to bring your water to a boil.Using a Steam Canner: Put your steam canner on your stove. Add the steam canner rack to the bottom of the steam canner. Add the recommended amount of water to the steam canner according to the manufacturer. Add your pint jars or quart jars to the steam canner. Put the lid on your steam canner and start your stove. The jars will warm as you heat your steam canner.
- Combine the raspberry juice, sugar, light corn syrup, and bottled lemon juice in a large stainless steel pot or enameled Dutch oven. Stir to dissolve the sugar.
- Bring to a full rolling boil over medium-high heat. Boil hard for 1 minute.
- Once you have hot jars and hot syrupWater Bath Canner:Remove your jars from the water bath canner one at a time using your jar lifter. Dump the water out of the jar into your water bath canner to ensure there is still 2-3 inches of water above your jars.Steam Canner:Remove the steam canner lid and remove your jars one at a time using your jar lifter.
- Using the ladle and funnel. Ladle hot syrup into hot jars, leaving 1/2 inch headspace. Use your headspace measurer to verify space. Remove any air bubbles with your de-bubbler and adjust the headspace, if necessary, by adding more syrup.
- Wipe the rim to ensure a good seal is made with the lid. Center the lid on the jar and screw the band down to fingertip tight.
- Place the jar in the canner using your jar lifter. Repeat until all raspberry syrup is used.
- ProcessingWater Bath Canner:Lower the water bath canner rack into the boiling water. Ensure your jars are covered by at least 2 inches of water.If your water is not boiling start your processing time when the water is boiling. Process pint jars for 10 minutes. Make sure to adjust your time for altitude.Set a timer, it makes it much easier to make sure you process for the correct time. When your timer goes off turn off the heat and remove the canner lid.Leave the jars in the water for 5 minutes.Steam Canner:Put the lid on the steam canner. Turn your stove on high until your steam canner water comes to a vigorous boil. Continue heating so the indicator is in the correct "Zone" per your altitude. Start your processing time when the needle reaches the maximum point you have tested your steam canner to reach in your "Zone".Adjust the burner so that it maintains an even rolling boil throughout the entire processing time. Usually, this will be much lower than where it was set for the vigorous boil. If the top lid is lifting and/or spitting water from the edges this is an indication that you have the heat turned up too high. Slowly reduce the heat until this stops. Watch the indicator to ensure the temperature does not decrease.The processing times for steam canning are the same as for water bath canning. Process pint jars for 10 minutes.Make sure to adjust your time for altitude. Set a timer, it makes it much easier to make sure you process for the correct time.When your timer goes off turn off the heat and let the canner stand for 5 minutes with the lid on before removing the jars. The lid MUST remain ON the canner during this time. This cool-down period is necessary to ensure the jar contents are properly processed.Carefully remove the lid by tilting it away from you to avoid steam burns.
- Using your jar lifer carefully move the jars onto a wire rack or kitchen towel to allow them to cool. When moving the jars try not to tilt them to the side as this could affect the seal of the jars. Allow your jars to cool for 12-24 hours before handling.
- Once cool, remove the canning rings from the jars. Wash your jars off to ensure no food residue on the outside of the jar from processing. Label your jar with the name of the recipe and date. This will help you remember what recipe you used to can and the date will allow you to use the oldest canned goods first.