


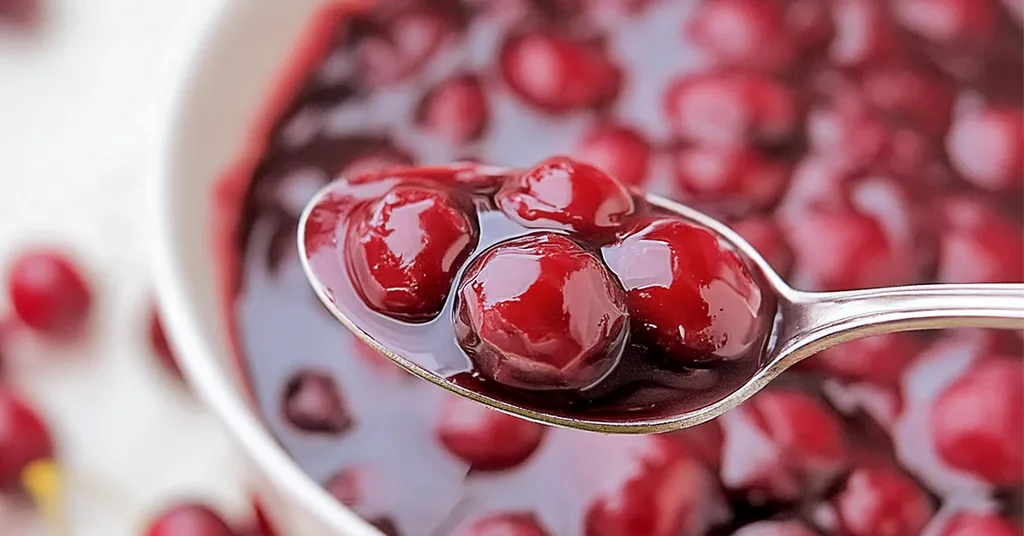
Imagine the satisfaction of opening a jar of your own homemade tart cherry pie filling, bursting with fresh, tangy cherries that taste just like summer. There’s something incredibly rewarding about preserving the vibrant flavors of the season to enjoy year-round. Canning your tart cherry pie filling not only ensures the freshest and most flavorful results but also allows you to avoid the preservatives and additives found in store-bought options.
This recipe comes from the Ball Complete Book of Home Preserving and will yield 4 quart jars of Tart Cherry Pie Filling for Canning.
Ingredients for Cherry Pie Filling
List of Ingredients
- Frozen tart cherries (10 lbs)
- Sugar (3 1/2 cups)
- Clear Jel (1 cup)
- Bottled Lemon juice (1/4 cup)
- Cinnamon (1/2 teaspoon)
If you can’t find the cook type Clear Jel I have a resource that provides information on how to can pie filling without clear jel.

Quality Tips
Frozen tart cherries are a convenient option and are often picked at their peak ripeness, ensuring great flavor.
Equipment needed for Canning Cherry Pie Filling
Here is the equipment I used when canning tart cherry pie filling:
- Large Bowl
- Colander
- Measuring Cups
- Measuring Spoons
- Large Stainless Steel Pot
- 1/2 pint Canning Ladle
- Quart Size or Pint Size Canning Jars
- Lids
- Rings
- Water Bath Canner or Steam Canner
- Jar Lifter
- Headspace Measurer/De-bubbler
Instructions for Canning Cherry Pie Filling
Clean Jars and Lids
Clean jars and lids with warm soapy water. Ensure the jars do not have any chips or bubbles in the glass.
Collect Cherry Juice
Drain thawed cherries in a colander, placed over a large bowl, stirring occasionally, until 8 cups of cherry juice have been collected. This will take about 2 hours.
Set cherry juice and cherries aside.
Prepare Canner
Using Water Bath Canner
Put your water bath canner on your stove. Add your canning rack to the water bath canner. Add your pint jars or quart jars to the water bath canner. They will warm as you heat the water. Add enough water to cover jars with at least 2-3 inches of water. Start to bring your water to a boil.
Using Steam Canner
Put your steam canner on your stove. Add the steam canner rack to the bottom of the steam canner. Add the recommended amount of water to the steam canner according to the manufacturer. Add your pint jars or quart jars to the steam canner. Put the lid on your steam canner and start your stove. The jars will warm as you heat your steam canner.


Cooking Cherry Pie Filling
Whisk together 4 cups of cherry juice, sugar, ClearJel, and cinnamon in a large stainless steel pot. Bring ingredients to a boil over medium-high heat, stirring constantly. Boil until thickened and the mixture begins to bubble.
Add lemon juice. Return to a boil and boil for 1 minute, stirring constantly.
Add reserved cherries all at once. Return to a boil, stirring constantly but gently. Remove from the heat.
Fill Jars
Once you have hot jars and hot pie filling
Water Bath Canner
Remove your jars from the water bath canner one at a time using your jar lifter. Dump the water out of the jar into your water bath canner to ensure there is still 2-3 inches of water above your jars.
Steam Canner
Remove the steam canner lid and remove your jars one at a time using your jar lifter.
Fill Jars
Using the ladle and funnel. Ladle hot pie filling into hot jars, leaving 1 1/4 inch headspace. Use your headspace measurer to verify space. Remove any air bubbles with your de-bubbler and adjust the headspace, if necessary, by adding more pie filling. (This recipe calls for a slightly larger headspace because it does expand a lot while processing).
Wipe the rim to ensure a good seal is made with the lid. Center the lid on the jar and screw the band down to fingertip tight.
Place the jar in the canner using your jar lifter. Repeat until all cherry pie filling is used.


Processing Cherry Pie Filling
Water Bath Canner
Lower the water bath canner rack into the boiling water. Ensure your jars are covered by at least 2 inches of water.
If your water is not boiling start your processing time when the water is boiling. Process pint or quart jars for 35 minutes. Make sure to adjust your time for altitude.
Set a timer, it makes it much easier to make sure you process for the correct time. When your timer goes off turn off the heat and remove the canner lid.
Leave the jars in the water for 5 minutes.
Steam Canner
Put the lid on the steam canner. Turn your stove on high until your steam canner water comes to a vigorous boil. Continue heating so the indicator is in the correct “Zone” per your altitude.
Start your processing time when the needle reaches the maximum point you have tested your steam canner to reach in your “Zone”.
Adjust the burner so that it maintains an even rolling boil throughout the entire processing time. Usually, this will be much lower than where it was set for the vigorous boil. If the top lid is lifting and/or spitting water from the edges this is an indication that you have the heat turned up too high. Slowly reduce the heat until this stops. Watch the indicator to ensure the temperature does not decrease.
The processing times for steam canning are the same as for water bath canning. Process pint or quart jars for 35 minutes.
Make sure to adjust your time for altitude. Set a timer, it makes it much easier to make sure you process for the correct time.
When your timer goes off turn off the heat and let the canner stand for 5 minutes with the lid on before removing the jars. The lid MUST remain ON the canner during this time. This cool-down period is necessary to ensure the jar contents are properly processed.
Carefully remove the lid by tilting it away from you to avoid steam burns.
Cooling Jars
Using your jar lifer carefully move the jars onto a wire rack or kitchen towel to allow them to cool. When moving the jars try not to tilt them to the side as this could affect the seal of the jars. Allow your jars to cool for 12-24 hours before handling.
Once cool, remove the canning rings from the jars. Wash your jars off to ensure no food residue on the outside of the jar from processing. Label your jar with the name of the recipe and date. This will help you remember what recipe you used to can and the date will allow you to use the oldest canned goods first.
Usage Ideas
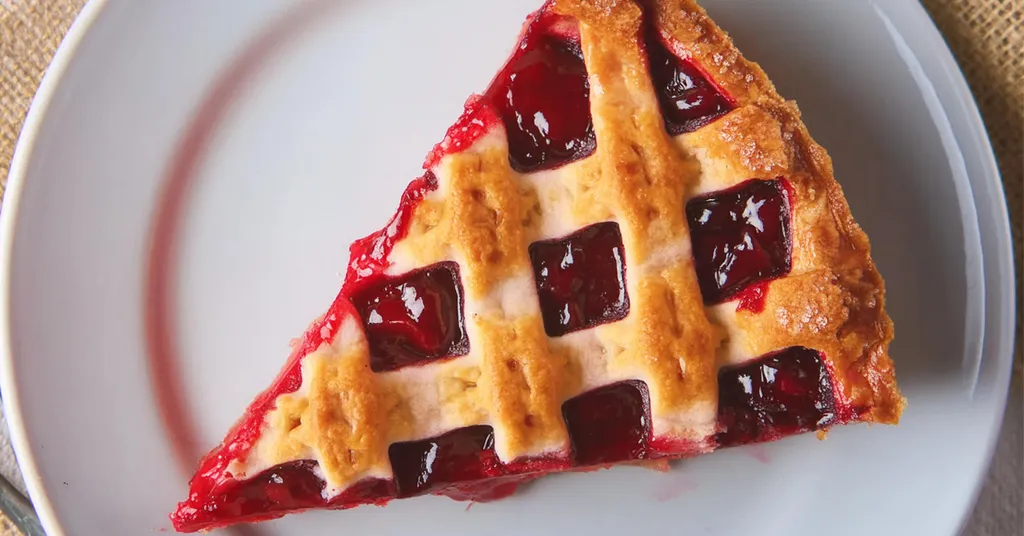
Beyond making delicious pies, use your tart cherry pie filling in:
- Pastries and turnovers
- As a topping for ice cream or yogurt
- Swirled into smoothies
- Mixed into oatmeal or breakfast bowls
Canning your own tart cherry pie filling is a rewarding process that results in delicious, homemade goodness you can enjoy all year long. It’s easier than you might think and well worth the effort.
Other Pie-Filling Recipes
Looking for some additional pie-filling recipes for canning or freezing?
Recipe Card

Tart Cherry Pie Filling for Canning
Equipment
- Quart size canning jars or Pint Size Canning Jars
- Pint Size Canning Jars or Quart Size Canning Jars
- Water Bath Canner or Steam Canner
- Steam Canner or Water Bath Canner
Ingredients
- 10 lbs frozen tart red cherries thawed in the refrigerator for 24 hours
- 3 and ½ cups Granulated Sugar
- 1 cup Clear Jel
- 1/2 tsp Ground Cinnamon
- 1/4 cup Bottled Lemon Juice
Instructions
- Clean jars and lids with warm soapy water. Ensure the jars do not have any chips or bubbles in the glass.
- Drain thawed cherries in a colander, placed over a large bowl, stirring occasionally, until 8 cups of cherry juice have been collected. This will take about 2 hours.
- Set cherry juice and cherries aside.
- Prepare your cannerUsing Water Bath Canner: Put your water bath canner on your stove. Add your canning rack to the water bath canner. Add your pint jars or quart jars to the water bath canner. They will warm as you heat the water. Add enough water to cover jars with at least 2-3 inches of water. Start to bring your water to a boil.Using a Steam Canner: Put your steam canner on your stove. Add the steam canner rack to the bottom of the steam canner. Add the recommended amount of water to the steam canner according to the manufacturer. Add your pint jars or quart jars to the steam canner. Put the lid on your steam canner and start your stove. The jars will warm as you heat your steam canner.
- Whisk together 4 cups of cherry juice, sugar, ClearJel, and cinnamon in a large stainless steel pot. Bring ingredients to a boil over medium-high heat, stirring constantly. Boil until thickened and the mixture begins to bubble.
- Add lemon juice. Return to a boil and boil for 1 minute, stirring constantly.
- Add reserved cherries all at once. Return to a boil, stirring constantly but gently. Remove from the heat.
- Once you have hot jars and hot pie fillingWater Bath Canner:Remove your jars from the water bath canner one at a time using your jar lifter. Dump the water out of the jar into your water bath canner to ensure there is still 2-3 inches of water above your jars.Steam Canner:Remove the steam canner lid and remove your jars one at a time using your jar lifter.
- Using the ladle and funnel. Ladle hot pie filling into hot jars, leaving 1 1/4 inch headspace. Use your headspace measurer to verify space. Remove any air bubbles with your de-bubbler and adjust the headspace, if necessary, by adding more pie filling. (This recipe calls for a slightly larger headspace because it does expand a lot while processing).
- Wipe the rim to ensure a good seal is made with the lid. Center the lid on the jar and screw the band down to fingertip tight.
- Place the jar in the canner using your jar lifter. Repeat until all cherry pie filling is used.
- ProcessingWater Bath Canner:Lower the water bath canner rack into the boiling water. Ensure your jars are covered by at least 2 inches of water.If your water is not boiling start your processing time when the water is boiling. Process pint or quart jars for 35 minutes. Make sure to adjust your time for altitude.Set a timer, it makes it much easier to make sure you process for the correct time. When your timer goes off turn off the heat and remove the canner lid.Leave the jars in the water for 5 minutes.Steam Canner:Put the lid on the steam canner. Turn your stove on high until your steam canner water comes to a vigorous boil. Continue heating so the indicator is in the correct "Zone" per your altitude. Start your processing time when the needle reaches the maximum point you have tested your steam canner to reach in your "Zone".Adjust the burner so that it maintains an even rolling boil throughout the entire processing time. Usually, this will be much lower than where it was set for the vigorous boil. If the top lid is lifting and/or spitting water from the edges this is an indication that you have the heat turned up too high. Slowly reduce the heat until this stops. Watch the indicator to ensure the temperature does not decrease.The processing times for steam canning are the same as for water bath canning. Process pint or quart jars for 35 minutes.Make sure to adjust your time for altitude. Set a timer, it makes it much easier to make sure you process for the correct time.When your timer goes off turn off the heat and let the canner stand for 5 minutes with the lid on before removing the jars. The lid MUST remain ON the canner during this time. This cool-down period is necessary to ensure the jar contents are properly processed.Carefully remove the lid by tilting it away from you to avoid steam burns.
- Using your jar lifer carefully move the jars onto a wire rack or kitchen towel to allow them to cool. When moving the jars try not to tilt them to the side as this could affect the seal of the jars. Allow your jars to cool for 12-24 hours before handling.
- Once cool, remove the canning rings from the jars. Wash your jars off to ensure no food residue on the outside of the jar from processing. Label your jar with the name of the recipe and date. This will help you remember what recipe you used to can and the date will allow you to use the oldest canned goods first.