


There’s nothing quite like a homemade tomatillo salsa recipe. Tomatillo salsa brings a fresh, tangy twist that brightens up everything from tacos to breakfast eggs. I love how this salsa can turn a bumper crop into jars of garden-fresh flavor you can enjoy months later.
If you enjoy preserving the best of each season, this recipe fits right into your pantry plans. Proper, safe preservation matters for every batch. Tried-and-true methods keep your salsa flavorful and shelf-stable, so you won’t have to worry when you serve it to friends and family. If you’re interested in even more ideas for canning different salsas, check out these Homemade Salsa Recipes for Canning.
Tomatillo salsa is a favorite among home food preservers for its bold color and zippy taste. With safe, tested techniques, it’s easy to add this standout salsa to your yearly preserving routine. This recipe comes from the Ball Complete Book of Home Preserving. This tomatillo salsa recipe will yield about 2 pint jars or 4 half-pint jars of salsa.
Why Tomatillo Salsa is a Home Preserver’s Favorite
Making tomatillo salsa at home holds a special spot in many food preservers’ kitchens. This isn’t just any salsa. There’s something about those bright green tomatillos and the tangy flavor they deliver that keeps me coming back batch after batch. Let’s take a closer look at what makes tomatillo salsa a must-have for the pantry, especially if you love home canning.
Tomatillos Bring More Than Color
Tomatillos kick off every tomatillo salsa recipe with their quirky charm. Hidden in their papery husks, these little fruits (yes, they’re technically fruits!) get their tart sparkle from natural pectin and acids. That fresh zing is different from the mellow heat you find in most tomato salsas.
A few things I love about tomatillos:
- High acidity keeps the salsa safe for water bath canning because it balances flavors and helps preservation.
- Their natural texture gives salsa body that doesn’t go mushy on the shelf.
- The vibrant green color stays bright even after processing, bringing a pop of freshness to every jar.
Tomatillos also pack a nutritional punch, lending vitamin C and antioxidants along with that unique flavor. They don’t need as much sugar or vinegar to stay safe, making for a cleaner-tasting salsa.

How Tomatillo Salsa Compares to Other Salsa Types
Many folks start out canning tomato salsa or even fruit salsas. Tomatillo salsa is set apart by its crisp acidity and the way it holds flavor over time. Tomato salsas are often thicker and a bit sweeter, while fruit salsas can be unpredictable for safe canning if not properly balanced.
If you’ve ever tried making a tomato salsa and found the color dull or the taste lacking zip after canning, a tomatillo salsa recipe might just win you over. And if you want to try something with a kick, check out my tips for how to can zesty salsa for more variety that still plays it safe.
Step-by-Step Tomatillo Salsa Recipe
Making a tomatillo salsa recipe at home is simple and rewarding. The secret to great salsa is choosing fresh ingredients and following each step with care. I always focus on quality and safety, especially when preserving food for my family. Here I’ll guide you through picking the best produce, prepping each ingredient, and cooking everything into a zesty, tangy salsa worth sharing and canning.
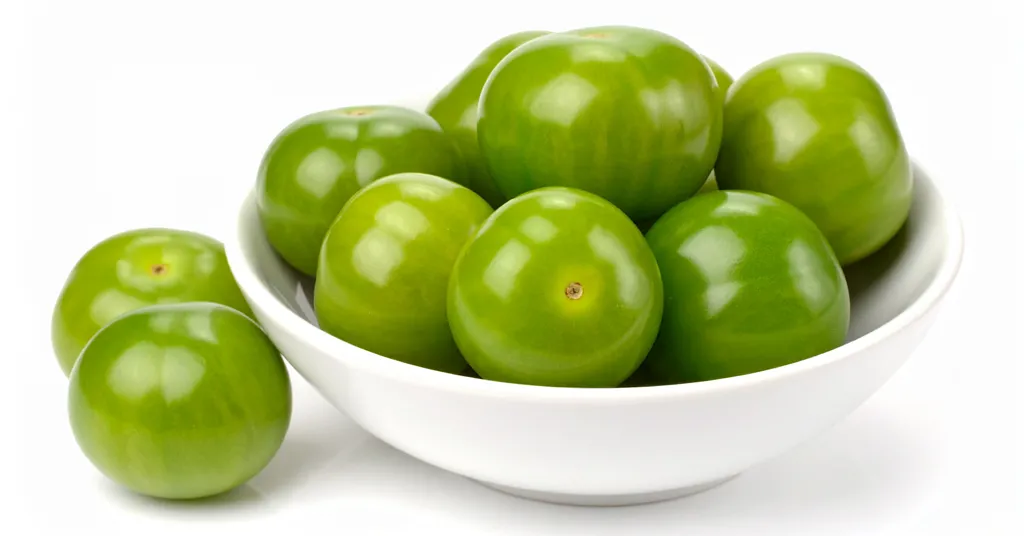
Selecting the Best Tomatillos and Ingredients
Always start with tomatillos that feel firm and heavy for their size. The husks should be tight and papery, but not shriveled or dry. If you find sticky residue under the husk, that’s normal. Just rinse it off before chopping. Bright green color means they’re full of tangy flavor. Avoid tomatillos that are yellow, which signals overripeness and a sweeter, less tart taste.
Here are the ingredients you need for this tomatillo salsa recipe:
- 5 1/2 cups chopped, cored, hulled tomatillos
- 1 cup chopped onion
- 1 cup chopped seeded jalapeno peppers
- 4 cloves of finely chopped garlic
- 2 tablespoons finely chopped cilantro
- 1/2 cup white vinegar (5% acidity)
- 4 tablespoons lime juice
- 2 teaspoons ground cumin
- 1/2 teaspoon salt
- 1/2 teaspoon hot pepper flakes
Preparation and Cooking Process for Tomatillo Salsa Recipe
Clean hands and clean surfaces make a difference, so start there. Here’s how I prepare each ingredient before cooking:
- Prep the tomatillos: Remove husks, wash off any stickiness, core, and chop.
- Jalapenos: Put on gloves. Seed peppers (for milder salsa) or leave some seeds (for extra heat), then chop.
- Onion: Chop enough to fill one cup.
- Garlic and cilantro: Chop both finely for even flavor throughout the salsa.
Once everything’s measured and prepped, place all ingredients in a large, non-reactive pot or enameled Dutch oven.
Stir to mix. Set your pot over medium-high heat and bring the mixture to a boil, stirring steadily to prevent sticking. As it boils, the tomatillos will soften and the mixture will get saucy. Once boiling, reduce heat and boil gently for 10 minutes, stirring often. The kitchen will start to smell amazing right away.
Keep these steps true and stick to the recipe’s proportions for safety, especially if you plan to can your salsa for pantry storage. That way, you can enjoy those bright, zesty flavors all year long.
Safe Canning and Storage Methods for Tomatillo Salsa
Preserving tomatillo salsa at home feels rewarding, but safety always comes first. Making sure you follow tested processes means your salsa stays fresh, bright, and safe to eat for months. For this tomatillo salsa recipe, water bath canning and steam canning are two of the most approachable ways to get shelf-stable jars in the pantry. I always rely on tried and true steps when I move from stovetop to storage.


Water Bath or Steam Canning Process for Salsa
Canning salsa isn’t just about the recipe, it’s about keeping those flavors locked in safely. I like to break down the steps so anyone can follow along, even if it’s their first batch.
Here’s how to safely can tomatillo salsa using either a water bath or a steam canner:
- Get Your Jars Ready:
- Wash jars, lids, and rings in hot, soapy water. Rinse well.
- Check for chips or cracks. Any flaws could mean a poor seal.
- Prepare Your Canner:
- Water Bath Canner
- Put your water bath canner on your stove. Add your canning rack to the water bath canner. Add your pint jars to the water bath canner. They will warm as you heat the water. Add enough water to cover jars with at least 2-3 inches of water. Start to bring your water to a boil.
- Steam Canner:
- Put your steam canner on your stove. Add the steam canner rack to the bottom of the steam canner. Add the recommended amount of water to the steam canner according to the manufacturer. Add your pint jars to the steam canner. Put the lid on your steam canner and start your stove. The jars will warm as you heat your steam canner.
- Water Bath Canner
- Fill Hot Jars with Hot Salsa:
- One jar at a time, use a jar lifter to remove a jar. Dump any water back into the canner for water bath canning.
- Ladle in your hot tomatillo salsa, leaving 1/2 inch headspace. This space helps build a vacuum seal.
- Slide a nonmetal tool (like a plastic de-bubbler) along the inside to remove air bubbles. Add extra salsa if needed to keep the headspace right.
- Wipe the rim with a clean, damp cloth. This step is key for a tight seal.
- Place the lid on the jar, then screw the band on until it’s just fingertip tight.
- Process Jars:
- For a water bath canner, lower the filled jars onto the canning rack, making sure jars are covered by at least 2 inches of water.
- Wait for a steady boil before you start your timer.
- Process pint jars for 15 minutes, adjusting for altitude if needed.
- When done, turn off the heat, remove the lid, and let jars rest in hot water for 5 minutes.
- For a steam canner, put the lid on and bring to a vigorous boil.
- Let the temperature indicator reach the proper zone for your altitude, then start your 15-minute processing time, adjusting for altitude if needed.
- Keep the heat gentle so the lid doesn’t rattle or spit water. Watch the temperature throughout.
- When time is up, turn off the stove, keep the lid on, and let jars sit for 5 minutes.
- Check the Seals:
- Carefully lift jars out and set them on a towel or rack. Don’t tilt them.
- Let jars cool undisturbed for 12–24 hours.
- When cool, check the center of each lid. It should not flex up and down. That’s your sign of a good seal.
If you want to really understand why water bath canning and steam canning work best for high-acid recipes like this, check out my guide on Water Bath Canning vs Pressure Canning.
Long-Term Preservation and Storage Tips
Once your jars of tomatillo salsa are sealed, safe storage keeps their taste and quality at their peak. Here’s how I care for my canned salsa:
- Let Jars Cool Completely: Always cool jars for 12 to 24 hours. Avoid moving or disturbing them during this time to keep the seal strong.
- Remove Rings and Wipe Down: Take off the screw bands once cool. Wipe jars to remove any residue so you can easily spot spoilage if it happens.
- Label Every Jar: I write the name and canning date on each lid or label. It’s the easiest way to use up the oldest jars first.
- Store in a Cool, Dark Place: Your best bet is a pantry or cupboard away from heat and sunlight. Extreme temperatures can break seals or fade flavors.
Most home-canned tomatillo salsa holds its quality for 12 to 18 months. I always use the oldest jars first, but if you spot cloudy liquid, leaks, or bulging lids, toss the jar. Safety comes first, always.
Troubleshooting tips:
- If you find a jar that didn’t seal, refrigerate and use it within a week.
- Never consume from jars with broken seals or signs of spoilage.
Want to dig deeper into safe home canning, including the importance of using tested recipes? Explore my favorite Safe Canning Resources and keep your pantry delicious and worry-free.
Serving Ideas
Nothing makes a homemade tomatillo salsa recipe shine like bringing it to the table in new and delicious ways. This salsa has a real pop of tang and gentle heat, making it one of my favorite jars to pull from the pantry. If you want to serve it for a quick snack or as the star ingredient in a family meal, there’s no shortage of creative ideas. Here are some of the best ways I like to enjoy and share my tomatillo salsa.
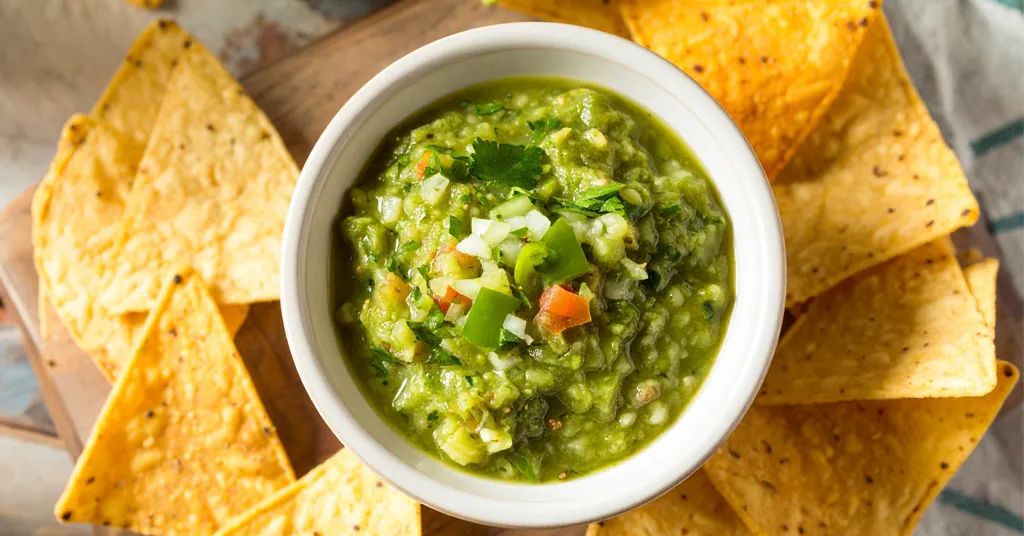
Classic Dipping and Snacking
The easiest way to use this salsa is as a dip. Pour it into a bowl, grab a bag of tortilla chips, and let everyone dig in. The fresh and slightly spicy flavors beat any store-bought salsa. It’s also ideal for a platter of cut veggies or as a topping for nachos.
Taco Night Upgrade
Tomatillo salsa turns any taco into a must-make meal. Spoon it over grilled chicken, beef, or fish tacos. The bright tang balances rich meats perfectly and adds just enough heat. Try drizzling it over breakfast tacos or even scrambled eggs for a flavor boost.
Topping for Grilled Proteins
I love how tomatillo salsa brings life to grilled chicken, steak, or pork chops. Just a spoonful on top, right before serving, adds color and taste. It’s like giving your favorite grilling recipes a flavorful summer upgrade. For a plant-based twist, use it as a topper for grilled portobello mushrooms or roasted cauliflower steaks.


Marinade and Cooking Sauce
Don’t stop at dipping. This salsa makes an excellent marinade. Coat chicken, shrimp, or pork in a few tablespoons of salsa before grilling or roasting. The acidity helps tenderize the meat while the spices soak in deep. You can also stir some into a pan with roasted veggies or shredded chicken for quick enchiladas or chilaquiles.
Tomatillo salsa is one of those jars in the pantry that never go to waste. Any time you want a splash of bright, bold flavor, reach for it. You’ll wow your tastebuds and keep mealtime exciting all year long.
Additional Salsa Recipes
Interested in some additional ideas for Salsa Recipes? Find many safe and tested salsa recipes on my site.
Recipe Card
Tomatillo Salsa Recipe
Equipment
- Large stainless steel pot or enameled dutch oven
- Enameled Dutch Oven or large stainless steel pot
- Water Bath Canner or Steam Canner
- Steam Canner or Water Bath Canner
Ingredients
- 5 1/2 cups chopped, cored, husked tomatillos
- 1 cup chopped onion
- 1 cup chopped, seeded green jalapenos
- 4 cloves finely chopped garlic
- 1/2 cup White Vinegar (5% acidity)
- 4 tbsp Lime Juice
- 2 tbsp finely chopped cilantro
- 2 tsp Ground Cumin
- 1/2 tsp salt
- 1/2 tsp Hot Pepper Flakes
Instructions
- Clean jars and lids with warm, soapy water. Ensure the jars do not have any chips or bubbles in the glass.
- Husk, core, and chop your tomatillos.
- While wearing gloves. Seed and chop your jalapeno peppers.
- Chop your onion.
- Finely chop your garlic cloves and cilantro.
- Combine all ingredients in an enameled Dutch oven or Stainless Steel Pot. Bring to a boil over medium-high heat, stirring constantly.
- Reduce the hear and boil gently, stirring frequently, for about 10 minutes.
- Prepare your cannerUsing Water Bath Canner: Put your water bath canner on your stove. Add your canning rack to the water bath canner. Add your pint jars to the water bath canner. They will warm as you heat the water. Add enough water to cover jars with at least 2-3 inches of water. Start to bring your water to a boil.Using a Steam Canner: Put your steam canner on your stove. Add the steam canner rack to the bottom of the steam canner. Add the recommended amount of water to the steam canner according to the manufacturer. Add your pint jars to the steam canner. Put the lid on your steam canner and start your stove. The jars will warm as you heat your steam canner.
- Once you have hot jars and hot salsa.Water Bath Canner:Remove your jars from the water bath canner one at a time using your jar lifter. Dump the water out of the jar into your water bath canner to ensure there is still 2-3 inches of water above your jars.Steam Canner:Remove the steam canner lid and remove your jars one at a time using your jar lifter.
- Ladle hot salsa into hot jar, leaving 1/2 inch (1 cm) headspace. (Check with a headspace measurer.) Remove air bubbles with a de-bubbler and adjust the headspace by adding more hot salsa if necessary.
- Wipe the rim to ensure a good seal is made with the lid. Center the lid on the jar and screw the band down to fingertip tight.
- Using your jar lifter, place the full jar back into the canner. Repeat the process until all salsa is used.
- Water Bath Canner:Lower the water bath canner rack into the boiling water. Ensure your jars are covered by at least 2 inches of water.If your water is not boiling, start your processing time when the water is boiling. Process pint jars for 15 minutes. Make sure to adjust your time for altitude.Set a timer, it makes it much easier to make sure you process for the correct time. When your timer goes off, turn off the heat and remove the canner lid.Leave the jars in the water for 5 minutes.Steam Canner:Put the lid on the steam canner. Turn your stove on high until your steam canner water comes to a vigorous boil. Continue heating so the indicator is in the correct "Zone" per your altitude. Start your processing time when the needle reaches the maximum point you have tested your steam canner to reach in your "Zone".Adjust the burner so that it maintains an even rolling boil throughout the entire processing time. Usually, this will be much lower than where it was set for the vigorous boil. If the top lid is lifting and/or spitting water from the edges, this is an indication that you have the heat turned up too high. Slowly reduce the heat until this stops. Watch the indicator to ensure the temperature does not decrease.The processing times for steam canning are the same as for water bath canning. Process pint jars for 15 minutes.Make sure to adjust your time for altitude. Set a timer, it makes it much easier to make sure you process for the correct time.When your timer goes off, turn off the heat and let the canner stand for 5 minutes with the lid on before removing the jars. The lid MUST remain ON the canner during this time. This cool-down period is necessary to ensure the jar contents are properly processed.Carefully remove the lid by tilting it away from you to avoid steam burns.
- Using your jar lifter, carefully move the jars onto a wire rack or kitchen towel to allow them to cool. When moving the jars, try not to tilt them to the side, as this could affect the seal of the jars. Allow your jars to cool for 12-24 hours before handling.
- Once cool, remove the canning rings from the jars. Wash your jars off to ensure no food residue is on the outside of the jars from processing. Label your jar with the name of the recipe and date. This will help you remember what recipe you used to can, and the date will allow you to use the oldest canned goods first.