

Nothing says summer like a Homemade Peach Jam Recipe bubbling on the stove. If you love old-school flavor and the satisfaction of home canning, this Peach Jam Recipe is a must-make every peach season. Using ripe yellow peaches, this method ensures a safe and classic result that families have counted on for generations.
Canning your peach jam means you get to enjoy sweet, sun-kissed flavor all year long, not just when peaches are in season. You’ll find simple steps, trusted canning tips, and real-life advice that make home food preservation easy and rewarding. For more on preserving your summer haul, check out these helpful Tips for Preserving Peaches.
Essential Ingredients and Equipment for Peach Jam
Before you get started with your Peach Jam Recipe, having the right ingredients and equipment is key. This part of homemade jam making sets you up for sweet, spreadable success. By gathering everything ahead of time, you cut down on stress and make sure your jam turns out safe and delicious. Let’s break down exactly what you need for a true Classic Peach Jam Recipe that any home food preserver will love.
Key Ingredients for a Peach Jam Recipe
It’s tempting to experiment, but classic jams rely on a few tried-and-true staples. When making a Homemade Peach Jam Recipe, don’t substitute or skip ingredients, especially if you’re planning to can your jam for later.
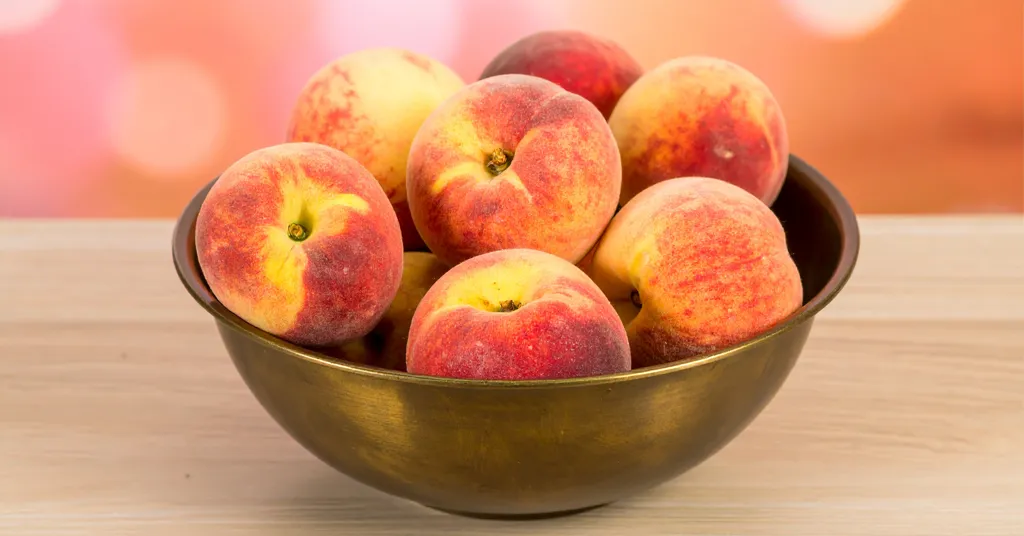
- Yellow Peaches: Only use yellow peaches for canning. They’re the gold standard for jam, both in flavor and food safety. White peaches lack enough acid to safely can.
- Bottled Lemon Juice: A must-have for safe preserving. Bottled lemon juice ensures consistent acid levels, which is important when canning peaches.
- Powdered Fruit Pectin: Look for regular powdered pectin. This ingredient helps your Homemade Peach Jam set perfectly every time.
- Granulated Sugar: Essential for flavor, texture, and food safety. Sugar helps create the gel in jam and acts as a preservative.
Here’s a simple ingredient list for one batch (6 Half-Pint Jars) of Peach Jam Canned using the Ball Peach Jam Recipe from the Ball Canning Back to Basics book:
- 2 2/3 cups peeled, chopped, ripe yellow peaches
- 2 tablespoons bottled lemon juice
- 3 tablespoons regular powdered fruit pectin
- 3 1/3 cups granulated sugar
These proportions are tried and true for a Peach Jam Recipe for Canning. Avoid lowering the sugar or swapping in white peaches to make sure your jam stays safe and shelf-stable.
Must-Have Equipment for Homemade Peach Jam
The right tools keep things running smoothly and make the whole process a lot more fun. If you love food preservation, these are items you’ll use again and again:
- Large Stainless Steel Pot or Enamel Dutch Oven: Deep enough to prevent bubbling fruit from splattering your stove.
- Canner: Either a water bath canner or a steam canner works for jam. Each needs a canning rack.
- Half-Pint Canning Jars, Lids, and Bands: Check for chips or cracks before using so you get a proper seal.
- Jar Lifter: Keeps you safe by letting you lift hot jars out of boiling water without burning your hands.
- Ladle and Funnel: Make it easy to get hot jam into jars with less mess.
- De-bubbler or Chopstick: Removes air bubbles from jars before sealing.
- Headspace Measurer: Ensures you leave the right amount of space for a good seal.
Keeping your tools clean is as important as having the right ones. Wash jars, lids, and utensils with warm, soapy water before getting started.
With this lineup, your Classic Peach Jam Recipe is set for smooth sailing. Gathering every ingredient and piece of equipment before you start takes the stress out of canning and lets you enjoy the fun part—watching summer’s best fruit turn into a homemade treat. If you want inspiration for what else you can preserve this season, check out the Best Recipes for Jam and Jelly.
Preparing Peaches for Jam and Canning
Getting your peaches prepped is one of the most important steps in making any Homemade Peach Jam Recipe. Taking a few minutes to prep your peaches pays off with a jam that’s bright, flavorful, and safe for canning. This part of the process is easy and even a little fun. You’ll feel like a homesteader, turning baskets of fresh peaches into jars of gold.
Why Acid Matters: Only Use Yellow Peaches
Food safety should always come first when making a Peach Jam Recipe for Canning. Only yellow peaches have enough natural acid to keep home-canned jam safe. That’s not just tradition, it’s science. The acid in yellow peaches, along with added lemon juice, keeps harmful bacteria like botulism at bay during water bath canning.
White peaches do not have the same acidity. They might be sweet and juicy, but they just don’t cut it when it comes to safe preserving. Even with added lemon juice, you can’t guarantee the right pH level every time. That’s why every Canning Peach Jam Recipe always calls for yellow peaches, never white.
If you’re curious about why acidity is so important, it’s tied directly to canning safety. High-acid foods like yellow peaches are perfect for water bath canning, a method trusted by generations of home preservers. For a deeper look, you can visit this helpful comparison of Water Bath vs Pressure Canning.

Step-by-Step Process: Cooking and Canning Peach Jam
You’ve gathered your yellow peaches, lined up your jars, and set the kitchen buzzing with excitement. Now it’s time to turn those summer fruits into a Classic Peach Jam Recipe you’ll be proud to put on your shelf. In this section, you’ll find clear, reassuring steps to help you cook and can your jam the safe and easy way.
Prepare Peaches
Start by rinsing the yellow peaches under cool water to remove dirt or debris. Pat them dry with a clean towel or kitchen cloth.
Peel, pit, and chop the yellow peaches to measure 2 2/3 cups.
Prepare Jars and Canner
Clean jars and lids with warm, soapy water. Ensure the jars do not have any chips or bubbles in the glass.
Using Water Bath Canner:
Put your water bath canner on your stove. Add your canning rack to the water bath canner. Add your 1/2 pint jars to the water bath canner. They will warm as you heat the water. Add enough water to cover jars with at least 2-3 inches of water. Start to bring your water to a boil.
Using a Steam Canner:
Put your steam canner on your stove. Add the steam canner rack to the bottom of the steam canner. Add the recommended amount of water to the steam canner according to the manufacturer. Add your 1/2 pint jars to the steam canner. Put the lid on your steam canner and start your stove. The jars will warm as you heat your steam canner.
Cooking Peach Jam
Stir together the peaches and the lemon juice in a large, deep stainless steel pot or enameled Dutch oven.
Stir in the pectin.
Over high heat, bring the mixture to a full rolling boil that cannot be stirred down. Stirring constantly.
Add the sugar, stirring to dissolve. Return to a full rolling boil. Boil hard for 1 minute, stirring constantly.
Remove from the heat and skim off the foam from the top of the jam. Note: Foam accumulates on the surface of soft spreads as air is released from the fruit during cooking. To reduce foaming, add up to 1/2 tsp (2mL) butter or margarine to the recipe before cooking. This will reduce surface tension and thus reduce the buildup of air bubbles of foam.
Filling Jars and Processing Peach Jam Recipe
Once you have hot jars and hot jam.
Water Bath Canner:
Remove your jars from the water bath canner one at a time using your jar lifter. Dump the water out of the jar into your water bath canner to ensure there is still 2-3 inches of water above your jars.
Steam Canner:
Remove the steam canner lid and remove your jars one at a time using your jar lifter.
Ladle hot jam into hot jars, leaving 1/4 inch (.5 cm) headspace (Check with headspace measurer). Remove air bubbles with a de-bubbler and adjust the headspace by adding more hot jam if necessary.
Wipe the rim to ensure a good seal is made with the lid. Center the lid on the jar and screw the band down to fingertip tight.
Water Bath Canner:
Lower the water bath canner rack into the boiling water. Ensure your jars are covered by at least 2 inches of water.
If your water is not boiling start your processing time when the water is boiling. Process 1/2 pint jars for 10 minutes. Make sure to adjust your time for altitude.
Set a timer, it makes it much easier to make sure you process for the correct time. When your timer goes off turn off the heat and remove the canner lid.
Leave the jars in the water for 5 minutes.
Steam Canner:
Put the lid on the steam canner. Turn your stove on high until your steam canner water comes to a vigorous boil. Continue heating so the indicator is in the correct “Zone” per your altitude.
Start your processing time when the needle reaches the maximum point you have tested your steam canner to reach in your “Zone”.
Adjust the burner so that it maintains an even rolling boil throughout the entire processing time. Usually, this will be much lower than where it was set for the vigorous boil. If the top lid is lifting and/or spitting water from the edges, this is an indication that you have the heat turned up too high. Slowly reduce the heat until this stops. Watch the indicator to ensure the temperature does not decrease.
The processing times for steam canning are the same as for water bath canning. Process 1/2 pint jars for 10 minutes.
Make sure to adjust your time for altitude. Set a timer, it makes it much easier to make sure you process for the correct time.
When your timer goes off, turn off the heat and let the canner stand for 5 minutes with the lid on before removing the jars. The lid MUST remain ON the canner during this time. This cool-down period is necessary to ensure the jar contents are properly processed.
Carefully remove the lid by tilting it away from you to avoid steam burns.
Using your jar lifter, carefully move the jars onto a wire rack or kitchen towel to allow them to cool. When moving the jars, try not to tilt them to the side, as this could affect the seal of the jars. Allow your jars to cool for 12-24 hours before handling.
Once cool, remove the canning rings from the jars. Wash your jars off to ensure no food residue on the outside of the jars from processing. Label your jar with the name of the recipe and date. This will help you remember what recipe you used to can, and the date will allow you to use the oldest canned goods first.

Troubleshooting: Foam, Boiling, and Common Issues
Every home food preserver runs into a hiccup or two. Cooking and canning peach jam can sometimes throw a curveball, from fighting off foamy bubbles to jars that just won’t seal. Here’s what you need to know to get smooth, consistent results and fix common issues without the stress.
Foam on Top of the Jam
- It’s normal for a frothy layer of foam to form when your Peach Jam Recipe is boiling hard.
- Foam looks harmless but can make your jam cloudy and give the lid seal a headache.
- Right after boiling, take your jam off the heat and use a spoon to gently skim off any foam. If you work quickly, you’ll catch it before it sets.
- To reduce foaming, it is safe to add up to 1/2 tsp (2mL) butter or margarine to the recipe before cooking. This will reduce surface tension and thus reduce the buildup of air bubbles of foam.
Trouble Reaching a Rolling Boil
- Getting to a full rolling boil, one that can’t be stirred down, is key for activating the pectin in your Homemade Peach Jam Recipe. Without this step, your jam may not set.
- Use high heat and stir constantly. Make sure you’re using a large, deep pot so the bubbling jam doesn’t splatter.
- If you’re struggling, check for these common culprits:
- Not enough heat (turn up the burner if needed)
- Old or expired pectin (fresh pectin matters)
- Too much fruit or liquid in the pot
- Only start timing your “hard boil” minute when you see big bubbles all across the surface, even when stirring.
Jars Not Sealing
- Proper seals keep your Peach Jam Canned shelf-stable and safe to eat.
- Always check that your jars, lids, and rims are clean and free from chips. Wipe rims after filling jars to remove any sticky residue.
- Use fresh lids and screw the bands fingertip-tight (not cranked as tight as possible).
- After processing, listen for that cheerful “ping.” The center of each lid should be concave and shouldn’t flex when pressed.
- If a jar didn’t seal, pop it in the fridge and eat it soon, or reprocess it within 24 hours with a fresh lid.
Making peach jam at home is one of those simple joys that never gets old. A Classic Peach Jam Recipe does more than fill your pantry. It gives your family a taste of summer even in the middle of winter. By following safe canning steps, you can count on a shelf-stable sweet reward of preserving your classic peach jam recipe.
Recipe Card
Peach Jam Recipe
Equipment
- Large stainless steel pot or Enameled Dutch Oven
- Enameled Dutch Oven or Large stainless steel pot
- Water Bath Canner or Steam Canner
- Steam Canner or Water Bath Canner
Ingredients
- 2 2/3 Cups Chopped, Peeled, Ripe Yellow Peaches
- 2 Tbsp Bottled Lemon Juice
- 3 Tbsp regular powdered fruit pectin
- 3 1/3 Cups Granulated Sugar
Want to Save this Recipe?
Instructions
- Clean jars and lids with warm, soapy water. Ensure the jars do not have any chips or bubbles in the glass.
- Start by rinsing the yellow peaches under cool water to remove dirt or debris. Pat them dry with a clean towel or kitchen cloth.
- Peel, pit, and chop the yellow peaches to measure 2 2/3 cups.
- Prepare your cannerUsing Water Bath Canner: Put your water bath canner on your stove. Add your canning rack to the water bath canner. Add your 1/2 pint jars to the water bath canner. They will warm as you heat the water. Add enough water to cover jars with at least 2-3 inches of water. Start to bring your water to a boil.Using a Steam Canner: Put your steam canner on your stove. Add the steam canner rack to the bottom of the steam canner. Add the recommended amount of water to the steam canner according to the manufacturer. Add your 1/2 pint jars to the steam canner. Put the lid on your steam canner and start your stove. The jars will warm as you heat your steam canner.
- Stir together the peaches and the lemon juice in a large, deep stainless steel pot or enameled Dutch oven.
- Stir in the pectin.
- Over high heat, bring the mixture to a full rolling boil that cannot be stirred down. Stirring constantly.
- Add the sugar, stirring to dissolve. Return to a full rolling boil. Boil hard for 1 minute, stirring constantly.
- Remove from the heat and skim off the foam from the top of the jam.
- Once you have hot jars and hot jam.Water Bath Canner:Remove your jars from the water bath canner one at a time using your jar lifter. Dump the water out of the jar into your water bath canner to ensure there is still 2-3 inches of water above your jars.Steam Canner:Remove the steam canner lid and remove your jars one at a time using your jar lifter.
- Ladle hot jam into hot jars, leaving 1/4 inch (.5 cm) headspace (Check with headspace measurer). Remove air bubbles with a de-bubbler and adjust the headspace by adding more hot jam if necessary.
- Wipe the rim to ensure a good seal is made with the lid. Center the lid on the jar and screw the band down to fingertip tight.
- Water Bath Canner:Lower the water bath canner rack into the boiling water. Ensure your jars are covered by at least 2 inches of water.If your water is not boiling start your processing time when the water is boiling. Process 1/2 pint jars for 10 minutes. Make sure to adjust your time for altitude.Set a timer, it makes it much easier to make sure you process for the correct time. When your timer goes off turn off the heat and remove the canner lid.Leave the jars in the water for 5 minutes.Steam Canner:Put the lid on the steam canner. Turn your stove on high until your steam canner water comes to a vigorous boil. Continue heating so the indicator is in the correct "Zone" per your altitude. Start your processing time when the needle reaches the maximum point you have tested your steam canner to reach in your "Zone".Adjust the burner so that it maintains an even rolling boil throughout the entire processing time. Usually, this will be much lower than where it was set for the vigorous boil. If the top lid is lifting and/or spitting water from the edges this is an indication that you have the heat turned up too high. Slowly reduce the heat until this stops. Watch the indicator to ensure the temperature does not decrease.The processing times for steam canning are the same as for water bath canning. Process 1/2 pint jars for 10 minutes.Make sure to adjust your time for altitude. Set a timer, it makes it much easier to make sure you process for the correct time.When your timer goes off turn off the heat and let the canner stand for 5 minutes with the lid on before removing the jars. The lid MUST remain ON the canner during this time. This cool-down period is necessary to ensure the jar contents are properly processed.Carefully remove the lid by tilting it away from you to avoid steam burns.
- Using your jar lifter, carefully move the jars onto a wire rack or kitchen towel to allow them to cool. When moving the jars, try not to tilt them to the side, as this could affect the seal of the jars. Allow your jars to cool for 12-24 hours before handling.
- Once cool, remove the canning rings from the jars. Wash your jars off to ensure no food residue on the outside of the jars from processing. Label your jar with the name of the recipe and date. This will help you remember what recipe you used to can, and the date will allow you to use the oldest canned goods first.


No Comment! Be the first one.