

Nothing compares to this homemade raspberry jam recipe when you want a burst of bright, pure fruit flavor. It’s no wonder that making raspberry jam is a favorite project for home canners around the country. The mix of sweet-tart berries with a hint of real summer in every spoonful keeps homemade raspberry jam at the top of most “must make” lists.
This easy raspberry jam recipe with pectin uses just a few pantry staples—crushed raspberries, a little powdered pectin, and sugar. You’ll get all the sweetness you love without endless stirring. Making raspberry jam at home lets you control the ingredients, skip the store-bought stuff, and fill your shelves with something that’s truly the best raspberry jam recipe you’ll taste.
If you’re looking for more tasty ideas for your canning adventures, you’ll love checking out some of my other jam and jelly preserving recipes. Get ready to enjoy this tried-and-true small batch raspberry jam—perfect for toast, desserts, or sharing with friends.
Selecting and Preparing Raspberries
Great homemade raspberry jam starts with ripe, flavorful fruit. The berries you choose and how you handle them makes a big difference in the final flavor and texture of your batch. Before you start this raspberry jam recipe, set yourself up for success with some simple steps for choosing and prepping your berries.
Picking the Best Raspberries
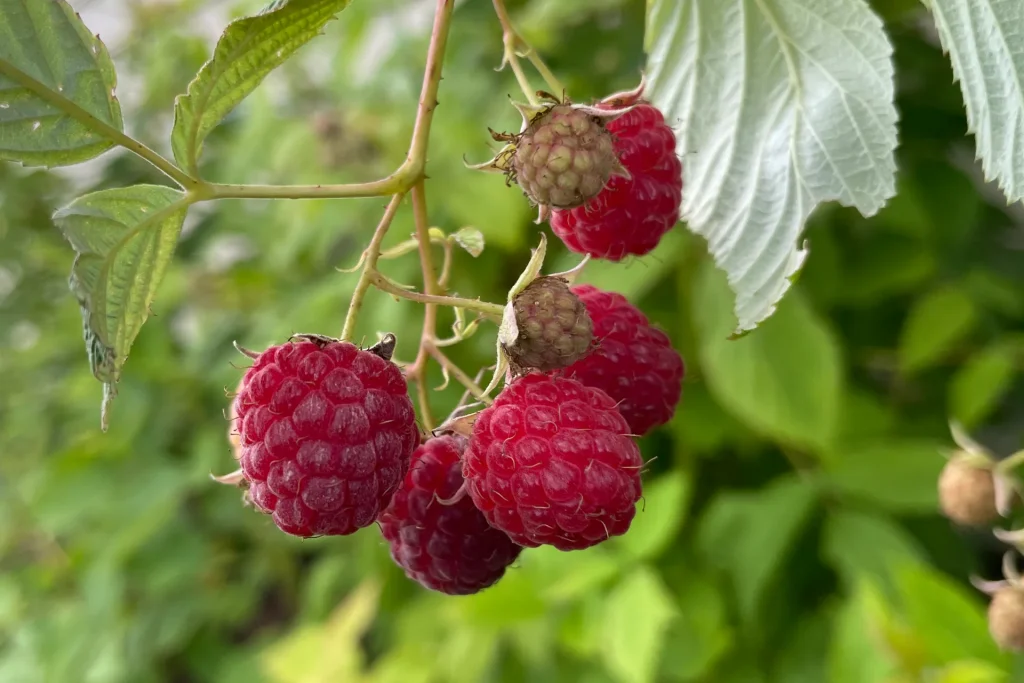
Fresh, ripe raspberries are key for jam with lively color and bold flavor. When I shop or pick my own, I always look for berries that are:
- Bright red and plump: Skip any berries that look dull or feel mushy.
- Free from mold or soft spots: Even one spoiled berry can throw off the whole batch.
- Dry and fragrant: Excess moisture leads to mushy results.
Using underripe berries can make your jam taste bland, while overripe ones can cause it to spoil quicker. I like to plan my jam-making for when berries are just at their peak. If you grow your own or visit a local farm, pick early in the day after the dew has dried.
Washing and Sorting
It’s tempting to dump raspberries right into your bowl, but a little care here helps your small batch raspberry jam shine.
- Rinse gently: Place berries in a large colander and give them a quick, light rinse with cool water.
- Drain well: Lay them out on a towel and allow them to dry for a few minutes. This prevents extra water in your jam.
- Pick out debris: Remove leaves, stems, and any spoiled or unripe berries.
Handle raspberries with care. They’re delicate, and too much pressure will crush them before you’re ready.
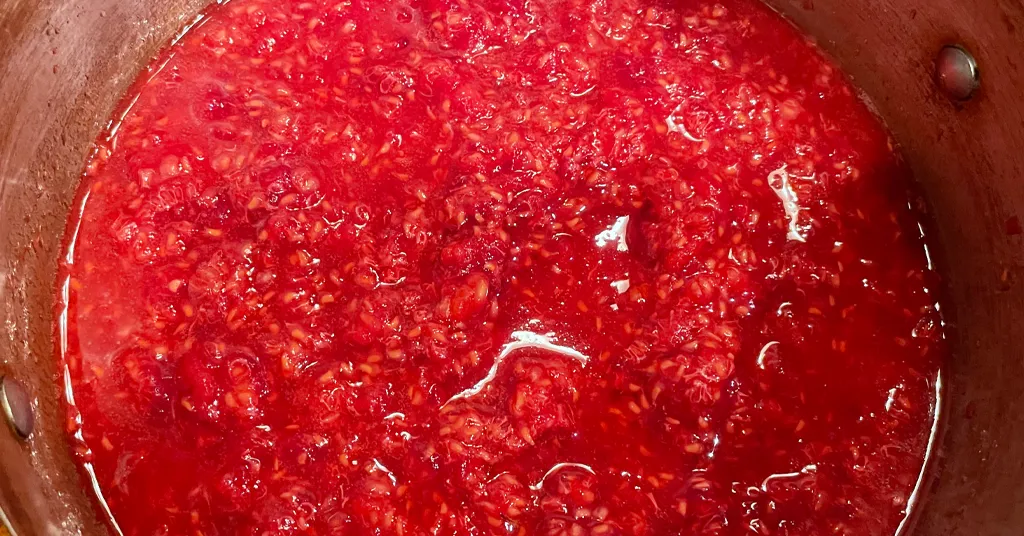
Crushing the Berries for Raspberry Jam
How you crush your raspberries affects the texture of your homemade jam. I like to use a potato masher for just the right amount of control. For this standard raspberry jam recipe with pectin, you’ll need 2 2/3 cups of crushed raspberries.
- Mash in small batches: Doing a bit at a time gives you a nice, even consistency.
- Leave some chunks: If you want a rustic jam, avoid turning the berries into puree. Some whole pieces give a classic texture.
Crushing them right before you start making raspberry jam locks in that fresh flavor.
Interested in other combinations? Try adding a twist to your jams by checking out this flavorful Cranberry Raspberry Jam Recipe for more inspiration.
Essential Ingredients and Equipment for this Raspberry Jam Recipe
Before you start making your own batch of homemade raspberry jam, you’ll want to get familiar with the key ingredients and the tools you’ll need. Having everything prepped and ready at the start makes even a small batch jam session smooth and fun. There’s nothing worse than getting mid-recipe and realizing you’re missing something important.
The Essential Ingredients
Success with any raspberry jam recipe starts with a simple list of pantry basics. Here’s what you’ll need for this easy raspberry jam recipe with pectin:
- Crushed raspberries (2 2/3 cups): Use those freshly washed and prepped berries from earlier. This is the real flavor star in every spoonful.
- Powdered pectin (3 tablespoons): Pectin is what helps the jam thicken without endless boiling.
- Sugar (3 1/3 cups): Regular granulated sugar does the trick. It’s the key to getting a balance of sweetness while helping the jam keep its shape and bright color.
If you’re curious about taking your raspberries in a chocolatey direction, the chocolate raspberry sauce recipe is a fun twist to try later.
Must-Have Equipment for Making Raspberry Jam
Savvy home canners swear by having their gear organized before the first pot goes on the stove. Even for a small batch of raspberry jam, having the right equipment at the ready helps everything go smoothly.
Here’s a quick rundown of what you’ll want at your side:
- Large, heavy-bottomed saucepan: This is where the magic happens. A wide pan helps prevent burning and allows the jam to cook evenly.
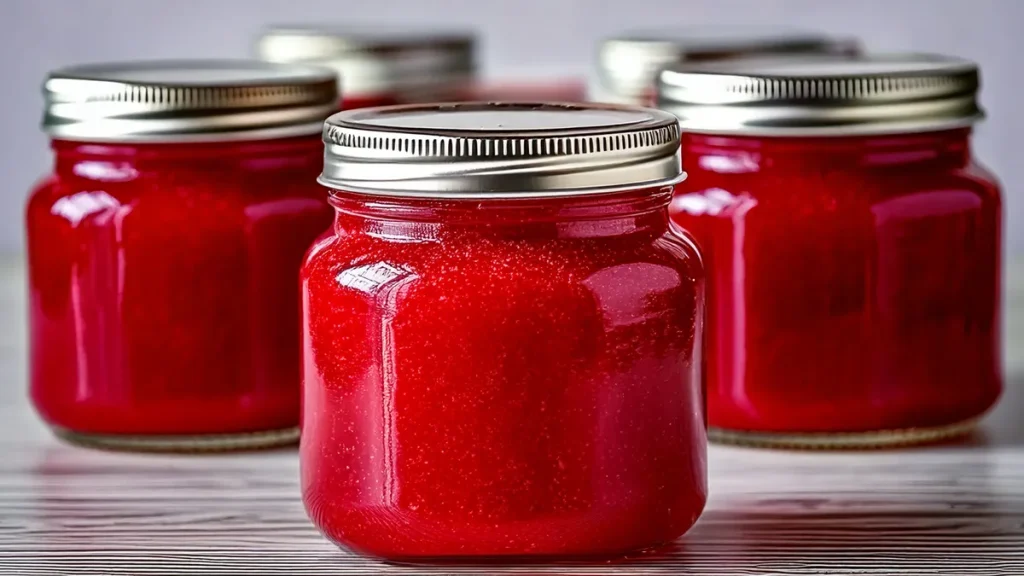
- Canning jars and lids: Half-pint jars work best for this recipe and are the perfect size for shelf storage or gifting.
- Jar lifter: Lifting piping hot jars out of boiling water is much easier (and safer!) with a jar lifter.
- Canning funnel: This keeps the sticky jam inside your jars, not all over your counter.
- Ladle: Great for scooping jam into jars without the mess.
- Potato masher: Perfect for crushing berries if you want chunky jam.
- Clean towels: For wiping jar rims and catching drips.
A water bath canner or a steam canner is handy if you’re preserving jars for longer storage, but any deep pot with a rack in the bottom will work for small batches.
The best raspberry jam recipe comes together when you start with fresh fruit, follow a trusted recipe, and make sure your equipment is ready to go. Once you’ve made a batch, you might want to try another flavor, like the old-fashioned approach in this delicious Apricot Jam Recipe. Keeping your tools close and ingredients simple makes jam making something special and doable, even on a busy weeknight.

Step-by-Step Raspberry Jam Recipe Instructions
Ready to turn those fresh raspberries into delicious, shelf-stable jam? Below, I’ll walk you through the exact process I follow for making raspberry jam with pectin. Get your ingredients measured out and your equipment in place, this is the fun part.
Raspberry Jam Recipe Canning Instructions
Canning raspberry jam at home is simple, but a few safety steps are important if you want a pantry stocked with tasty jam all year.
Prepare Jars and Canner
Clean jars and lids with warm soapy water. Ensure the jars do not have any chips or bubbles in the glass.
Prepare your canner
Using Water Bath Canner:
Put your water bath canner on your stove. Add your canning rack to the water bath canner. Add your 1/2 pint jars to the water bath canner. They will warm as you heat the water. Add enough water to cover jars with at least 2-3 inches of water. Start to bring your water to a boil.
Using a Steam Canner:
Put your steam canner on your stove. Add the steam canner rack to the bottom of the steam canner. Add the recommended amount of water to the steam canner according to the manufacturer. Add your 1/2 pint jars to the steam canner. Put the lid on your steam canner and start your stove. The jars will warm as you heat your steam canner.
Making Raspberry Jam
Measure sugar into a bowl and set aside. The sugar is added all at once so make sure to measure it ahead of time.
In a colander placed over a sink, wash the raspberries in cool running water. Drain thoroughly.
In a glass pie plate or flat-bottomed bowl, place a single layer of raspberries. Using a potato masher, crush berries and transfer them to a 1-cup (250 mL) liquid measuring cup.
As you accumulate each cup (250 mL), transfer crushed berries to a large, deep stainless steel pot. Repeat until you have 2 2/3 cups (650 mL) of crushed raspberries in the pot.
Add pectin to fruit. Whisk in pectin until dissolved. Over high heat, stirring constantly, bring the contents to a full rolling boil that cannot be stirred down.
Add sugar all at once and stir constantly. Return to a full rolling boil that cannot be stirred down. Boil hard, stirring constantly, for 1 minute.
Remove from the heat and skim off foam from the top of the jam.

Fill Jars with Raspberry Jam
Once you have hot jars and hot jam.
Water Bath Canner:
Remove your jars from the water bath canner one at a time using your jar lifter. Dump the water out of the jar into your water bath canner to ensure there is still 2-3 inches of water above your jars.
Steam Canner:
Remove the steam canner lid and remove your jars one at a time using your jar lifter.
Ladle hot jam into hot jars, leaving 1/4 inch (.5 cm) headspace (Check with headspace measurer). Remove air bubbles with a de-bubbler and adjust the headspace by adding more hot jam if necessary.
Wipe the rim to ensure a good seal is made with the lid. Center the lid on the jar and screw the band down to fingertip tight.
Process Jars in Canner
Water Bath Canner:
Lower the water bath canner rack into the boiling water. Ensure your jars are covered by at least 2 inches of water.
If your water is not boiling, start your processing time when the water is boiling. Process 1/2 pint jars for 10 minutes. Make sure to adjust your time for altitude.
Set a timer, it makes it much easier to make sure you process for the correct time. When your timer goes off, turn off the heat and remove the canner lid.
Leave the jars in the water for 5 minutes.
Steam Canner:
Put the lid on the steam canner. Turn your stove on high until your steam canner water comes to a vigorous boil. Continue heating so the indicator is in the correct “Zone” per your altitude.
Start your processing time when the needle reaches the maximum point you have tested your steam canner to reach in your “Zone”.
Adjust the burner so that it maintains an even rolling boil throughout the entire processing time. Usually, this will be much lower than where it was set for the vigorous boil. If the top lid is lifting and/or spitting water from the edges, this is an indication that you have the heat turned up too high. Slowly reduce the heat until this stops. Watch the indicator to ensure the temperature does not decrease.
The processing times for steam canning are the same as for water bath canning. Process 1/2 pint jars for 10 minutes.
Make sure to adjust your time for altitude. Set a timer, it makes it much easier to make sure you process for the correct time.
When your timer goes off, turn off the heat and let the canner stand for 5 minutes with the lid on before removing the jars. The lid MUST remain ON the canner during this time. This cool-down period is necessary to ensure the jar contents are properly processed.
Carefully remove the lid by tilting it away from you to avoid steam burns.
Cool and Store
Using your jar lifter, carefully move the jars onto a wire rack or kitchen towel to allow them to cool. When moving the jars, try not to tilt them to the side, as this could affect the seal of the jars. Allow your jars to cool for 12-24 hours before handling.
Once cool, remove the canning rings from the jars. Wash your jars off to ensure no food residue on the outside of the jars from processing. Label your jar with the name of the recipe and date. This will help you remember what recipe you used to can, and the date will allow you to use the oldest canned goods first.
Safe canning gives your homemade raspberry jam a long shelf life and preserves the bright flavor. For more inspiration and the best recipes for different jams and jellies, visit my favorite Jam and Jelly Preserving Recipes collection. You’ll find tried-and-true methods that keep your pantry stocked and your breakfasts bright.

Making this Raspberry Jam Recipe from Frozen Raspberries
Frozen raspberries are a real gift when fresh berries are out of season or hard to find. You can still enjoy this easy raspberry jam recipe year-round, just by reaching into your freezer. If you’ve got a stockpile of frozen berries from last summer’s picking or found a great deal at the store, you’re in luck, this raspberry jam recipe works beautifully with frozen fruit. I’ve found the flavors stay bold, and the finished jam tastes just as bright as when fresh berries are in season.
Why Use Frozen Raspberries
You don’t have to wait for summer to make homemade raspberry jam. Frozen raspberries are picked at their peak and frozen quickly, holding onto their tart-sweet punch and deep color. Using frozen fruit helps you keep that taste of sunshine even in the middle of winter. Plus, you can make a small batch of raspberry jam any time you feel like it.
Preparing Frozen Raspberries for Jam
The best results come from thawing your berries before you start. Working with thawed fruit makes measuring and crushing easier and gives you a better texture in your jam:
- Pour the needed amount of frozen raspberries (2 2/3 cups, measured after crushing) into a large bowl.
- Let them thaw at room temperature or in the refrigerator until soft. This may take several hours, so plan ahead.
- Once fully thawed, check for excess liquid. You should keep most of the juice for maximum flavor and acidity.
- Gently mash the berries with a potato masher, leaving a few chunks for texture.
Don’t worry if the berries look a bit mushy—that’s just what you want for making raspberry jam.
Tips for Consistent Jam with Frozen Berries
Frozen raspberries have a little more water than fresh ones, which can sometimes make jam runnier. Here’s how I keep things on track:
- Add the powdered pectin (3 tablespoons) right to the crushed berries. Pectin helps set the jam even if there’s extra moisture.
- Use the full amount of sugar (3 1/3 cups) listed in this raspberry jam recipe with pectin. The sugar works with the pectin and the fruit acid to give a firm set.
- Bring the jam mixture to a full rolling boil, you can’t stir down before adding sugar—this activates the pectin.
- After adding sugar, return the mix to a hard boil for 1 minute, stirring all the while.
This simple method lets you enjoy the best raspberry jam recipe, even from the freezer. You don’t compromise on flavor or color.
Storing and Using Jam Made from Frozen Raspberries
Jam made from frozen raspberries will keep just as well as when you use fresh. Store your sealed jars in a cool, dark place, and enjoy them throughout the year.
Frozen raspberries are a smart choice, especially if you love making raspberry jam in the winter or want to stretch your summer harvest for later. Try this method the next time you see those bags of berries on sale. It’s your ticket to homemade raspberry jam, no matter the season.
Serving Suggestions and Uses for Homemade Raspberry Jam
Homemade raspberry jam is more than just a pretty jar on your pantry shelf. With its sweet-tart flavor and jewel-toned color, this small batch raspberry jam brings a burst of real fruit to so many foods. I love having a few jars on hand, not just for breakfast, but for snacks, desserts, and even savory meals. The best raspberry jam recipe is the one you reach for again and again, and with a little inspiration, you’ll find it shines everywhere.
Classic Spreads for Breakfast
Starting your day with raspberry jam is a tradition that never gets old. Here’s how I like to use it for quick breakfasts or weekend treats:
- Spread thick on toast or English muffins for simple, old-fashioned comfort.
- Tucked into warm biscuits or scones. Let the heat from fresh bread melt the jam a bit—there’s nothing better.
- Swirled into oatmeal or yogurt for a burst of color and flavor.
These breakfast ideas make your homemade raspberry jam the star of the morning, and kids love it in their lunchboxes on peanut butter and jam sandwiches, too.
Dessert Highlights
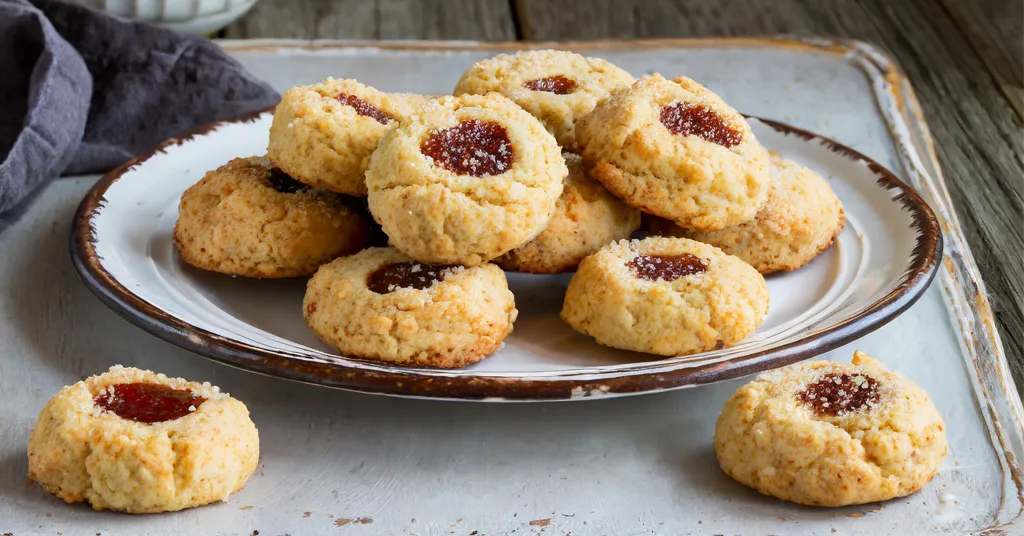
Raspberry jam can turn a basic dessert into a showstopper. If you’re craving something sweet, try these easy ideas:
- Bake it into thumbprint cookies. That bright red center is always a favorite at bake sales and holidays.
- Layer between cake or brownie layers to add moisture and a pop of berry flavor.
- Warm and drizzle over vanilla ice cream or cheesecake for a quick, impressive dessert.
- Blend into homemade milkshakes or smoothies for fruity punch and sweetness.
If you’re interested in tasting other unique fruit dessert ideas, the apple pie jam recipe is another favorite for a cozy, sweet treat.
Savory and Snack Pairings
You might be surprised how homemade raspberry jam fits with savory foods. I reach for it when making party snacks or cheese boards:
- Pair with soft brie, goat cheese, or sharp cheddar on a cracker for a sweet-salty bite.
- Spread on a turkey sandwich, especially with cream cheese, for a classic café-style lunch.
- Add as a glaze for roast chicken or pork—just warm jam with a splash of balsamic vinegar and brush it on for the last few minutes of cooking.
Jam doesn’t just have to be for breakfast foods. I love using it as a trusty ingredient every time I want something a bit special with very little effort.
If you want to explore more ways to enjoy preserved fruits, check out the differences between jam, jelly, and preserves so you can mix and match to suit every taste and occasion.
Homemade raspberry jam offers endless ways to brighten up snacks, meals, and desserts. It’s a true staple for any home food preserver, and every jar opens up a new possibility in your kitchen.
Recipe Card
Raspberry Jam Recipe
Equipment
- Water Bath Canner or Steam Canner
- Steam Canner or Water Bath Canner
Ingredients
- 2 2/3 cups Crushed Raspberries
- 3 1/3 cups Granulated Sugar
- 3 tbsp regular powdered fruit pectin
Want to Save this Recipe?
Instructions
- Clean jars and lids with warm soapy water. Ensure the jars do not have any chips or bubbles in the glass.
- Prepare your cannerUsing Water Bath Canner: Put your water bath canner on your stove. Add your canning rack to the water bath canner. Add your 1/2 pint jars to the water bath canner. They will warm as you heat the water. Add enough water to cover jars with at least 2-3 inches of water. Start to bring your water to a boil.Using a Steam Canner: Put your steam canner on your stove. Add the steam canner rack to the bottom of the steam canner. Add the recommended amount of water to the steam canner according to the manufacturer. Add your 1/2 pint jars to the steam canner. Put the lid on your steam canner and start your stove. The jars will warm as you heat your steam canner.
- Measure sugar into a bowl and set aside. The sugar is added all at once so make sure to measure it ahead of time.
- In a colander placed over a sink, wash the raspberries in cool running water. Drain thoroughly.
- With a Potato Masher:In a glass pie plate or flat-bottomed bowl, place a single layer of raspberries. Using a potato masher, crush berries and transfer them to a 1-cup (250 mL) liquid measuring cup.As you accumulate each cup (250 mL), transfer crushed berries to a large, deep stainless steel pot. Repeat until you have 2 2/3 cups (650 mL) of crushed raspberries in the pot.
- Add pectin to fruit. Whisk in pectin until dissolved.
- Over high heat, stirring constantly, bring the contents to a full rolling boil that cannot be stirred down.
- Add sugar all at once and stir constantly. Return to a full rolling boil that cannot be stirred down. Boil hard, stirring constantly, for 1 minute.
- Remove from the heat and skim off foam from the top of the jam.
- Once you have hot jars and hot jam.Water Bath Canner:Remove your jars from the water bath canner one at a time using your jar lifter. Dump the water out of the jar into your water bath canner to ensure there is still 2-3 inches of water above your jars.Steam Canner:Remove the steam canner lid and remove your jars one at a time using your jar lifter.
- Ladle hot jam into hot jars, leaving 1/4 inch (.5 cm) headspace (Check with headspace measurer). Remove air bubbles with a de-bubbler and adjust the headspace by adding more hot jam if necessary.
- Wipe the rim to ensure a good seal is made with the lid. Center the lid on the jar and screw the band down to fingertip tight.
- Water Bath Canner:Lower the water bath canner rack into the boiling water. Ensure your jars are covered by at least 2 inches of water.If your water is not boiling, start your processing time when the water is boiling. Process 1/2 pint jars for 10 minutes. Make sure to adjust your time for altitude.Set a timer, it makes it much easier to make sure you process for the correct time. When your timer goes off, turn off the heat and remove the canner lid.Leave the jars in the water for 5 minutes.Steam Canner:Put the lid on the steam canner. Turn your stove on high until your steam canner water comes to a vigorous boil. Continue heating so the indicator is in the correct "Zone" per your altitude. Start your processing time when the needle reaches the maximum point you have tested your steam canner to reach in your "Zone".Adjust the burner so that it maintains an even rolling boil throughout the entire processing time. Usually, this will be much lower than where it was set for the vigorous boil. If the top lid is lifting and/or spitting water from the edges, this is an indication that you have the heat turned up too high. Slowly reduce the heat until this stops. Watch the indicator to ensure the temperature does not decrease.The processing times for steam canning are the same as for water bath canning. Process 1/2 pint jars for 10 minutes.Make sure to adjust your time for altitude. Set a timer, it makes it much easier to make sure you process for the correct time.When your timer goes off, turn off the heat and let the canner stand for 5 minutes with the lid on before removing the jars. The lid MUST remain ON the canner during this time. This cool-down period is necessary to ensure the jar contents are properly processed.Carefully remove the lid by tilting it away from you to avoid steam burns.
- Using your jar lifter, carefully move the jars onto a wire rack or kitchen towel to allow them to cool. When moving the jars, try not to tilt them to the side, as this could affect the seal of the jars. Allow your jars to cool for 12-24 hours before handling.
- Once cool, remove the canning rings from the jars. Wash your jars off to ensure no food residue on the outside of the jars from processing. Label your jar with the name of the recipe and date. This will help you remember what recipe you used to can, and the date will allow you to use the oldest canned goods first.


No Comment! Be the first one.