

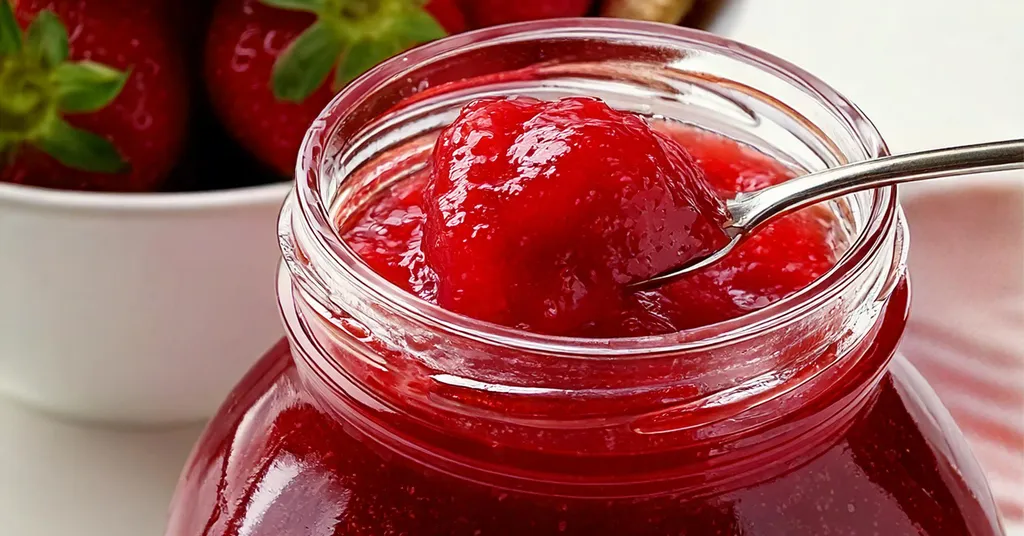
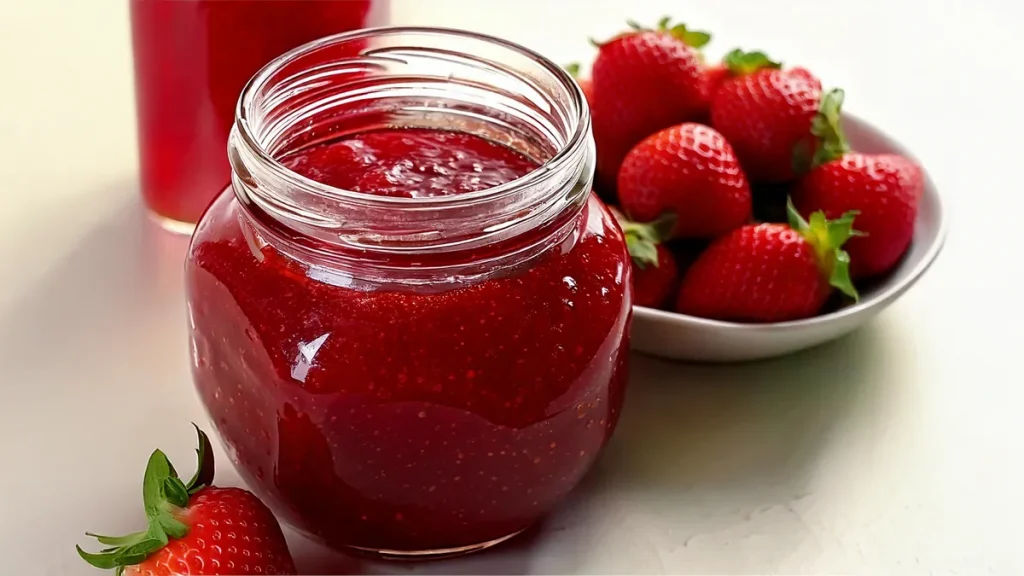
There’s something truly special about homemade strawberry jelly. It’s sweet, simple, and packed with real fruit flavor—just like summer in a jar. With this strawberry jelly recipe for canning, you’ll know exactly what’s going into your food while creating something that lasts well beyond the peak strawberry season. Plus, it doesn’t get much better than opening a jar of your own homemade strawberry jelly in the middle of winter. This recipe, adapted from the trusted Ball Canning Back to Basics Book, is not only easy but also yields four and a half jars of pure deliciousness. If you’re new to preserving, understanding the basics of water bath canning can help you get started with confidence.
Strawberry Jelly Ingredients
Before you dive into making this strawberry jelly recipe with pectin, let’s go over the ingredients you’ll need. It’s important to have everything prepped and ready for a smooth canning experience. The best part? These ingredients are simple and let the strawberries shine without unnecessary additives. Here’s what you’ll need to create a batch of delicious homemade strawberry jelly.
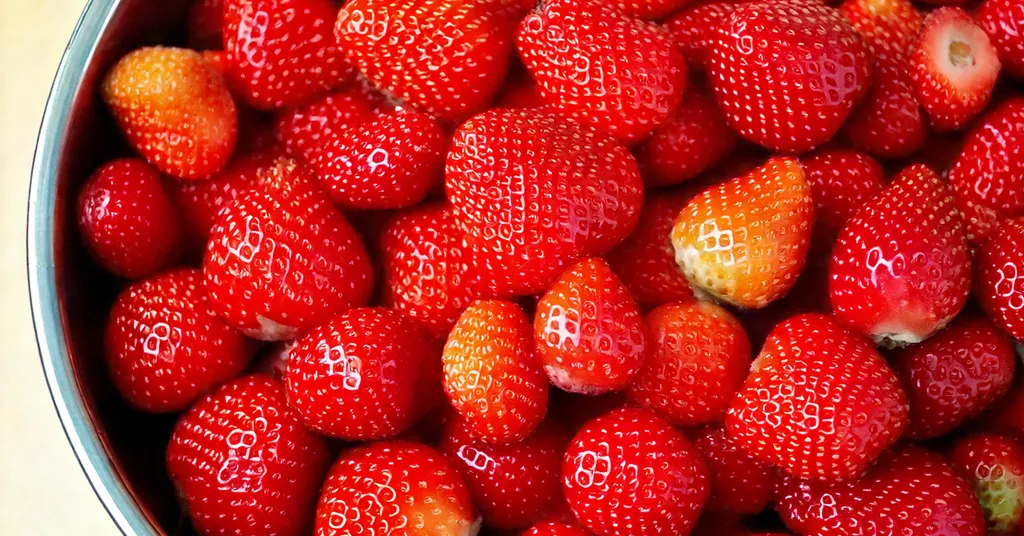
- 8 lbs Strawberries
- 4 tbsp Regular Powdered Fruit Pectin
- 3 1/3 cups Granulated Sugar
Fresh Strawberries
The foundation of any good strawberry jelly recipe is, of course, fresh and ripe strawberries. Look for strawberries that are bright red, firm, and fragrant. Avoid ones with bruises or moldy spots. Fresh strawberries make all the difference in both flavor and texture. Do you need help selecting strawberries for this Strawberry Jelly Canning Recipe? I have a great resource for Selecting Strawberries for Home Preservation.
Granulated Sugar
Sugar not only sweetens your jelly but also helps it set properly. It preserves the rich strawberry flavor and gives your jelly that glossy finish. Regular white granulated sugar works best for this recipe. Resist the urge to reduce the sugar, as it plays a key role in preserving the jelly’s texture and shelf life.
Powdered Pectin
Pectin is what makes your jelly set beautifully. Make sure to select a Regular Powdered Pectin. I typically use Original SureJell when making this strawberry jelly recipe with pectin.
Essential Equipment for Canning Strawberry Jelly
Making your strawberry jelly is satisfying, but having the right tools makes the process smoother and more enjoyable. If you’re a beginner or a seasoned canner, using the proper equipment ensures your strawberry jelly sets perfectly and stays shelf-stable. Let’s go over the essentials for this project!
- Knife
- Cutting Board
- Steam Juicer (Optional)
- Potato Masher
- Cheesecloth
- Mesh Strainer
- Large Bowl
- Liquid Measuring Cups
- Measuring Cups
- Large Stainless Steel Pot or Enameled Dutch Oven
- Water Bath Canner or Steam Canner
- 1/2 Pint Canning Jars
- Lids
- Bands
- 1/2 Pint Canning Ladle
- Canning Funnel
- Jar Lifter
- Headspace Measurer
- De-Bubbler
Step-by-Step Instructions for Making Homemade Strawberry Jelly
Making strawberry jelly at home isn’t just about the delicious taste—it’s a satisfying way to preserve the flavors of summer for later enjoyment.
Preparing the Strawberries
The foundation of any great strawberry jelly recipe starts with the right preparation. Washing, hulling, and crushing the strawberries properly ensures a smooth and consistent jelly texture.
- Wash and Hull: Start by rinsing your strawberries under cool running water. Remove the green tops using a hulling tool or simply pinch them off with your fingers. Make sure to discard any bruised or overripe berries.
- Crush the Berries: To achieve the best texture, crush your strawberries one layer at a time in a stainless steel pot or enameled Dutch oven. A potato masher works wonders for this step. If you find it difficult, you can pulse the berries gently in a food processor, but avoid over-pureeing.
- Simmer the Mixture: Bring the crushed strawberries to a boil, then cover and reduce the heat to let them simmer for five minutes. This helps release the juice.
- Strain for Juice: Using a mesh strainer lined with three layers of dampened cheesecloth, pour the strawberries into a bowl. Be patient—let it drain naturally for two to four hours until you have 3 cups of juice. Avoid squeezing or pressing the fruit, as this can make your jelly cloudy.
Steam Juicing: Alternate Juicing Method
Another option for extracting juice is using a steam juicer. This equipment simplifies the process and can be a great alternative if you already own one.
- Set Up Your Juicer: Add water to the bottom reservoir of the steam juicer, then stack the middle and top sections in place. Ensure the strawberries go into the top section.
- Begin Juicing: With the lid on, heat the juicer on medium-high until the water boils. Let it work its magic until you collect at least 3 cups of juice in the designated compartment.
Both methods work well—choose what’s easiest for you. The goal is to get clean, pure strawberry juice as the base for your jelly.

Preparing Canning Equipment for Strawberry Jelly Recipe
Getting your jars and equipment ready is a critical step for safe canning. Here’s how to prepare:
- Inspect and Wash Your Jars: Check each jar for any nicks, cracks, or imperfections. Wash them thoroughly in warm, soapy water.
- Prepare Your Lids: Clean your lids and bands, ensuring they’re free of debris and ready for sealing.
- Set Up the Canner:
- Using a Water Bath Canner: Place your canning rack inside the water bath canner. Fill it with enough water to cover the jars by 2–3 inches. Begin heating the water so it’s ready to boil when needed.
- Using a Steam Canner: Follow the manufacturer’s instructions to add the correct amount of water to the steam canner. Preheat with the lid on while preparing the jelly mixture.
Clean equipment is non-negotiable when it comes to safe food preservation. For more about the safety behind water bath canning, this resource is worth checking out.
Cooking the Jelly Mixture
This is where the magic happens. The cooking step turns your strawberry juice into the perfect jelly consistency.
- Combine the strawberry juice and pectin in a stainless steel pot or enameled Dutch oven. Stir constantly as you bring it to a rolling boil—this is a boil that doesn’t fade when stirred.
- Add the sugar, stirring vigorously to dissolve it completely.
- Return the mixture to a rolling boil and let it boil hard for exactly one minute while stirring constantly. Skipping this step could result in jelly that doesn’t set properly.
- Remove the pot from the heat and skim off any foam from the top, if necessary. Foam won’t affect the taste but can alter the texture.
Filling the Jars and Sealing
Properly filling and sealing the jars ensures your strawberry jelly stays fresh and shelf-stable.
- Hot Jars, Hot Jelly: Work with hot jars and jelly to avoid cracking or improper sealing.
- Water Bath Canner: Remove jars from the boiling water using a jar lifter and pour out the water into your canner.
- Steam Canner: Remove jars carefully from the preheated steam canner.
- Ladle the Jelly: Use a canning funnel to ladle the jelly into jars, leaving 1/4 inch of headspace. Remove air bubbles with a non-metallic tool, and adjust the headspace if needed.
- Wipe and Seal: Wipe the rims of the jars thoroughly with a clean towel. Place the lids on top and screw the bands until they are fingertip-tight. Add jars back into your canner to stay warm. Repeat for all jars or until all jelly is used.
Water Bath or Steam Canning Process
Finally, the canning process locks in freshness and ensures your jelly is safe for storage.
- Water Bath Canner:
- Lower the rack with jars into the boiling water, ensuring they are covered by at least 2 inches.
- Start the processing time (10 minutes for 1/2 pint jars) once the water reaches a full boil. Adjust for altitude as needed.
- Once the timer goes off, turn off the heat, remove the lid, and let the jars rest in the water for 5 minutes.
- Steam Canner:
- Put the lid on the steam canner. Turn your stove on high until your steam canner water comes to a vigorous boil. Continue heating so the indicator is in the correct “Zone” per your altitude.
- Start your processing time when the needle reaches the maximum point you have tested your steam canner to reach in your “Zone”. Adjust the burner so that it maintains an even rolling boil throughout the entire processing time. Usually, this will be much lower than where it was set for the vigorous boil. If the top lid is lifting and/or spitting water from the edges this is an indication that you have the heat turned up too high. Slowly reduce the heat until this stops. Watch the indicator to ensure the temperature does not decrease. Process for the same time as the water bath method (10 minutes for 1/2 pint jars). Like before, adjust for altitude.
- When your timer goes off turn off the heat and let the canner stand for 5 minutes with the lid on before removing the jars. The lid MUST remain ON the canner during this time. This cool-down period is necessary to ensure the jar contents are properly processed.
Carefully remove the jars and place them onto a towel-lined surface, allowing them to sit undisturbed for 12–24 hours. You’ll hear the satisfying “ping” as the lids seal—this sound is music to any canner’s ears! For more canning tips, check out the resource on safe and effective canning practices.
Now you’ve got beautifully sealed jars of your very own strawberry jelly!
Troubleshooting Common Issues in Strawberry Jelly Canning
Canning your strawberry jelly can feel like a rewarding process, but even the most experienced home preservers encounter a few bumps along the way. From unset jelly to cloudy textures, these issues don’t just impact aesthetics—they can affect shelf life and taste as well. Let’s walk through some of the most common problems and how to fix them, so you’ll always end up with a batch to be proud of.
Jelly Didn’t Set
One of the most frequent hiccups in making strawberry jelly is when it doesn’t set as expected. If your jelly remains more like syrup, don’t panic—there’s a solution.
- Common Causes: Using incorrect amounts of pectin, insufficient sugar levels, or under-boiling could be the culprit. Since pectin activates at specific temperatures, double-check your rolling boil time and measurements.
- How to Fix It: Allow your jelly to cool fully—sometimes it takes up to 24 hours to set properly. If it still hasn’t set after 24 hours, you can reprocess it. To do this:
- Empty the jelly back into a pot.
- Add additional pectin (following the package instructions).
- Boil again for one minute before refilling your jars. Process for same amount of time in the recipe.
If you’re interested in the science behind the process, the guide on Jam vs Jelly vs Preserves gives a fantastic explanation of why certain consistencies differ.
Foam on the Surface
Foam might develop on top of your jelly during cooking. While it doesn’t harm the jelly, it’s not the prettiest sight when you open a jar.
- Why It Happens: Boiling fruit mixtures naturally trap air, creating foam.
- How to Prevent It: Stir in a teaspoon of butter when heating the juice and pectin, the fat helps minimize foaming. Do not add more than a teaspoon.
- What to Do: Skim the foam from the top of your pot before filling the jars. This extra step ensures your jelly looks clean and professional in every jar. Don’t throw away that foam, store it in the refrigerator and use it like jelly.

Seals Did Not Hold
Proper sealing is critical for food safety and avoiding spoilage. If a jar lid doesn’t seal, you’ll need to act quickly to salvage your batch.
- Why It Happens: This issue could stem from improper cleaning of jar rims, over-tightened bands, or faulty lids.
- How to Resolve It: First, check whether food particles on the rim prevented a seal. Clean the rim, use a new lid, and reprocess the jar, ensuring water covers it by at least two inches in the water bath canner.
- Pro Tip: Always use new lids; even slight imperfections on reused lids can ruin the seal.
Cloudy or Grainy Jelly
A cloudy or grainy jelly might still taste great, but it’s not ideal visually or texturally.
- Likely Causes: Squeezing the juice through the cheesecloth can introduce pulp, or undissolved sugar might give a gritty texture.
- Solutions: Be patient when straining the juice. Let gravity do the work instead of pressing the fruit. If the issue is sugar-related, ensure you bring your mixture to a full rolling boil while stirring to dissolve every grain.
Tips for Storing and Using Homemade Strawberry Jelly
Once you’ve canned your homemade strawberry jelly, it’s important to know how to store it properly and make the most of its delightful flavor.
Storing Your Homemade Strawberry Jelly
Proper storage ensures your strawberry jelly maintains its flavor and safety for the long term. Here’s how to do it right:
- Cool & Inspect First: After processing, let your jars sit undisturbed for 12 to 24 hours. Check that all lids are sealed properly. A sealed lid will have an inward curve and won’t flex when pressed. If a jar doesn’t seal, don’t fret! You can refrigerate it and use it within a week or reprocess it following canning guidelines.
- Label Your Jars: Clearly label each jar with the type of jelly and the canning date. While it’s tempting to assume you’ll remember, labels are a lifesaver when you’re sorting through your pantry months later.
- Store in a Cool, Dark Place: Keep your jars in a pantry, cupboard, or basement that stays cool and dark, where temperatures don’t fluctuate much. Avoid direct sunlight—it can alter the color and quality of your strawberry jelly.
- Follow Recommended Shelf Life: For the best flavor and safety, aim to use your jelly within a year of canning. Even though it does last longer, the quality starts to decline over time.
This easy strawberry jelly recipe proves just how simple and enjoyable food preservation can be. With only a few staple ingredients and the right canning tools, you’ll create something your family will savor on toast, in desserts, or even given as gifts.
Other Strawberry Preserving Recipes
Recipe Card
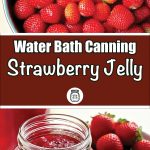
Strawberry Jelly
Equipment
- Steam Juicer Optional
- Large stainless steel pot or Enameled Dutch Oven
- Enameled Dutch Oven or Large Stainless Steel Pot
- Water Bath Canner or Steam Canner
- Steam Canner or Water Bath Canner
Ingredients
- 8 lbs Strawberries hulled
- 4 tbsp regular powdered fruit pectin
- 3 1/3 cups Granulated Sugar
Want to Save this Recipe?
Instructions
- Wash, hull, and crush strawberries one layer at a time with a potato masher, in a pot or enameled Dutch Oven. If it is too hard to crush the strawberries pulse them in a food processor.
- Bring to a boil. Cover and reduce the heat. Simmer for 5 minutes.
- Pour the Strawberries through a mesh strainer lined with 3 layers of dampened cheesecloth into a bowl. Let strawberries drain for 2 to 4 hours or until the juice measures 3 cups. To avoid cloudy jelly, do not press or squeeze the strawberries.
- Alternate Juicing Method. Using a steam juicer is an alternate method to get the strawberry juice required for this recipe. Add water to the bottom section of the steam juicer. Add the middle and top sections of the steam juicer. Add your strawberries to the top section of the steam juicer and add the lid. Turn the steam juicer to medium-high heat until the water begins to boil. Juice your strawberries until you have at least 3 cups of strawberry juice.
- Wash your jars and lids in warm soapy water. Make sure there are no chips or bubbles in your jars.
- Prepare your cannerUsing Water Bath Canner: Put your water bath canner on your stove. Add your canning rack to the water bath canner. Add enough water to cover jars with at least 2-3 inches of water. Start to bring your water to a boil. Using a Steam Canner: Put your steam canner on your stove. Add the steam canner rack to the bottom of the steam canner. Add the recommended amount of water to the steam canner according to the manufacturer. Put the lid on your steam canner and start your stove.
- Combine the strawberry juice and the pectin in a stainless steel pot or enameled Dutch oven. Bring mixture to a rolling boil that cannot be stirred down, over high heat, stirring constantly.
- Add the sugar, stirring the mixture to dissolve. Return the mixture to a full rolling boil. Boil hard for 1 minute, stirring constantly.
- Remove from heat. Skim the foam off top of jelly, if necessary.
- Once you have hot jars and hot jelly.Water Bath Canner:Remove your jars from the boiling water one at a time using your jar lifter. Dump the water out of the jar into your water bath canner to ensure there is still 2-3 inches of water above your jars.Steam Canner:Remove the steam canner lid and remove your jars one at a time using your jar lifter.
- Ladle hot jelly into hot jars, leaving 1/4 inch (.5 cm) headspace (Check with headspace measurer). Remove air bubbles with a de-bubbler and adjust the headspace by adding more hot jelly if necessary.
- Wipe the rim to ensure a good seal is made with the lid. Center the lid on the jar and screw the band down to fingertip tight. Repeat until all jelly is used.
- Place jars in the canner with your jar lifter.
- Water Bath Canner:Lower the water bath canner rack into the boiling water. Ensure your jars are covered by at least 2 inches of water.If your water is not boiling start your processing time when the water is boiling. Process 1/2 pint jars for 10 minutes. Make sure to adjust your time for altitude.Set a timer, it makes it much easier to make sure you process for the correct time. When your timer goes off turn off the heat and remove the canner lid.Leave the jars in the water for 5 minutes.Steam Canner:Put the lid on the steam canner. Turn your stove on high until your steam canner water comes to a vigorous boil. Continue heating so the indicator is in the correct "Zone" per your altitude. Start your processing time when the needle reaches the maximum point you have tested your steam canner to reach in your "Zone".Adjust the burner so that it maintains an even rolling boil throughout the entire processing time. Usually, this will be much lower than where it was set for the vigorous boil. If the top lid is lifting and/or spitting water from the edges this is an indication that you have the heat turned up too high. Slowly reduce the heat until this stops. Watch the indicator to ensure the temperature does not decrease.The processing times for steam canning are the same as for water bath canning. Process 1/2 pint jars for 10 minutes.Make sure to adjust your time for altitude. Set a timer, it makes it much easier to make sure you process for the correct time.When your timer goes off turn off the heat and let the canner stand for 5 minutes with the lid on before removing the jars. The lid MUST remain ON the canner during this time. This cool-down period is necessary to ensure the jar contents are properly processed.Carefully remove the lid by tilting it away from you to avoid steam burns.
- Using your jar lifer carefully move the jars onto a wire rack or kitchen towel to allow them to cool. When moving the jars try not to tilt them to the side as this could affect the seal of the jars. Allow your jars to cool for 12-24 hours before handling.
- Once cool, remove the canning rings from the jars. Wash your jars off to ensure no food residue on the outside of the jar from processing. Label your jar with the name of the recipe and date. This will help you remember what recipe you used to can and the date will allow you to use the oldest canned goods first.


No Comment! Be the first one.