

Nothing beats the taste of homemade strawberry lemonade. It’s a refreshing mix of tart lemons and sweet strawberries that strikes just the right balance. If you’re using fresh or frozen strawberries, this easy strawberry lemonade recipe comes together in no time, making it a favorite for anyone who loves simple yet delicious drinks. Perfect for summer days or to enjoy year-round, it’s a treat that’s both satisfying and versatile.
Why Make Strawberry Lemonade at Home?
Strawberry lemonade is more than just a sweet and tangy treat. It’s a simple recipe that lets you control the ingredients, flavors, and even the level of sweetness. Making it at home ensures that you’re getting the freshest taste, free of unnecessary additives. If you love the classic blend of strawberries and lemons or you’re looking to try a new twist with frozen strawberries, homemade lemonade is a must.
Freshness and Flavor You Can Trust
Store-bought strawberry lemonade might be convenient, but the flavor is no comparison to what comes from fresh ingredients. When you make it yourself, you can handpick ripe strawberries. This guarantees a bold, natural taste that is much better than anything bottled or powdered.
Perfect for Preserving and Year-Round Enjoyment
One of the best things about homemade strawberry lemonade is its versatility. You can preserve it in jars for sipping anytime or freeze it into fun popsicles. If you’re a home preserver, this is a great way to stretch the life of your strawberry harvest.
A Healthier Option for the Whole Family
Making strawberry lemonade at home removes the mystery of store-bought options. No artificial dyes, preservatives, or overly processed sugars in sight.
Feel good knowing you’re serving a drink that’s wholesome yet delicious. It’s family-friendly, refreshing, and hydrating for every occasion—from summer BBQs to cozy movie nights.
Experiment with Frozen Strawberries
Don’t have fresh strawberries on hand? No problem! Strawberry lemonade with frozen strawberries is a brilliant option. Frozen fruit locks in peak season flavor, so it’s like having fresh strawberries all year long. They also blend beautifully, making your lemonade rich and full-bodied.
Pair frozen strawberries with a delicious lemon base for the ultimate easy strawberry lemonade recipe. It’s proof that creativity in the kitchen doesn’t need to be complicated. For inspiration on more strawberry-based ideas, this Strawberry Rhubarb Pie Filling Freezer Recipe showcases how versatile strawberries can be.
Making strawberry lemonade at home isn’t just about the drink; it’s about the experience. Keep it as simple or as creative as you like, and enjoy the process, flavor, and satisfaction of creating something from scratch.
Ingredients for the Perfect Strawberry Lemonade
Creating the best strawberry lemonade recipe starts with selecting the right ingredients. Every detail matters, from the strawberries to the lemon juice, and understanding these choices can transform your drink into something truly special. Do fresh or frozen strawberries make the better choice for your easy strawberry lemonade recipe?
Fresh vs. Frozen Strawberries
When it comes to strawberries, either fresh or frozen can work brilliantly. But the choice can significantly influence the flavor and texture of your strawberry lemonade.
Using fresh strawberries brings unbeatable flavor and aroma. Freshly picked strawberries offer a natural sweetness and vibrant color that can make your homemade drink feel luxurious. They’re particularly perfect in-season, when they’re bursting with rich flavor and juiciness.
On the other hand, frozen strawberries are an incredible option, especially during the off-season months. Freezing preserves strawberries at their peak ripeness, locking in their sweetness and nutrients. Because they’re often pre-washed and prepped, they also save time, making this choice convenient without sacrificing quality.
How to Use Frozen Strawberries Effectively:
- Thaw your frozen strawberries slightly before blending to minimize dilution from excess ice.
- They also double as natural ice cubes! Toss them in whole to keep your drink cold and flavorful.
If you’re interested in more ways to use strawberries, check out this helpful Strawberry Jam Canning Recipe. It’s a great way to ensure zero waste when you buy strawberries in bulk.
Ultimately, there’s no wrong choice between fresh and frozen. Post-season smoothies and summer picnics can both benefit from either option.

Step-by-Step Strawberry Lemonade Recipe
Transforming fresh ingredients into a satisfying beverage like strawberry lemonade is easier than you think. With a little preparation and the right balance of flavors, you can make a delicious recipe that’s perfect for preserving. This recipe comes from the Ball Complete Book of Home Preserving and will yield around 7 pint jars of Strawberry Lemonade Concentrate. Here’s how to do it step by step.
Ingredients Required for this Strawberry Lemonade Recipe
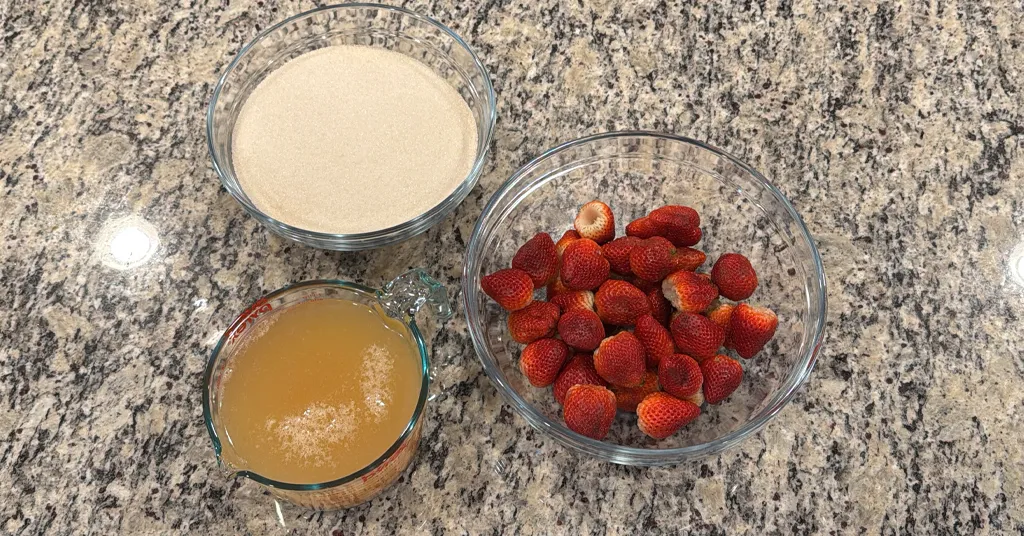
Here are the ingredients I used for this recipe:
- 6 cups Strawberries
- 4 cups Bottled Lemon Juice
- 6 cups Granulated Sugar
Equipment Needed
Here is the equipment you need to successfully make this easy strawberry lemonade recipe:
- Strawberry Huller
- Food Processor or Blender
- Measuring Cups
- Liquid Measuring Cups
- Large Stainless Steel Pot
- Candy Thermometer
- 1/2 Pint Canning Ladle
- Pint Size Canning Jars
- Lids
- Bands/Rings
- Water Bath Canner or Steam Canner
- Jar Lifter
- Funnel
- Headspace Measurer/De-Bubbler
Prepare Canner and Jars
Every great recipe starts with clean equipment. Begin with your canning jars and lids—they must be free of any debris, chips, or cracks. Wash them in warm, soapy water, rinse well, and let them dry. This step prevents potential sealing issues and keeps bacteria at bay.
Prepare Your Canner
Depending on the equipment you have, you’ll want to set up either a water bath canner or a steam canner.
Using Water Bath Canner:
- Place the canner on your stove and add a canning rack.
- Insert your jars into the canner—this keeps them warm as the water heats.
- Fill the canner with enough water to cover the jars by 2-3 inches.
- Begin heating the water but don’t let it boil until your jars are ready.
Using a Steam Canner:
- Position your steam canner on the stove and place the rack at the bottom.
- Add water according to your model’s manufacturer guidelines.
- Place your jars inside, then cover them with the lid.
- Start warming the canner as you prep your lemonade concentrate.
Keeping the jars warm helps prevent cracking when filling them with the hot strawberry lemonade concentrate later.
Prepping the Strawberries
The secret to the best strawberry lemonade recipe lies in fresh, juicy strawberries. Start by washing them thoroughly under cold water to remove dirt and debris. Check for any mushy or overripe berries; we only want the tastiest additions for our recipe!
Steps to Prepare Strawberries:
- Hull the strawberries by removing the green tops and cores. You can use a small paring knife or a hulling tool.
- Slice them evenly to ensure they puree smoothly.
- Use a food processor or blender to create a silky puree. Work in batches if needed, and aim for a uniform texture.
- Transfer your puree into a large stainless-steel pot to avoid any unwanted reactions with acidic ingredients later.

Combining Ingredients for Perfect Balance
Striking the right balance of sweetness and tanginess is key to a great strawberry lemonade. Mixing the ingredients correctly ensures every sip is just right.
- Add bottled lemon juice to the prepared strawberry puree.
- Stir in sugar.
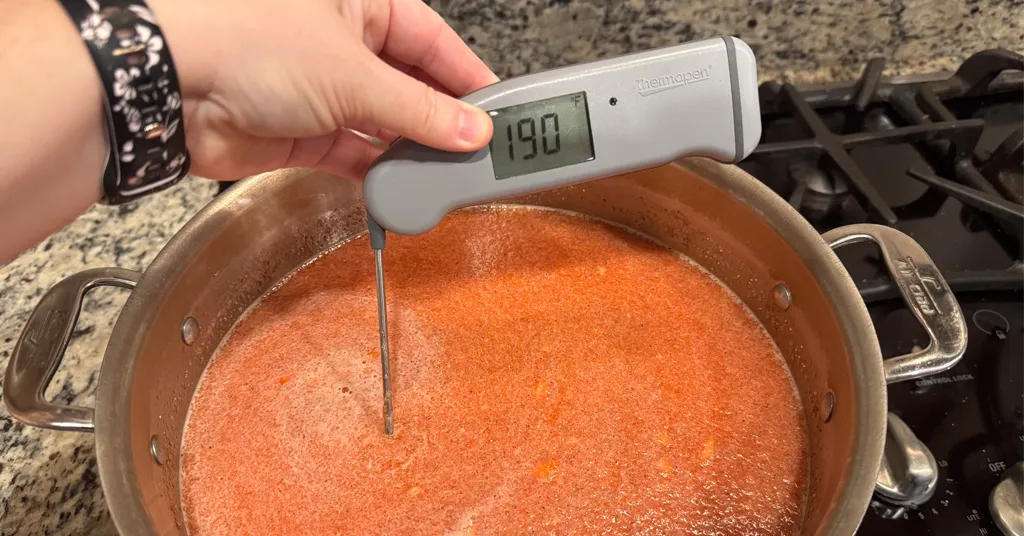
- Heat the mixture gradually to 190℉ (88℃) over medium-high heat. Stir occasionally and avoid letting it boil — this maintains the integrity of the flavor.
- Use a spoon to skim off any foam that forms on top. This creates a smoother consistency for your concentrate.
Canning Strawberry Lemonade Concentrate
Once your concentrate is ready, it’s time to can your strawberry lemonade. Follow the steps for either water bath canning or steam canning.
Steps for Hot Jars and Hot Concentrate:
- Use a jar lifter to remove jars from the canner. Empty any water back into the canner.
- Place your jars on a towel-lined surface to avoid temperature shocks.
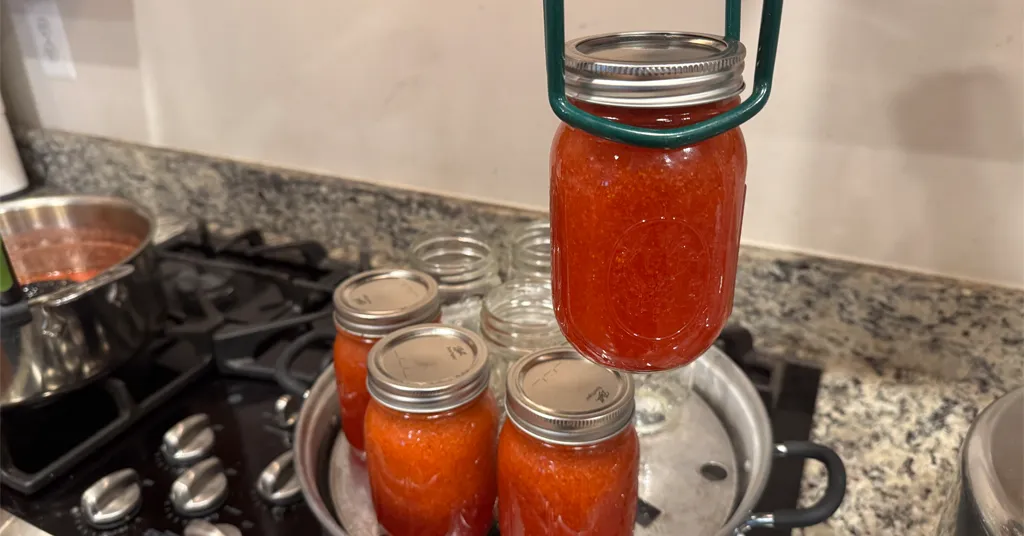
Filling Jars:
- Use a ladle and funnel to pour the hot concentrate into the jars, leaving 1/4 inch of headspace.
- Use a de-bubbler to release trapped air, then adjust the liquid as needed.
- Clean the jar rims to ensure they seal properly before centering the lid.
- Screw bands onto jars until just fingertip tight.
Processing Steps:
For Water Bath Canner:
- Lower the jar rack into the bubbling water, ensuring jars are submerged by at least 2 inches of water.
- Start the processing timer once the water starts boiling: 15 minutes for pint jars. Adjust for your altitude if needed.
- Let jars rest in the canner for 5 minutes after processing before removing.
For Steam Canner:
- Put the lid on the steam canner. Turn your stove on high until your steam canner water comes to a vigorous boil. Continue heating so the indicator is in the correct “Zone” per your altitude.
- Ensure your canner’s indicator needle is in the correct zone for your altitude before starting the processing timer.
- Adjust the burner so that it maintains an even rolling boil throughout the entire processing time. Usually, this will be much lower than where it was set for the vigorous boil. If the top lid is lifting and/or spitting water from the edges this is an indication that you have the heat turned up too high. Slowly reduce the heat until this stops. Watch the indicator to ensure the temperature does not decrease.
- The processing times for steam canning are the same as for water bath canning. Process pint jars for 15 minutes.
- When your timer goes off turn off the heat and let the canner stand for 5 minutes with the lid on before removing the jars. The lid MUST remain ON the canner during this time. This cool-down period is necessary to ensure the jar contents are properly processed.
- Carefully remove the lid by tilting it away from you to avoid steam burns.
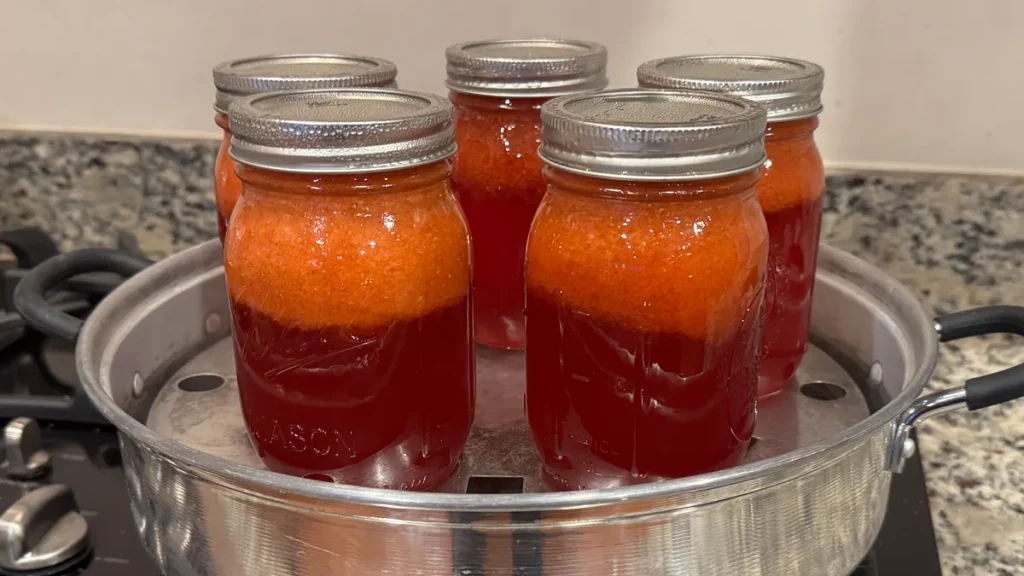
Post-Processing:
- Safely transfer jars to a cooling rack or towel, keeping them upright.
- Allow jars to cool undisturbed for 12-24 hours.
- Test the lids for proper sealing. Remove the bands, wipe jars clean, and label them with the recipe name and date.
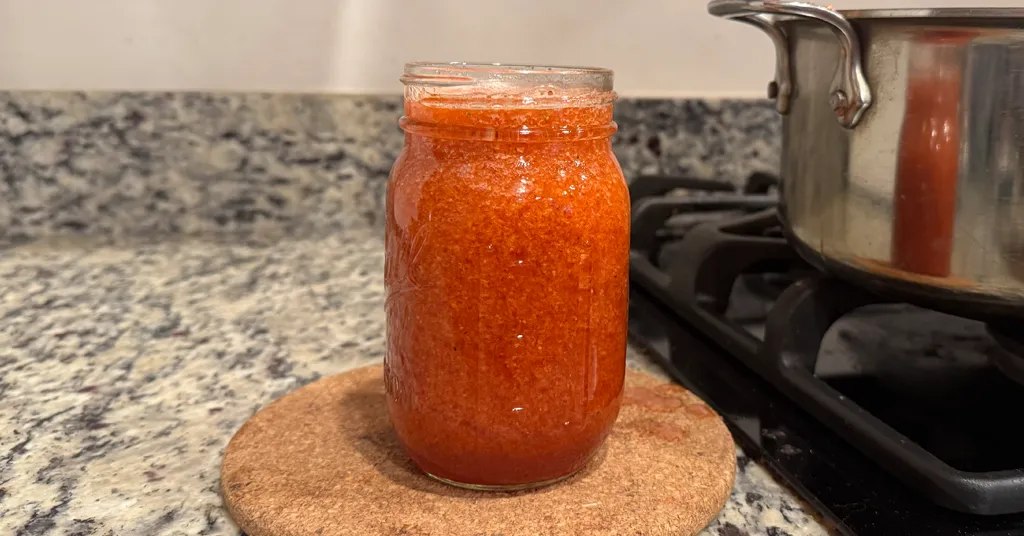
Canning strawberry lemonade concentrate captures the essence of summer in a jar. Once you’re done, you’ll have a versatile base for homemade drinks that you can enjoy anytime you’d like.
Strawberry Lemonade Recipe with Frozen Strawberries
Using frozen strawberries to craft strawberry lemonade is a game-changer, especially if you’re looking for an easy way to enjoy this summer favorite all year long. Frozen strawberries are packed with flavor and nutrients, making them an excellent stand-in for fresh fruit when it’s out of season. If you’re short on time or just want a quick and refreshing option, this method is as flexible as it is delicious.
Why Choose Frozen Strawberries?
Frozen strawberries are a practical choice for your lemonade recipe. They’re harvested and frozen at peak ripeness, preserving that luscious sweetness and bold flavor. Plus, they’re available year-round—no need to wait for strawberry season! Using frozen strawberries also simplifies the preparation process. There’s no washing or hulling required; you can just thaw them and toss them into your blender.
Follow the instructions above just by replacing the fresh strawberries with frozen strawberries. Why not experiment with both options? Fresh strawberries highlight the flavors of summer, while frozen strawberries provide convenience without sacrificing quality. Either way, you’ll taste the difference compared to store-bought alternatives.
If you’re looking for more ways to preserve fruits, this Strawberry Jam Canning Recipe is a fantastic companion guide. Try your hand at making the recipe today, and let those bursts of strawberry and lemon flavor brighten up your day!
Recipe Card
Strawberry Lemonade Recipe for Canning
Equipment
- Food Processor or Blender
- Blender or Food Processor
- Water Bath Canner or Steam Canner
- Steam Canner or Water Bath Canner
Ingredients
- 6 cups Strawberries hulled
- 4 cups Bottled Lemon Juice
- 6 cups Granulated Sugar
Want to Save this Recipe?
Instructions
- Clean jars and lids with warm soapy water. Ensure the jars do not have any chips or bubbles in the glass.
- Prepare your cannerUsing Water Bath Canner: Put your water bath canner on your stove. Add your canning rack to the water bath canner. Add your pint jars or quart jars to the water bath canner. They will warm as you heat the water. Add enough water to cover jars with at least 2-3 inches of water. Start to bring your water to a boil.Using a Steam Canner: Put your steam canner on your stove. Add the steam canner rack to the bottom of the steam canner. Add the recommended amount of water to the steam canner according to the manufacturer. Add your pint jars or quart jars to the steam canner. Put the lid on your steam canner and start your stove. The jars will warm as you heat your steam canner.
- Wash and sort your strawberries to ensure you have the best strawberries for your strawberry lemonade. Hull your strawberries.
- Puree strawberries in a food processor with the metal blade or blender, working in batches, until smooth. Transfer strawberries to a large stainless steel pot.
- Add lemon juice and sugar and stir to combine. Heat to 190℉ (88℃) over medium-high heat, stirring occasionally. Do not boil. Remove from heat and skim off the foam.
- Once you have hot jars and hot strawberry lemonade concentrateWater Bath Canner:Remove your jars from the water bath canner one at a time using your jar lifter. Dump the water out of the jar into your water bath canner to ensure there is still 2-3 inches of water above your jars.Steam Canner:Remove the steam canner lid and remove your jars one at a time using your jar lifter.
- Using the ladle and funnel. Ladle hot strawberry lemonade concentrate into hot jars, leaving 1/4 inch headspace. Use your headspace measurer to verify space. Remove any air bubbles with your de-bubbler and adjust the headspace, if necessary, by adding more syrup.
- Wipe the rim to ensure a good seal is made with the lid. Center the lid on the jar and screw the band down to fingertip tight.
- Place the jar in the canner using your jar lifter. Repeat until all Strawberry Lemonade Concentrate is used.
- ProcessingWater Bath Canner:Lower the water bath canner rack into the boiling water. Ensure your jars are covered by at least 2 inches of water.If your water is not boiling start your processing time when the water is boiling. Process pint jars for 15 minutes. Make sure to adjust your time for altitude.Set a timer, it makes it much easier to make sure you process for the correct time. When your timer goes off turn off the heat and remove the canner lid.Leave the jars in the water for 5 minutes.Steam Canner:Put the lid on the steam canner. Turn your stove on high until your steam canner water comes to a vigorous boil. Continue heating so the indicator is in the correct "Zone" per your altitude. Start your processing time when the needle reaches the maximum point you have tested your steam canner to reach in your "Zone".Adjust the burner so that it maintains an even rolling boil throughout the entire processing time. Usually, this will be much lower than where it was set for the vigorous boil. If the top lid is lifting and/or spitting water from the edges this is an indication that you have the heat turned up too high. Slowly reduce the heat until this stops. Watch the indicator to ensure the temperature does not decrease.The processing times for steam canning are the same as for water bath canning. Process pint jars for 15 minutes.Make sure to adjust your time for altitude. Set a timer, it makes it much easier to make sure you process for the correct time.When your timer goes off turn off the heat and let the canner stand for 5 minutes with the lid on before removing the jars. The lid MUST remain ON the canner during this time. This cool-down period is necessary to ensure the jar contents are properly processed.Carefully remove the lid by tilting it away from you to avoid steam burns.
- Using your jar lifer carefully move the jars onto a wire rack or kitchen towel to allow them to cool. When moving the jars try not to tilt them to the side as this could affect the seal of the jars. Allow your jars to cool for 12-24 hours before handling.
- Once cool, remove the canning rings from the jars. Wash your jars off to ensure no food residue on the outside of the jar from processing. Label your jar with the name of the recipe and date. This will help you remember what recipe you used to can and the date will allow you to use the oldest canned goods first.


No Comment! Be the first one.