

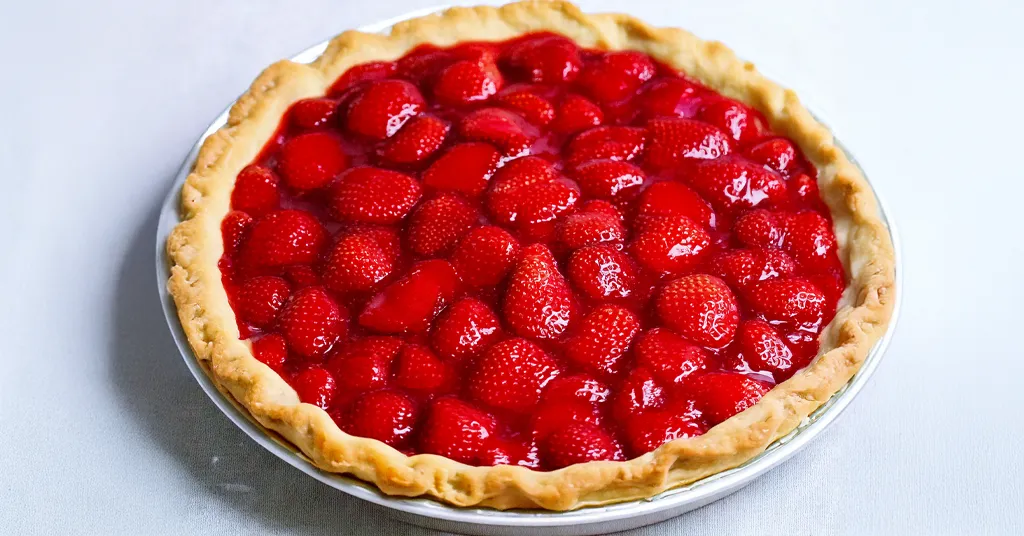
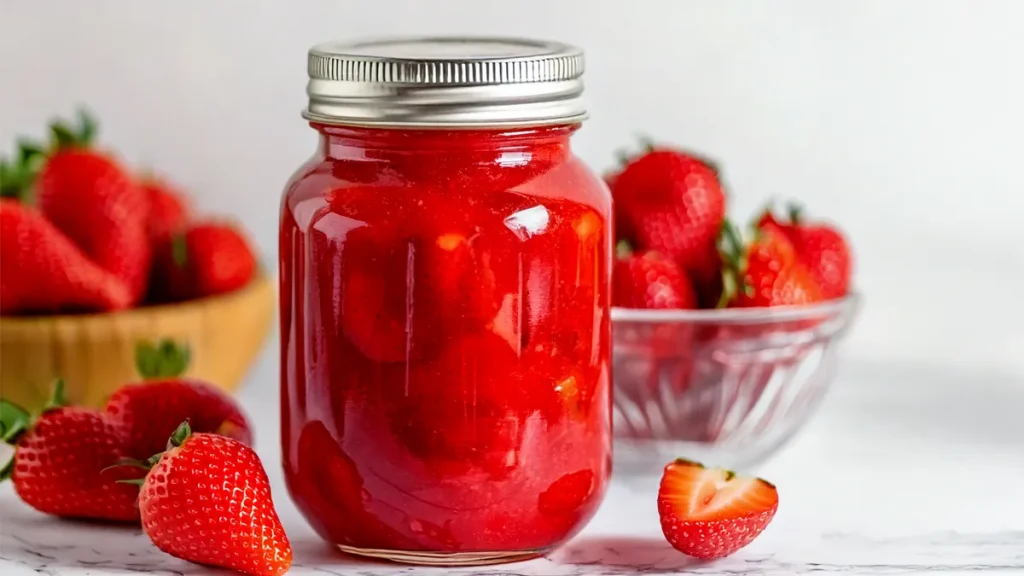
Who doesn’t love a classic strawberry pie? If you’re filling a flaky pie crust, topping a cheesecake, or adding a sweet twist to your morning crepes, this versatile recipe is a must-have for home food preservers. Plus, making it at home means you can control the ingredients and skip the unwanted additives often found in store-bought options.
Selecting the Best Strawberries for Your Pie Filling
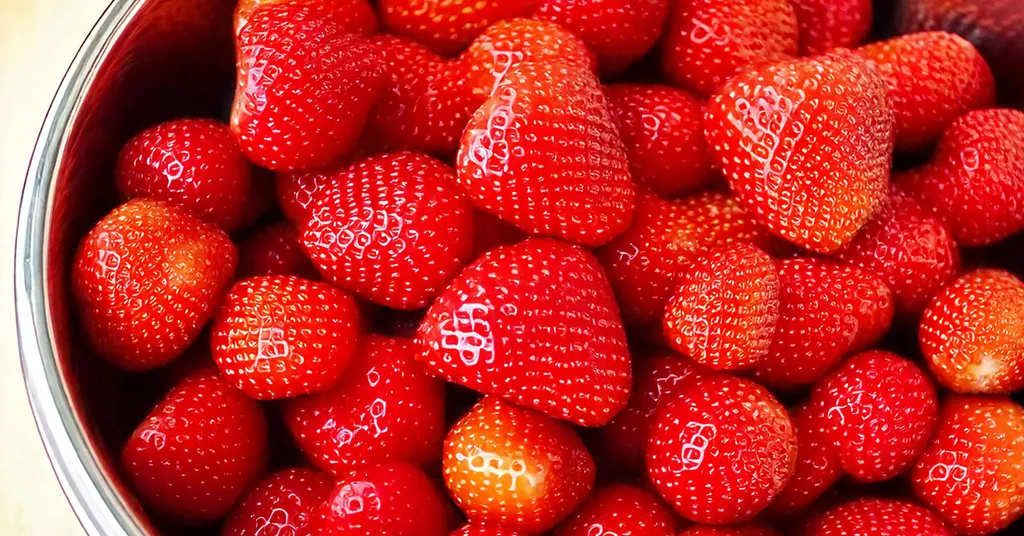
The key to making the best strawberry pie filling recipe lies in choosing the right strawberries. Since they’re the star of the dish, picking top-notch fruit ensures your pie stands out with vibrant flavors and a fresh, juicy texture. But what should you look for when buying or picking strawberries? I have a handy resource if you need additional information on selecting strawberries:
Essential Ingredients and Tools for Strawberry Pie Filling
Creating the perfect strawberry pie filling starts with the right ingredients and tools. Here’s what you need to know about thickeners and canning equipment to ensure your recipe is not only delicious but safe for long-term storage.
This recipe is from the Washington State University Extension Office’s Let’s Preserve Fruit Pie Fillings Article. Washington State University Extension Office provided a safe and tested blueberry pie filling recipe that they approved to be adapted to strawberry pie filling.
Full Ingredient List for Strawberry Pie Filling for Canning
Here are the ingredients you need for 7 quart jars of Strawberry Pie Filling:
- 6 quarts of Strawberries
- 6 cups Granulated Sugar
- 2 1/4 cups Clear Jel
- 1 cup Water
- 1/2 cup Bottled Lemon Juice
Choosing the Right Thickener
One of the key elements in any strawberry pie filling recipe is getting the consistency just right. For home food preservers, using the correct thickener is not just about texture—it’s also essential for safety.
Clear Jel is the Gold Standard: When it comes to canning strawberry pie filling, Clear Jel is the only approved thickener by the USDA for safe preserving. It ensures consistent results without compromising the quality or safety of your recipe. This modified cornstarch can hold up to high temperatures during processing and won’t break down over time, keeping your filling perfectly thick even after months on the shelf.
No Clear Jel? Don’t Worry: If you can’t get your hands on Clear Jel, don’t let that stop you from making your favorite strawberry pie filling recipe. You can omit the thickener during the canning process and add it later when you’re ready to use the filling. For more details on how to can pie filling safely without Clear Jel, check out this guide:
Necessary Canning Equipment
To successfully prepare and preserve your strawberry pie filling canning recipe, having the right tools is non-negotiable. Here are the tools I used to make this recipe:
- Knife
- Cutting Board
- Strawberry Huller
- Colander
- Measuring Cups
- Large Stainless Steel Pot
- Quart Size Canning Jars
- Lids
- Bands/Rings
- Water Bath Canner or Steam Canner
- 1/2 Pint Canning Ladle
- Funnel
- Jar Lifter
- Headspace Measurer/De-bubbler
Step-by-Step Process for Cooking Strawberry Pie Filling
Making a strawberry pie filling recipe from scratch is easier than you think, and the results are unbeatable in taste and texture.
Preparing the Strawberries
The first step to any delicious filling is preparing your strawberries correctly. Fresh, juicy strawberries are the heart of this recipe, so giving them a little extra care in the prep stage will make all the difference.
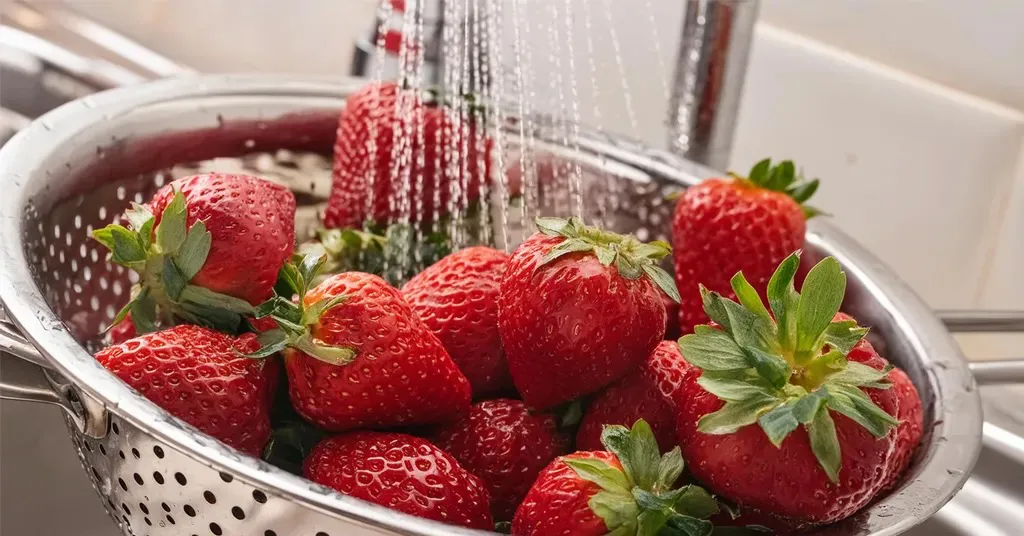
- Clean and Hull the Strawberries Start by rinsing your strawberries under cool water. To remove the green tops (hulls), a strawberry huller works best, but a small knife will do the trick. For small strawberries, simply cut them in half. Larger strawberries should be sliced into quarters for even cooking.
- Blanching the Strawberries Blanching is a key step, especially for strawberry pie filling canning recipes, as it helps maintain their flavor and texture. Here’s how:
- Fill a large stainless steel pot halfway with water and bring it to a rolling boil.
- Carefully add the strawberries to the boiling water. Let them blanch for 1 minute after the water returns to a boil.
- Drain them thoroughly and keep the heated strawberries in a covered pot to retain their warmth.
Taking these extra steps during preparation ensures your strawberries hold up perfectly during the cooking process.
Prepare Canner and Jars
Start by ensuring your jars and lids are thoroughly cleaned. Wash them with warm, soapy water, and inspect each jar carefully for any chips or cracks that could interfere with sealing or cause breakage during processing. Damaged glass jars should never be used for canning. Once everything is ready, it’s time to prepare your canning equipment.
Using Water Bath Canner:
- Place your water bath canner on the stove with a canning rack inside.
- Add your jars to the canner, ensuring they are submerged in water.
- Fill the canner with enough water to cover jars by at least 2–3 inches.
- Begin heating the water, allowing the jars to warm up as the water heats to a boil.
Using a Steam Canner:
- Position your steam canner on the stove and insert the steam rack.
- Pour the recommended amount of water into the steam canner based on the manufacturer’s instructions.
- Place the jars on the rack, secure the canner lid, and start heating. The jars will warm as the canner heats up.
Proper preparation of your jars ensures a smooth canning process and helps your strawberry pie filling canned recipes turn out beautifully.
Cooking the Filling
Now comes the fun part—turning those beautiful strawberries into a rich, flavorful pie filling that’s better than any store-bought version.
- Combine the Base Ingredients Start by whisking together the sugar and Clear Jel in a large stainless steel pot. Gradually add 7 cups of water while continuing to whisk. This step ensures a smooth mixture without lumps.
- Cook Over Medium-High Heat Heat the mixture over medium-high heat, stirring constantly. As the mixture begins to bubble, you’ll notice it thickening—this is the Clear Jel doing its magic. Once thickened, add in the lemon juice and allow it to boil for 1 minute. Keep stirring during this time to prevent scorching.
- Add the Heated Strawberries Remove the thickened mixture from the heat and gently fold in your heated strawberries. Stir until every piece of fruit is evenly coated with the sweet, glossy filling.
Your filling is now ready to can!
Strawberry Pie Filling Recipe Using Frozen Berries
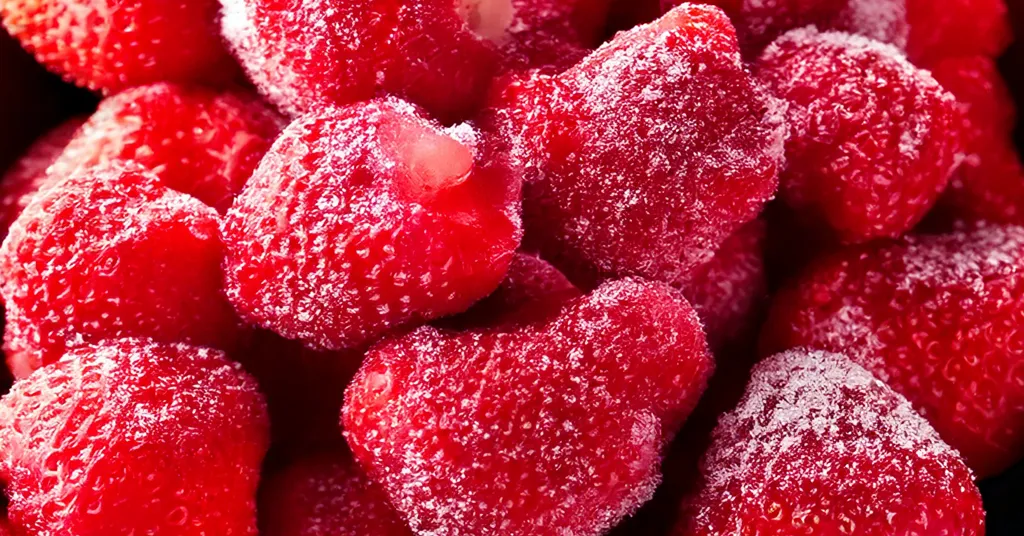
Making a strawberry pie filling recipe with frozen strawberries is a fantastic way to enjoy the sweetness of summer flavors all year long. Frozen berries are convenient, affordable, and lock in nutrients and flavor at their peak. However, proper preparation is key to ensuring your filling has the right texture and taste. Let’s look into how to thaw and prepare your frozen strawberries for the best results!
Thawing and Preparing Frozen Strawberries
Using frozen strawberries in your pie filling can be just as delicious as fresh ones when done right. Here’s how to handle them to maintain their natural sweetness and texture while ensuring the liquid from thawing doesn’t go to waste—because every drop counts!
- Thaw the Strawberries Properly Start by removing your frozen strawberries from the freezer and transferring them to a bowl or container. Place them in the refrigerator to thaw slowly overnight. This method prevents the berries from becoming mushy and helps retain their structure.
- Collect the Juice As the strawberries thaw, you’ll notice some natural juice collecting in the bottom of the container. Don’t discard it! This juice is packed with flavor and should be used to replace part of the water in your recipe, enhancing the taste of your filling.
- Measure the Juice and the Berries Once thawed, measure both the strawberries and their juice. This recipe calls for 7 cups of water, replace part of that quantity with the juice from the thawed berries. This substitution brings an extra layer of richness and eliminates waste.
- Prepare the Strawberries for Cooking After measuring, inspect the strawberries for any large chunks that might need slicing. Cut oversized strawberries into halves or quarters for uniform consistency in your pie filling. Smaller berries can often be left as-is.
- Follow the Same Steps as Fresh Strawberries: Go back up to cooking the filling and follow the same steps as the fresh strawberries just replacing the juice for some of the water and the frozen berries.
By following these steps, you’re setting the stage for the best strawberry pie filling recipe, even when using frozen berries. Need more tips for preserving or preparing strawberries? Check out this resource for dehydrating strawberries to discover other creative uses for your frozen stash.
Processing Strawberry Pie Filling for Canning
Canning strawberry pie filling is an excellent way to enjoy the delicious taste of fresh strawberries all year long. If you’re using a water bath canner or a steam canner, each step in the process plays a key role in preserving the flavor, texture, and safety of your homemade strawberry pie filling recipe. Let’s go over the essential steps for preparing and processing your jars.
Fill Jars
Once both your jars and the strawberry pie filling are heated, you’re ready to fill the jars. This step requires care to ensure a proper seal and the right amount of headspace.
- For Water Bath Canner: Use a jar lifter to remove one jar at a time from the canner, pouring the water from the jar back into the canner to maintain the correct water level.
- For Steam Canner: Remove the lid and use a jar lifter to take out a jar one at a time.
Use a ladle and canning funnel to transfer the hot pie filling into each jar, leaving exactly 1 inch of headspace at the top. Check the headspace using a headspace measurer.
- Remove air bubbles with a bubble remover tool or a non-metallic utensil. This step is essential since trapped air can cause improper sealing.
- Adjust the headspace if needed, adding more filling to maintain accuracy.
- Wipe the rim of each jar with a clean, damp cloth to ensure no residue is left behind that could interfere with the seal.
- Center the lid on the jar and screw the band down to fingertip tightness. Avoid overtightening, which can prevent proper sealing.
- Place the jar back into the canner using the jar lifter and repeat until all the strawberry pie filling is used.

Processing Jars
Processing your jars correctly is crucial for creating a shelf-stable strawberry pie filling canning recipe. Make sure to follow the instructions specific to your chosen canner.
Water Bath Canner:
- Lower the canner rack into the boiling water, ensuring the jars are covered by at least 2 inches of water.
- Start timing once the water returns to a full boil. Process quart jars for 30 minutes, adjusting the time for your altitude if needed.
- After the timer goes off, turn off the heat and remove the lid. Let the jars sit in the hot water for an additional 5 minutes before removing them.
Steam Canner:
- Replace the lid on the steam canner and heat until the indicator needle reaches the correct zone for your altitude.
- Begin timing only when the indicator stabilizes in the proper zone. Process quart jars for 30 minutes, making your altitude adjustments as necessary.
- Once the processing time is complete, turn off the heat. Let the jars sit in the closed canner for 5 extra minutes, ensuring they are properly processed.
Carefully lift each jar out using a jar lifter, keeping them upright to avoid disturbing the seal. Place the jars on a towel or wire rack to cool undisturbed for 12–24 hours.
Once your jars are cooled and sealed, don’t forget to label them with the recipe name and date. Proper labeling helps you track which jars to use first and reminds you of what’s inside. Want more guidance on canning? Check out this helpful guide on canning essentials for beginners. It’s a great resource if you’re new to preserving or need a refresher!
Strawberry pie filling is so much more than a dessert staple—it’s a versatile creation that turns any dish into a celebration of fresh, seasonal flavor. The beauty of making this filling at home lies in the control you have over the ingredients, ensuring every spoonful is free of unnecessary additives while still bursting with deliciousness.

If you’re whipping up an easy strawberry pie filling recipe for a special occasion or preserving it to enjoy throughout the year, the process is equally rewarding. With options to can, use frozen berries, or experiment with creative uses like cake fillings or breakfast toppings, this recipe proves itself to be a true kitchen essential.
Additional Strawberry Recipes
Looking for some additional strawberry preserving recipes?
Recipe Card
Strawberry Pie Filling Recipe
Equipment
- Water Bath Canner or Steam Canner
- Steam Canner or Water Bath Canner
Ingredients
- 6 quarts Strawberries
- 6 cups Granulated Sugar
- 2 1/4 cups Clear Jel
- 1 cup Water
- 1/2 cup Bottled Lemon Juice
Want to Save this Recipe?
Instructions
- Clean jars and lids with warm soapy water. Ensure the jars do not have any chips or bubbles in the glass.
- Select fresh, ripe, and firm strawberries. Wash and sort your strawberries to ensure you have the best strawberries for your pie filling. Unsweetened frozen strawberries may be used (Collect, measure, and use the juice from thawing fruit to partially replace the water specified in the recipe).
- For fresh strawberries – Use your strawberry huller to remove the hulls of the strawberries. Cut small strawberries in half and large strawberries in quarters.
- Fill a Large Stainless Steel pot halfway with water and bring it to a full rolling boil over high heat.
- Add strawberries to the boiling water and blanch them for 1 minute after the water returns to a boil.
- Drain well and keep heated strawberries in a covered bowl or pot.
- Prepare your cannerUsing Water Bath Canner: Put your water bath canner on your stove. Add your canning rack to the water bath canner. Add your pint jars or quart jars to the water bath canner. They will warm as you heat the water. Add enough water to cover jars with at least 2-3 inches of water. Start to bring your water to a boil.Using a Steam Canner: Put your steam canner on your stove. Add the steam canner rack to the bottom of the steam canner. Add the recommended amount of water to the steam canner according to the manufacturer. Add your pint jars or quart jars to the steam canner. Put the lid on your steam canner and start your stove. The jars will warm as you heat your steam canner.
- In a Large Stainless Steel Pot, combine the sugar and Clear Jel. Whisk in 7 cups of water.
- Cook on medium-high heat until mixture thickens and begins to bubble.
- Stir in the Lemon Juice and boil for 1 minute, stirring constantly.
- Remove from heat. Fold in the heated strawberries so everything is combined.
- Once you have hot jars and hot pie fillingWater Bath Canner:Remove your jars from the water bath canner one at a time using your jar lifter. Dump the water out of the jar into your water bath canner to ensure there is still 2-3 inches of water above your jars.Steam Canner:Remove the steam canner lid and remove your jars one at a time using your jar lifter.
- Using the ladle and funnel. Ladle hot pie filling into hot jars, leaving 1 inch headspace. Use your headspace measurer to verify space. Remove any air bubbles with your de-bubbler and adjust the headspace, if necessary, by adding more pie filling.
- Wipe the rim to ensure a good seal is made with the lid. Center the lid on the jar and screw the band down to fingertip tight.
- Place the jar in the canner using your jar lifter. Repeat until all strawberry pie filling is used.
- ProcessingWater Bath Canner:Lower the water bath canner rack into the boiling water. Ensure your jars are covered by at least 2 inches of water.If your water is not boiling start your processing time when the water is boiling. Process quart jars for 30 minutes. Make sure to adjust your time for altitude.Set a timer, it makes it much easier to make sure you process for the correct time. When your timer goes off turn off the heat and remove the canner lid.Leave the jars in the water for 5 minutes.Steam Canner:Put the lid on the steam canner. Turn your stove on high until your steam canner water comes to a vigorous boil. Continue heating so the indicator is in the correct "Zone" per your altitude. Start your processing time when the needle reaches the maximum point you have tested your steam canner to reach in your "Zone".Adjust the burner so that it maintains an even rolling boil throughout the entire processing time. Usually, this will be much lower than where it was set for the vigorous boil. If the top lid is lifting and/or spitting water from the edges this is an indication that you have the heat turned up too high. Slowly reduce the heat until this stops. Watch the indicator to ensure the temperature does not decrease.The processing times for steam canning are the same as for water bath canning. Process quart jars for 30 minutes.Make sure to adjust your time for altitude. Set a timer, it makes it much easier to make sure you process for the correct time.When your timer goes off turn off the heat and let the canner stand for 5 minutes with the lid on before removing the jars. The lid MUST remain ON the canner during this time. This cool-down period is necessary to ensure the jar contents are properly processed.Carefully remove the lid by tilting it away from you to avoid steam burns.
- Using your jar lifer carefully move the jars onto a wire rack or kitchen towel to allow them to cool. When moving the jars try not to tilt them to the side as this could affect the seal of the jars. Allow your jars to cool for 12-24 hours before handling.
- Once cool, remove the canning rings from the jars. Wash your jars off to ensure no food residue on the outside of the jar from processing. Label your jar with the name of the recipe and date. This will help you remember what recipe you used to can and the date will allow you to use the oldest canned goods first.


No Comment! Be the first one.