Get ready to elevate your BBQ game with the taste of homemade Zesty Peach Barbecue Sauce. This unique sauce combines the sweetness of yellow peaches, the tanginess of cider vinegar, and the kick of hot pepper flakes, creating a flavor explosion that will leave your taste buds begging for more.
You will be creating your very own homemade Zesty Peach Barbecue Sauce, a mouthwatering sauce that will transform your grilling adventures. I will guide you step-by-step through the process, revealing the delicious ingredients that will make your taste buds sing with delight.
The Secret to Homemade Zesty Peach Barbecue Sauce
The secret to homemade Zesty Peach Barbecue Sauce is to start with the right ingredients. By gathering the perfect combination of savory and sweet components, you’ll create a sauce that will elevate your grilling game to new heights.
Gather Your Ingredients for Peach Barbecue Sauce
For this recipe you will need:
- 6 cups (1.5 L) finely chopped pitted peeled yellow-fleshed peaches
- 1 cup (250 mL) finely chopped seeded red bell pepper
- 1 cup (250mL) finely chopped onion
- 3 tbsp (45 mL) finely chopped garlic
- 1 1/4 cups (300 mL) liquid honey
- 3/4 cup (175 mL) cider vinegar
- 1 tbsp (15 mL) Worcestershire sauce
- 2 tsp (10 mL) hot pepper flakes
- 2 tsp (10 mL) dry mustard
- 2 tsp (10 mL) salt
Yellow Peaches
First and foremost, you’ll need fresh, ripe yellow-fleshed peaches. Look for peaches that are fragrant and yield slightly to gentle pressure. Their natural sweetness and vibrant flavor will be the foundation of your barbecue sauce. It is important to only use yellow-fleshed peaches. White peaches are not acidic enough to use when canning. Using yellow peaches allows you to be sure you are canning safely. The fruity flavor of peaches complements the savory and tangy elements, creating a well-balanced taste.
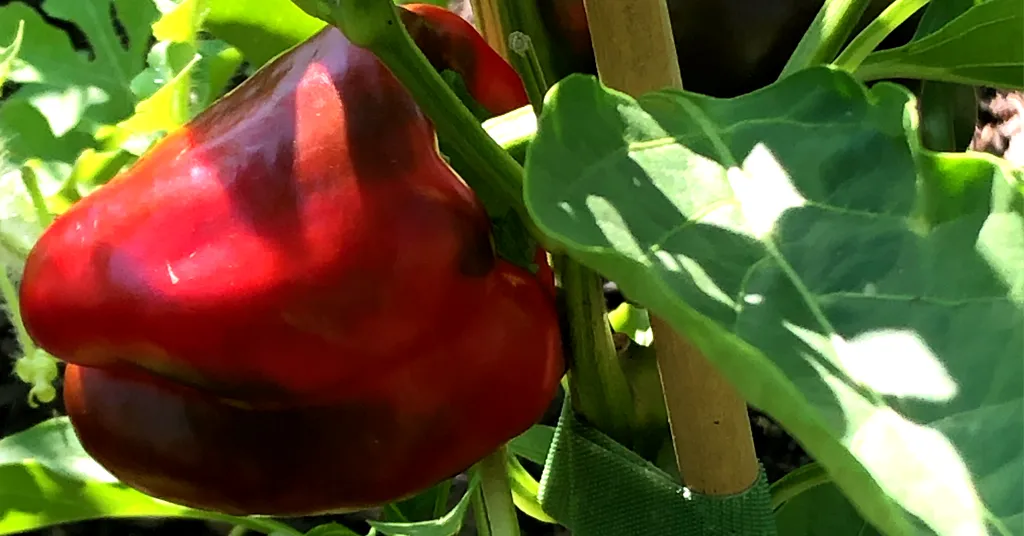
Red Bell Peppers
The vibrant red bell peppers not only add a pop of color but also contribute a mild sweetness and a subtle smokiness. They enhance the overall flavor profile and provide a pleasant texture to the sauce.
Onions
Choose fresh onions for a savory and aromatic base. Onions add depth and richness, creating a complex flavor that enhances the overall taste of the barbecue sauce.
Garlic
Garlic brings a robust and savory undertone to the sauce. Its aromatic essence combines with other ingredients to create a flavorful and well-rounded barbecue experience.
Honey
Introduce natural sweetness with honey, adding a touch of complexity to the sauce. The sweet notes complement the tanginess and heat, creating a harmonious balance that tantalizes the taste buds.
Cider Vinegar
Cider vinegar provides acidity, balancing the sweetness and enhancing the overall brightness of the sauce. It also contributes a subtle fruity undertone, complementing the peach flavor.
Water Bath Canning Made Easy
Preserve the flavors of your favorite fruits and vegetables with my FREE comprehensive and beginner-friendly Water Bath canning eBook.
Worcestershire Sauce
Worcestershire sauce adds umami and depth to the barbecue sauce. Its combination of savory, sweet, and tangy elements elevates the complexity of flavors, making the sauce more robust.
Hot Pepper Flakes
For those who enjoy a bit of heat, hot pepper flakes bring a spicy kick to the barbecue sauce. Since the hot pepper flakes are just for flavor feel free to adjust the quantity based on your preference to. This is a safe substitution. You can also leave the flakes out if you would prefer.
Dry Mustard
Dry mustard offers a subtle tanginess and a hint of heat, enhancing the overall flavor profile of the sauce. It adds depth without overpowering the other ingredients.
Salt
Salt acts as a flavor enhancer, bringing out the natural flavors of each ingredient. Use it to balance the sweetness, acidity, and spiciness, ensuring a perfectly seasoned barbecue sauce.
Gathering these quality ingredients will set the foundation for a delightful peach barbecue sauce that combines sweet, savory, and spicy notes for a memorable culinary experience.
Guide to Making and Canning Peach Barbecue Sauce
Now that we’ve gathered our tantalizing blend of ingredients, we’re ready to start the exciting journey of creating our Zesty Peach Barbecue Sauce. This step-by-step guide will ensure that you can confidently whip up this mouthwatering masterpiece from the comfort of your kitchen. Once you have made your made your barbecue sauce you have the ability to water bath or steam can it for long-term pantry storage.
Clean Jars
Clean jars and lids with warm soapy water. Ensure the jars do not have any chips or bubbles in the glass.
Prepare Peaches
Add vinegar to a Large Stainless Steel Pot.
To peel the peaches you can use a vegetable peeler or blanch your peaches to remove the skin.
Blanch Peaches:
Boil a large pot of water. Once the water is boiling get a large bowl of ice and fill it with water (Ice Bath) place next to your stove. Cut an X mark into the bottom of the peach (this will help with the skin splitting). Working in batches drop the peaches into the boiling water, this will cause their skin to split. Using the slotted spoon remove the peaches from the boiling water and immediately put them in the ice bath. This will cause the peaches to stop cooking. Once you have completed this process with all your peaches their skin should easily be removed.
Chop Peaches:
Remove the pit from your peaches with a knife. You can use your knife and cutting board to chop your peaches by hand or you can chop them in a food processor and place them into the vinegar in a Large Stainless Steel Pot. Mix to make sure all pieces of peach are coated with vinegar. This will prevent your peaches from browning.
Prepare Other Ingredients for Peach Barbecue Sauce
Finely chop red bell peppers, onions, and garlic. You can do this by hand with a knife and cutting board or a food processor.
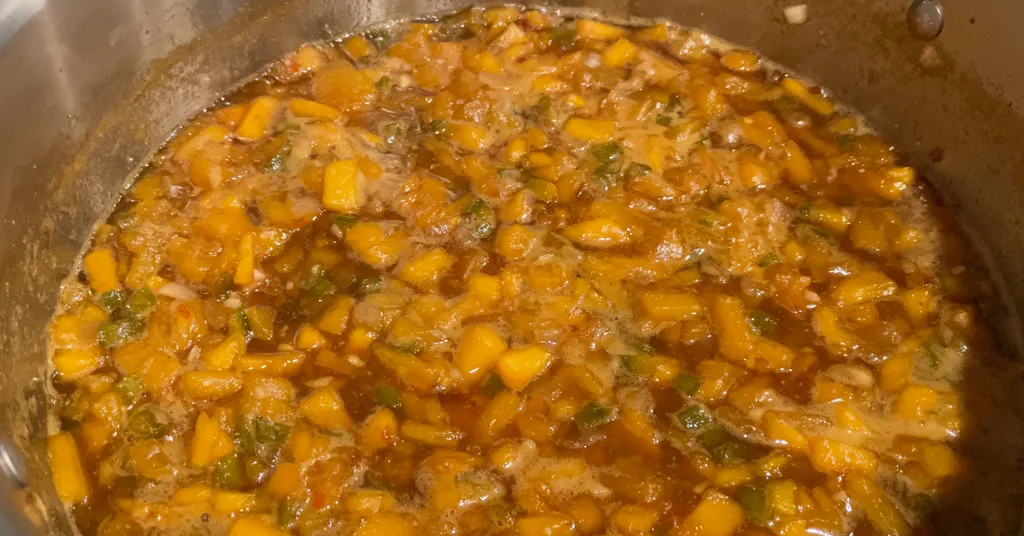
Add prepared red pepper, onion, garlic, honey, Worcestershire sauce, hot pepper flakes, mustard, and salt to the peaches and vinegar.
Bring to a boil over medium-high heat.
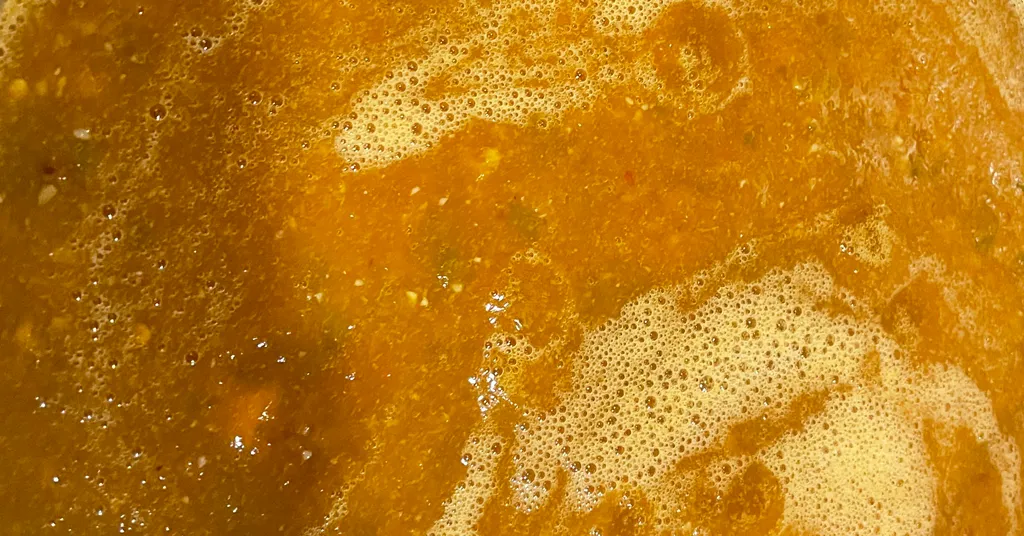
Reduce heat and boil gently, stirring frequently, until mixture is thickened to the consistency of a thin commercial barbecue sauce, about 25 minutes.
Smooth Barbecue Sauce
If you do not want a chunky barbecue sauce you can use an immersion blender to blend the sauce in the pot until smooth.
Prepare Canner
Using Water Bath Canner:
Put your water bath canner on your stove. Add your canning rack to the water bath canner. Add your 1/2 pint jars to the water bath canner. They will warm as you heat the water. Add enough water to cover jars with at least 2-3 inches of water. Start to bring your water to a boil.
Using a Steam Canner:
Put your steam canner on your stove. Add the steam canner rack to the bottom of the steam canner. Add the recommended amount of water to the steam canner according to the manufacturer. Add your 1/2 pint jars to the steam canner. Put the lid on your steam canner and start your stove. The jars will warm as you heat your steam canner.
Fill Jars
Once you have hot jars and hot barbecue sauce
Water Bath Canner:
Remove your jars from the water bath canner one at a time using your jar lifter. Dump the water out of the jar into your water bath canner to ensure there is still 2-3 inches of water above your jars.
Steam Canner:
Remove the steam canner lid and remove your jars one at a time using your jar lifter.
Using the ladle and funnel. Ladle hot sauce into hot jars, leaving 1/2 inch (1 cm) headspace. Use your headspace measurer to verify space. Remove any air bubbles with your de-bubbler and adjust the headspace, if necessary, by adding more barbecue sauce.
Wipe the rim of the jar to ensure a good seal is made with the lid. Center the lid on the jar and add the band to fingertip tight. Put the jar back into the canner using your jar lifter.
Repeat until the remaining barbecue sauce is used.
Canning Instructions for Zesty Peach Barbecue Sauce
Water Bath Canner:
Lower the water bath canner rack into the boiling water. Ensure your jars are covered by at least 2 inches of water.
If your water is not boiling start your processing time when the water is boiling. Process 1/2 pint for 15 minutes. Make sure to adjust your time for altitude.
Set a timer, it makes it much easier to make sure you process for the correct time. When your timer goes off turn off the heat and remove the canner lid.
Leave the jars in the water for 5 minutes.
Steam Canner:
Put the lid on the steam canner. Turn your stove on high until your steam canner water comes to a vigorous boil. Continue heating so the indicator is in the correct “Zone” per your altitude.
Start your processing time when the needle reaches the maximum point you have tested your steam canner to reach in your “Zone”.
Adjust the burner so that it maintains an even rolling boil throughout the entire processing time. Usually, this will be much lower than where it was set for the vigorous boil. If the top lid is lifting and/or spitting water from the edges this is an indication that you have the heat turned up too high. Slowly reduce the heat until this stops. Watch the indicator to ensure the temperature does not decrease.
The processing times for steam canning are the same as for water bath canning. Process 1/2 pint for 15 minutes.
Make sure to adjust your time for altitude. Set a timer, it makes it much easier to make sure you process for the correct time.
When your timer goes off turn off the heat and let the canner stand for 5 minutes with the lid on before removing the jars. The lid MUST remain ON the canner during this time. This cool-down period is necessary to ensure the jar contents are properly processed.
Carefully remove the lid by tilting it away from you to avoid steam burns.
Cool and Store
Using your jar lifer carefully move the jars onto a wire rack or kitchen towel to allow them to cool. When moving the jars try not to tilt them to the side as this could affect the seal of the jars. Allow your jars to cool for 12-24 hours before handling.
Once cool, remove the canning rings from the jars. Wash your jars off to ensure no food residue is on the outside of the jar from processing. Label your jar with the name of the recipe and date. This will help you remember what recipe you used to can and the date will allow you to use the oldest canned goods first.

Join My Preserving Guide Facebook Group
Expert tips, tested recipes, and vibrant discussions on canning, dehydrating, freezing, and all things food preservation!
Creative Ways to Use Zesty Peach Barbecue Sauce
Now that you have mastered creating this delectable Zesty Peach Barbecue Sauce, you are ready to explore the creative ways in which this versatile condiment can transform your dishes.
-
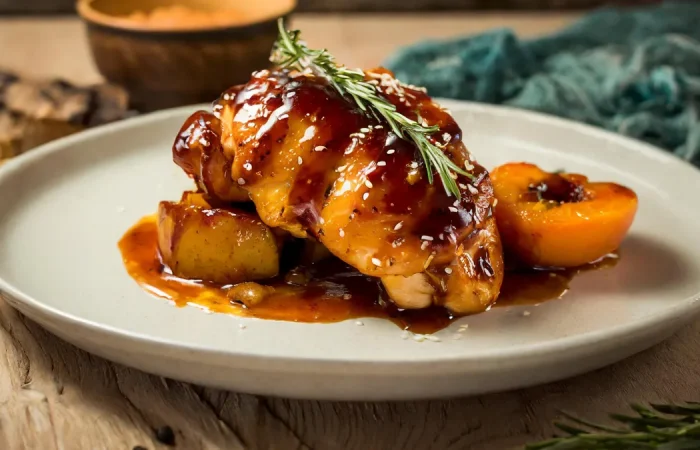
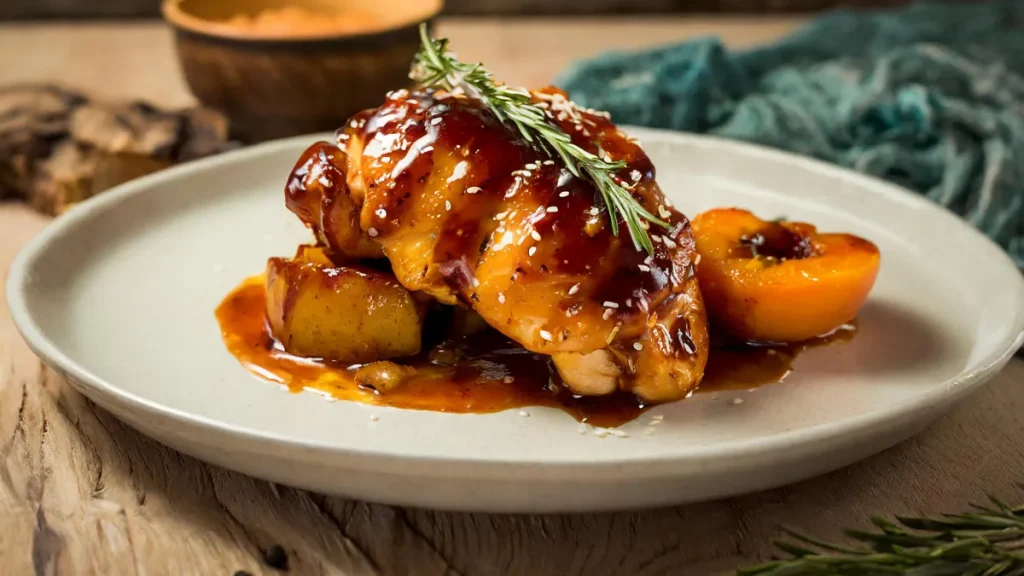
- Glaze for Grilled Meats: Brush the Zesty Peach Barbecue Sauce onto your favorite cuts of grilled meats as they cook, allowing the flavors to infuse and caramelize. Whether it’s chicken, pork ribs, or even a juicy steak, this sauce adds a delightful tangy-sweetness that elevates the overall taste and creates a mouthwatering crust.
-
- Dip for Appetizers: Take your party snacks to the next level by using the Zesty Peach Barbecue Sauce as a dip. Pair it with crispy chicken wings, skewered shrimp, or even vegetable crudites for a refreshing and flavorful twist. The combination of the sauce’s fruity notes with the savory snacks will have your guests reaching for more.
-
- Marinade for Seafood: Give your seafood an unexpected burst of flavor by marinating it in the Zesty Peach Barbecue Sauce. Whether you’re grilling shrimp, glazing salmon fillets, or even baking a whole fish, let the sauce work its magic by infusing the delicate flavors of the sea with a zingy peachy goodness.
-
- Drizzle for Salads: Turn an ordinary salad into a tantalizing treat by drizzling the Zesty Peach Barbecue Sauce over fresh greens and vegetables. Its bold flavors and slightly thickened texture will add a delightful tang to the crispness of the greens, giving each bite a burst of deliciousness.
-
- Sandwich Spread: Give your sandwiches a kick by slathering the Zesty Peach Barbecue Sauce onto the bread or using it as a condiment. It pairs exceptionally well with grilled chicken, pulled pork, or even a classic BLT, adding a unique and flavorful twist to your usual sandwich routine.
If you’re grilling, dipping, marinating, or drizzling, this versatile condiment is sure to take your culinary creations to new heights.
Looking for some more peach preserving recipes? Give these a try:
Looking for some more barbecue sauce recipes? Give these a try:
Recipe Card
Zesty Peach Barbecue Sauce
Equipment
- Immersion Blender or Food Processor
- Food Processor or Immersion Blender
- Water Bath Canner or steam canner
- Steam Canner or water bath canner
Ingredients
- 6 Cups Finely Chopped Pitted Peeled Yellow Peaches About 9 medium yellow peaches. See instructions before chopping peaches to prevent browning.
- 1 Cup Finely Chopped Seeded Red Bell Pepper
- 1 Cup Finely Chopped Onion
- 3 tbsp Finely Chopped Garlic
- 1 1/4 Cups Liquid Honey
- 3/4 Cup Cider Vinegar
- 1 tbsp Worcestershire Sauce
- 2 tsp Hot Pepper Flakes
- 2 tsp Dry Mustard
- 2 tsp salt
Want to Save this Recipe?
Instructions
- Clean jars and lids with warm soapy water. Ensure the jars do not have any chips or bubbles in the glass.
- Add vinegar to a Large Stainless Steel Pot
- To peel the peaches you can use a vegetable peeler or blanch your peaches to remove the skin. Blanch Peaches:Boil a large pot of water. Once the water is boiling get a large bowl of ice and fill it with water (Ice Bath) place next to your stove. Cut an X mark into the bottom of the peach (this will help with the skin splitting)Working in batches drop the peaches into the boiling water, this will cause their skin to split. Using the slotted spoon remove the peaches from the boiling water and immediately put them in the ice bath. This will cause the peaches to stop cooking. Once you have completed this process with all your peaches their skin should easily be removed. Chop Peaches:Remove the pit from your peaches with a knife. You can use your knife and cutting board to chop your peaches by hand or you can chop them in a food processor and place them into the vinegar in a Large Stainless Steel Pot. Mix to make sure all pieces of peach are coated with vinegar. This will prevent your peaches from browning.
- Add prepared red pepper, onion, garlic, honey, Worcestershire sauce, hot pepper flakes, mustard, and salt to the peaches and vinegar.
- Bring to a boil over medium-high heat.
- Reduce heat and boil gently, stirring frequently, until mixture is thickened to the consistency of a thin commercial barbecue sauce, about 25 minutes.
- If you do not want a chunky barbecue sauce you can use an immersion blender to blend the sauce in the pot until smooth.
- Prepare your cannerUsing Water Bath Canner: Put your water bath canner on your stove. Add your canning rack to the water bath canner. Add your 1/2 pint jars to the water bath canner. They will warm as you heat the water. Add enough water to cover jars with at least 2-3 inches of water. Start to bring your water to a boil.Using a Steam Canner: Put your steam canner on your stove. Add the steam canner rack to the bottom of the steam canner. Add the recommended amount of water to the steam canner according to the manufacturer. Add your 1/2 pint jars to the steam canner. Put the lid on your steam canner and start your stove. The jars will warm as you heat your steam canner.
- Once you have hot jars and hot barbecue sauceWater Bath Canner:Remove your jars from the water bath canner one at a time using your jar lifter. Dump the water out of the jar into your water bath canner to ensure there is still 2-3 inches of water above your jars.Steam Canner:Remove the steam canner lid and remove your jars one at a time using your jar lifter.
- Using the ladle and funnel. Ladle hot sauce into hot jars, leaving 1/2 inch (1 cm) headspace. Use your headspace measurer to verify space. Remove any air bubbles with your de-bubbler and adjust the headspace, if necessary, by adding more barbecue sauce.
- Wipe the rim of the jar to ensure a good seal is made with the lid. Center the lid on the jar and add the band to fingertip tight. Put the jar back into the canner using your jar lifter.
- Repeat until the remaining barbecue sauce is used.
- ProcessingWater Bath Canner:Lower the water bath canner rack into the boiling water. Ensure your jars are covered by at least 2 inches of water.If your water is not boiling start your processing time when the water is boiling. Process 1/2 pint for 15 minutes. Make sure to adjust your time for altitude.Set a timer, it makes it much easier to make sure you process for the correct time. When your timer goes off turn off the heat and remove the canner lid.Leave the jars in the water for 5 minutes.Steam Canner:Put the lid on the steam canner. Turn your stove on high until your steam canner water comes to a vigorous boil. Continue heating so the indicator is in the correct "Zone" per your altitude. Start your processing time when the needle reaches the maximum point you have tested your steam canner to reach in your "Zone".Adjust the burner so that it maintains an even rolling boil throughout the entire processing time. Usually, this will be much lower than where it was set for the vigorous boil. If the top lid is lifting and/or spitting water from the edges this is an indication that you have the heat turned up too high. Slowly reduce the heat until this stops. Watch the indicator to ensure the temperature does not decrease.The processing times for steam canning are the same as for water bath canning. Process 1/2 pint for 15 minutes.Make sure to adjust your time for altitude. Set a timer, it makes it much easier to make sure you process for the correct time.When your timer goes off turn off the heat and let the canner stand for 5 minutes with the lid on before removing the jars. The lid MUST remain ON the canner during this time. This cool-down period is necessary to ensure the jar contents are properly processed.Carefully remove the lid by tilting it away from you to avoid steam burns.
- Using your jar lifer carefully move the jars onto a wire rack or kitchen towel to allow them to cool. When moving the jars try not to tilt them to the side as this could affect the seal of the jars. Allow your jars to cool for 12-24 hours before handling.
- Once cool, remove the canning rings from the jars. Wash your jars off to ensure no food residue is on the outside of the jar from processing. Label your jar with the name of the recipe and date. This will help you remember what recipe you used to can and the date will allow you to use the oldest canned goods first.
Notes
Editorial Process
At Preserving Guide, I take pride in my thorough and impartial approach to recipe and product reviews. Read my editorial process for detailsRobin
Robin Phelps has been preserving food for her family for over 20 years. Today, Robin is a full-time home preservation blogger and coach. Join Robin to learn how to easily make delicious and safe homemade preserved items.










No Comment! Be the first one.