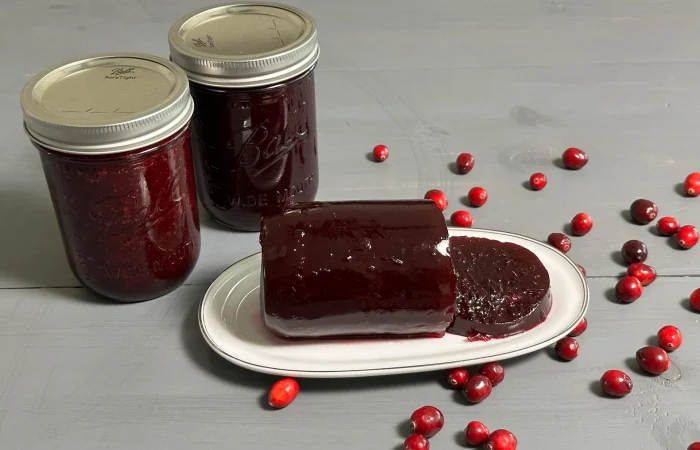
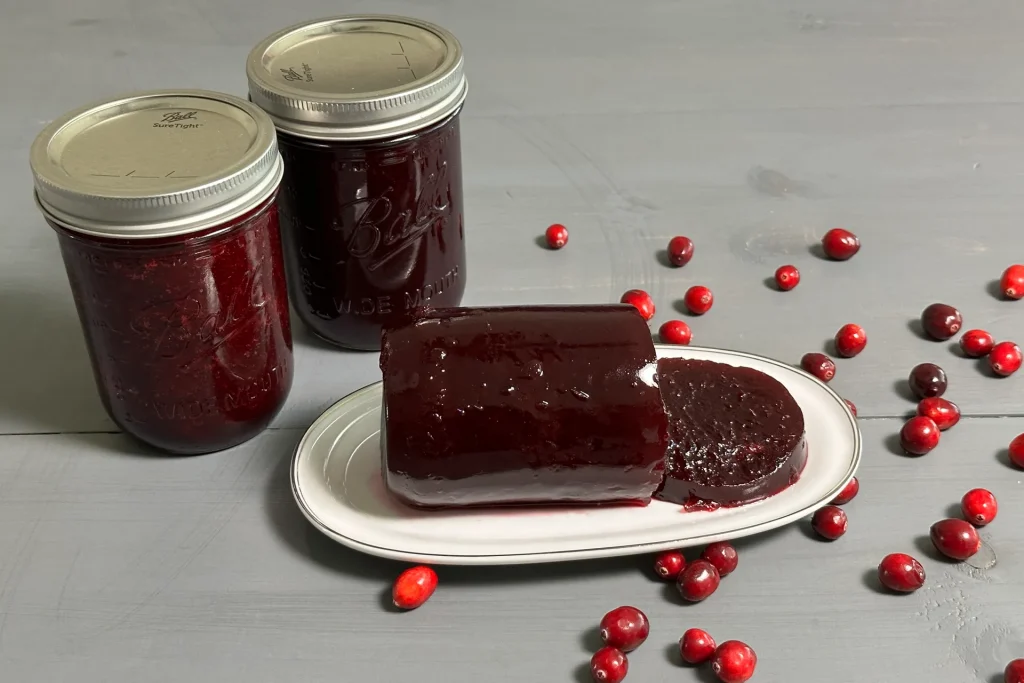
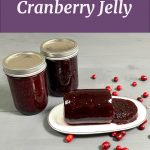
Canning cranberry jelly is a must in our house every year. My husband refuses to eat cranberry jelly unless it has taken on the shape of the mason jar or the can it came in. He wants to be able to slice it so he can put it on sandwiches. This recipe checks two boxes for my husband: it is delicious and it comes out of a wide-mouth mason jar in a perfect cylinder so he can slice it.
Canning Cranberry Jelly Recipe
This cranberry jelly recipe comes from the Ball Complete Book of Home Preserving on page 179. Cranberries contain enough pectin in them to make a great texture jelly without needing to add additional pectin. These 3 simple ingredients set into a delicious jelly that we serve at all Holiday meals.
Supplies for Canning Cranberry Jelly
- Large Stainless Steel Pot or Enameled Dutch Oven
- Slotted Spoon
- Measuring cups
- Food Mill
- Food Processor
- Water Bath Canner
- Water Bath Canning Rack
- Pint Size Canning Jars
- Regular or wide-mouth canning lids (depending on what jars you are using)
- Regular or wide-mouth canning rings (depending on what jars you are using)
- Jar Lifter
- 1/2 Pint Canning Ladle
- De-bubbler
- Headspace Measurer
Water Bath Canning Made Easy
Preserve the flavors of your favorite fruits and vegetables with my FREE comprehensive and beginner-friendly Water Bath canning eBook.
Cranberry Jelly Recipe Ingredients
- 4 and ¼ cups Cranberries (Fresh or Frozen (partially thawed))
- 1 and ¾ cups Water
- 2 cups Granulated Sugar
Step-by-Step Canning Instructions for Cranberry Jelly
-
Clean jars and lids with warm soapy water. Ensure the jars do not have any chips or bubbles in the glass.
-
Put your water bath canner on your stove. Add your canning rack to your water bath canner. Add your pint jars to the water bath canner. They will warm as you heat the water. Add enough water to cover jars with at least 2-3 inches of water. Bring to a low boil and allow the jars to boil for 10 minutes.
-
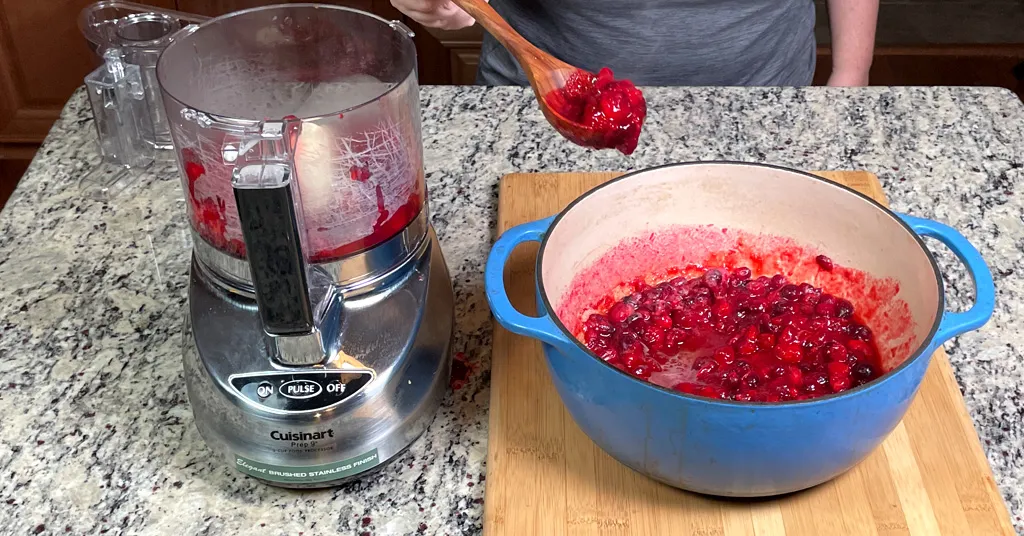
In a large stainless steel pot or enameled Dutch oven, combine cranberries and water. Bring to a boil over medium-high heat. Reduce heat and boil gently, stirring occasionally, until the cranberry skins burst (around 5 minutes). Remove from heat and let cool for 5 minutes.
-
Working in batches, transfer the cranberry mixture to a food processor fitted with a metal blade or to a food mill. Puree the cranberry mixture until smooth.
-
Return cranberry puree to the pot or enameled Dutch oven. Add sugar and bring to a boil over medium heat, stirring until sugar dissolves. Increase to high heat and boil hard until the mixture begins to sheet from a metal spoon. (Dip a cold metal spoon into the boiling cranberry mixture. Lift the spoon, and hold it horizontally, with the edge down so that the cranberry mixture runs off the edge. As the cranberry mixture cooks, the drops will become heavier and will drop off the spoon separately but two at a time. When the two drops join together and “sheet” off the spoon, the gel stage has been reached).
-
Skim off any foam that has formed during boiling.
-
Remove your jars from the water bath canner one at a time using your jar lifter. Dump the water out of the jar into your water bath canner to ensure there is still 2-3 inches of water above your jars.
-
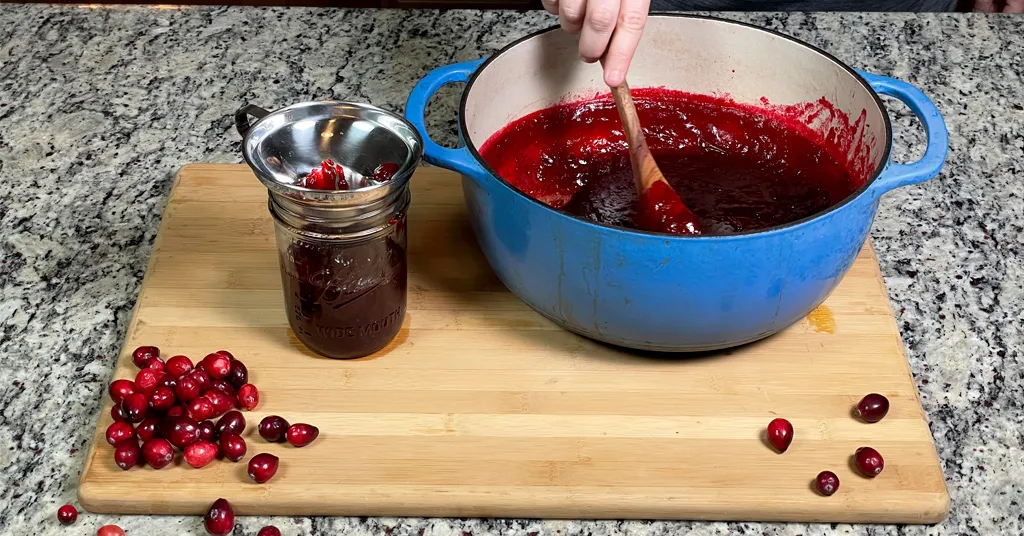
Use a funnel and ladle to add hot cranberry jelly into hot jars, leaving 1/4 inch headspace. Remove air bubbles with a de-bubbler and adjust the headspace as needed by adding more cranberry jelly.
-
Wipe the rim to ensure a good seal is made with the lid. Center the lid on the jar and screw the band down to fingertip tight.
-
Place the jar in the canner using your jar lifter. Repeat steps 7-9 until all cranberry jelly is used. Make sure the jars are completely covered by 2-3 inches of water.
-
If your water is not boiling start your processing time when the water is boiling. Process pint jars for 15 minutes (make sure to adjust for your altitude). Set a timer, it makes it much easier to make sure you process for the correct time. When your timer goes off turn off the heat and remove the canner lid. Leave the jars in the water for 5 minutes.
-
Lift your canning rack out of the water. Using your jar lifer carefully move the jars onto a wire rack or kitchen towel to allow them to cool. When moving the jars try not to tilt them to the side as this could affect the seal of the jars. Allow your jars to cool for 12-24 hours before handling.
-
Once cool, remove the canning rings from the jars. Wash your jars off to ensure no food residue on the outside of the jar from processing. Label your jar with the name of the recipe and date. This will help you remember what recipe you used to can and the date will allow you to use the oldest canned goods first.
Are you like my husband and will only eat cranberry jelly shaped like a cylinder? Then this is the recipe for you. It really is the only way he wants his cranberry jelly. If you prefer a more traditional cranberry sauce I recommend utilizing this recipe:
I hope you enjoy your cranberry jelly.
Recipe Card
Canning Cranberry Jelly
Equipment
- Large stainless steel pot or enameled dutch oven
- Enameled Dutch Oven or stainless steel pot
- Food mill or food processor
- Food Processor or food mill
Ingredients
- 4 and ¼ cups Cranberries Fresh or Frozen (partially thawed)
- 1 and ¾ cups Water
- 2 cups Granulated Sugar
Instructions
- Clean jars and lids with warm soapy water. Ensure the jars do not have any chips or bubbles in the glass.
- Put your water bath canner on your stove. Add your canning rack to your water bath canner. Add your pint jars to the water bath canner. They will warm as you heat the water. Add enough water to cover jars with at least 2-3 inches of water. Bring to a low boil and allow the jars to boil for 10 minutes.
- In a large stainless steel pot or enameled Dutch oven, combine cranberries and water. Bring to a boil over medium-high heat. Reduce heat and boil gently, stirring occasionally, until the cranberry skins burst (around 5 minutes). Remove from heat and let cool for 5 minutes.
- Working in batches, transfer the cranberry mixture to a food processor fitted with a metal blade or to a food mill. Puree the cranberry mixture until smooth.
- Return cranberry puree to the pot or enameled Dutch oven. Add sugar and bring to a boil over medium heat, stirring until sugar dissolves. Increase to high heat and boil hard until the mixture begins to sheet from a metal spoon. (Dip a cold metal spoon into the boiling cranberry mixture. Lift the spoon, and hold it horizontally, with the edge down so that the cranberry mixture runs off the edge. As the cranberry mixture cooks, the drops will become heavier and will drop off the spoon separately but two at a time. When the two drops join together and "sheet" off the spoon, the gel stage has been reached).
- Skim off any foam that has formed during boiling.
- Remove your jars from the water bath canner one at a time using your jar lifter. Dump the water out of the jar into your water bath canner to ensure there is still 2-3 inches of water above your jars.
- Use a funnel and ladle to add hot cranberry jelly into hot jars, leaving 1/4 inch headspace. Remove air bubbles with a de-bubbler and adjust the headspace as needed by adding more cranberry jelly.
- Wipe the rim to ensure a good seal is made with the lid. Center the lid on the jar and screw the band down to fingertip tight.
- Place the jar in the canner using your jar lifter. Repeat steps 7-9 until all cranberry jelly is used. Make sure the jars are completely covered by 2-3 inches of water.
- If your water is not boiling start your processing time when the water is boiling. Process pint jars for 15 minutes (make sure to adjust for your altitude). Set a timer, it makes it much easier to make sure you process for the correct time. When your timer goes off turn off the heat and remove the canner lid. Leave the jars in the water for 5 minutes.
- Lift your canning rack out of the water. Using your jar lifer carefully move the jars onto a wire rack or kitchen towel to allow them to cool. When moving the jars try not to tilt them to the side as this could affect the seal of the jars. Allow your jars to cool for 12-24 hours before handling.
- Once cool, remove the canning rings from the jars. Wash your jars off to ensure no food residue on the outside of the jar from processing. Label your jar with the name of the recipe and date. This will help you remember what recipe you used to can and the date will allow you to use the oldest canned goods first.
Notes
Robin
Robin Phelps has been preserving food for her family for over 20 years. Today, Robin is a full-time home preservation blogger and coach. Join Robin to learn how to easily make delicious and safe homemade preserved items.

No Comment! Be the first one.