

This post may contain affiliate links. When you purchase through links on my site, I may earn a commission at no cost to you. Here's how it works


Canning Tomato Sauce
A step-by-step guide to make and water bath can a basic tomato sauce. An easy-to-make recipe that can be used as the base for many delicious sauces or entrees. This recipe can be found in Ball's Complete Book of Home Preserving on page 362.
Equipment
- Large stainless steel pot or Electric Roaster
- Electric Roaster or Large Stainless Steel Pot
- Food mill or KitchenAid Food and Vegetable Strainer
- KitchenAid Food and Vegetable Strainer or Food Mill
Ingredients
- 5 lbs Tomatoes, Cored For each quart jar of thin sauce you'll need about 5 lbs of tomatoes
- Bottled Lemon Juice or Citric Acid
- Salt (Optional)
- Dried Herbs (Optional)
Want to Save this Recipe?
Instructions
- Clean jars and lids with warm soapy water. Ensure the jars do not have any chips or bubbles in the glass.
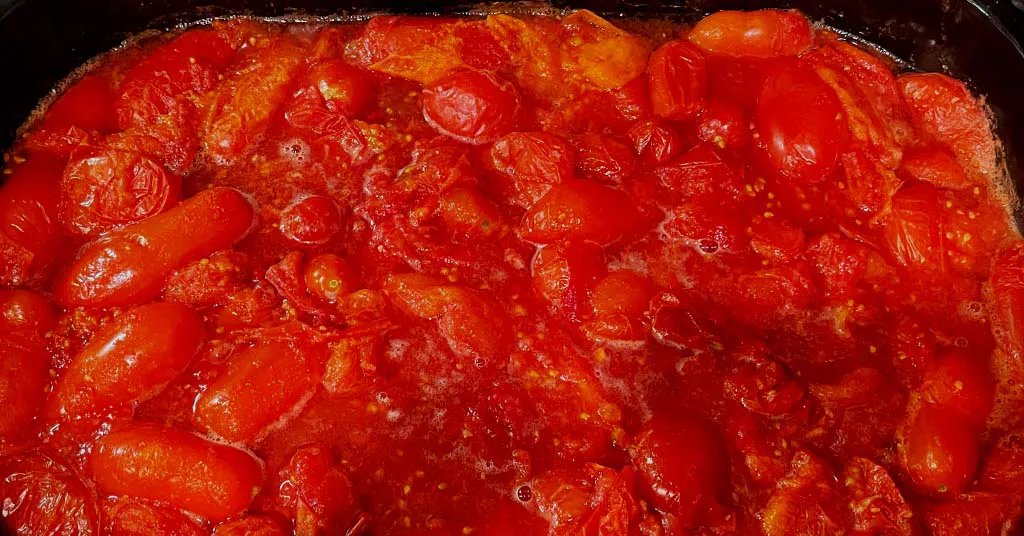
- Wash and sort tomatoes, removing any bad or bruised spots. Quarter 6 tomatoes and place in a large stainless steel saucepan or electric roaster. I utilize an electric roaster because when I make sauce I do it in very large batches. Bring to a boil over medium-high heat. Crush the tomatoes to release their juices, stirring constantly. While maintaining a boil continue to quarter tomatoes and add them to the pot or electric roaster. Continue to crush the tomatoes as you add them.5 lbs Tomatoes, Cored
- When all the tomatoes have been added, boil, stirring occasionally, until the tomatoes are soft and juicy. Then remove from heat.
- Next, you are going to remove the seeds and tomato peels. Working in batches, press the tomatoes through a food mill or your KitchenAid Food and Vegetable Strainer. This will remove the seeds and tomato peels. I usually run the discards through the Food and Vegetable Strainer a few times to ensure I am getting all the tomato pulp. You can dehydrate the tomato seeds and peels to make tomato powder which can be added to soups or sauces or you can just discard the excess.
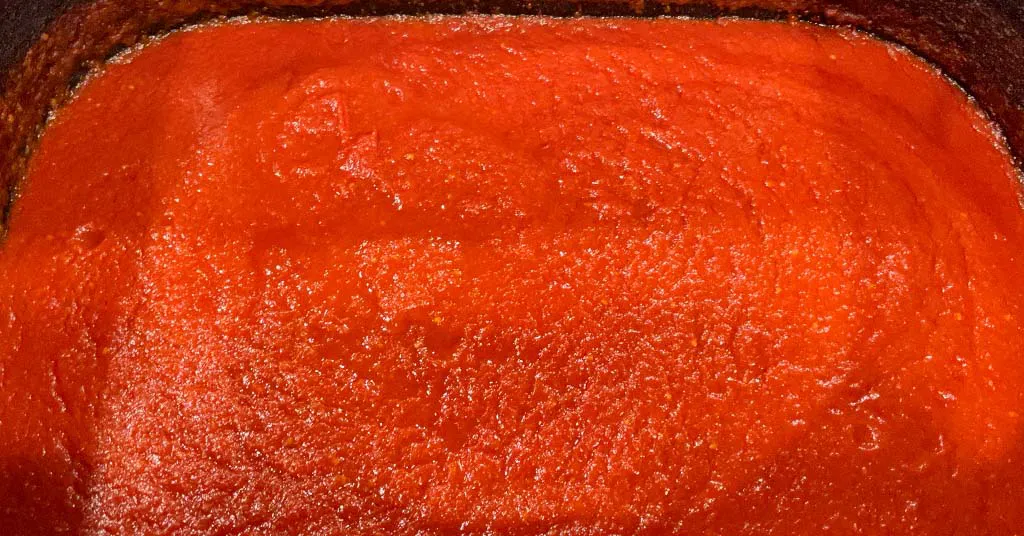
- Return the strained tomatoes to the saucepan or electric roaster. You are now going to reduce the tomato sauce. Bring the strained tomatoes to a boil over high heat, stirring frequently. Reduce the heat to medium-high and boil. This can take as little or as much time as you like. Reduce the volume of the sauce by a third if you like a thin sauce or continue cooking until it is reduced by half for a thicker sauce. Remember to keep stirring so it doesn't burn on the bottom.
- When you feel your sauce is getting close to the thickness you like for sauce. Put your water bath canner on your stove. Add your canning rack to your water bath canner. Add your pint jars or quart jars to the water bath canner. They will warm as you heat the water. Add enough water to cover jars with at least 2-3 inches of water. Bring to a low boil and allow the jars to heat up.
- Remove your jars from the water bath canner one at a time using your jar lifter. Dump the water out of the jar into your water bath canner to ensure there is still 2-3 inches of water above your jars.
- Before adding tomato sauce to the jar add bottled lemon juice or citric acid to the jar. If using pint jars add 1 tbsp of bottled lemon juice or ¼ tsp of Citric Acid to the jar. If using quart jars add 2 tbsp Bottled Lemon Juice or ½ tsp of Citric Acid to the jar.Bottled Lemon Juice or Citric Acid
- Add salt (optional). If using pint jars add ½ tsp of salt. If using quart jars use 1 tsp of salt.Salt (Optional)
- Add dried herbs (optional). If using pint jars add 1/2 tsp of dried herbs. If using quart jars use 1 tsp of dried herbs. You can always add more when using your sauce. Dried oregano, basil, thyme, rosemary or Italian Seasoning mixes are excellent seasonings for this sauce. I don't usually add dried herbs to my sauce until I open a jar. This is just my preferred method as we use this sauce for many different recipes.Dried Herbs (Optional)
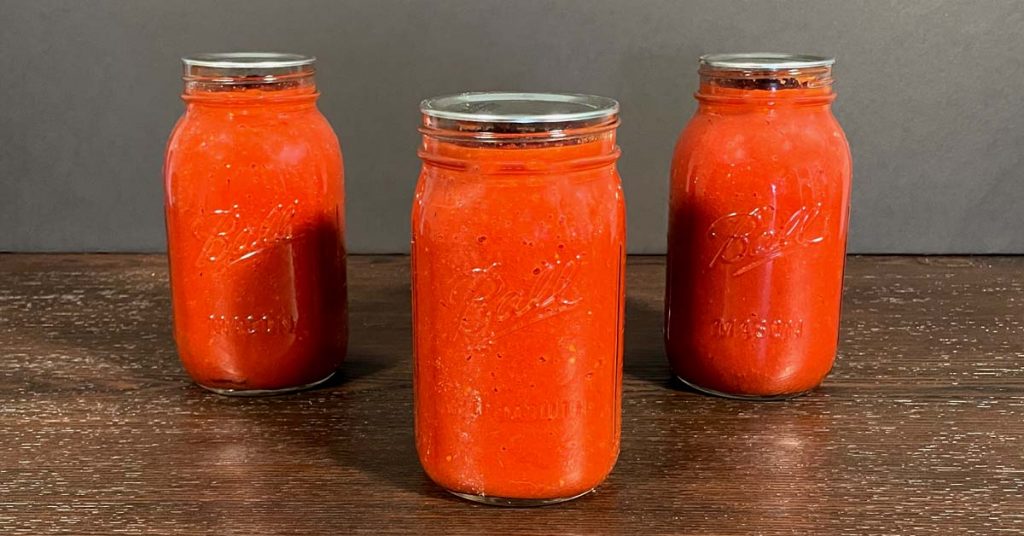
- Use a funnel and ladle to add hot sauce to the prepared jar. Leave ½ inch headspace at the top of the jar. Remove air bubbles with a de-bubbler and adjust the headspace as needed by adding more sauce. Wipe the rim to ensure a good seal is made with the lid. Center the lid on the jar and screw the band down to fingertip tight.
- Place the jar in the canner using your jar lifter. Repeat steps 7-11 until all sauce is used or all jars that fit in your canner are filled.
- Lower the water bath canner rack into the boiling water. Ensure the jars are covered completely by 2-3 inches of water.
- If your water is not boiling start your processing time when the water is boiling. Process pint jars for 35 minutes and quart jars for 40 minutes (make sure to adjust for your altitude). Set a timer, it makes it much easier to make sure you process for the correct time. When your timer goes off turn off the heat and remove the canner lid. Leave the jars in the water for 5 minutes.
- Lift your canning rack out of the water. Using your jar lifer carefully move the jars onto a wire rack or kitchen towel to allow them to cool. When moving the jars try not to tilt them to the side as this could affect the seal of the jars. Allow your jars to cool for 12-24 hours before handling.
- Once cool, remove the canning rings from the jars. Wash your jars off to ensure no food residue on the outside of the jar from processing. Label your jar with the name of the recipe and date. This will help you remember what recipe you used to can and the date will allow you to use the oldest canned goods first.
Notes
This recipe can be found in Ball's Complete Book of Home Preserving on page 362.
This recipe can also be found on Ball's website called "Tomato Sauce"


No Comment! Be the first one.